Disclosure: This post contains affiliate links and I will be compensated if you make a purchase after clicking through my links. Learn More
Mig welding is popular because it is fast, easy to learn, and produces clean welds. But many beginners get confused about one thing: should you push or pull the welding gun? This simple question has a big impact on the quality and strength of your welds. The answer is not just a matter of personal style; it changes how the metal melts, how the weld looks, and even how strong the joint will be.
Knowing when to push or pull in mig welding can help you avoid problems like poor penetration, too much spatter, or a weak bead. This article explains both techniques in detail, shows when to use each one, and offers real-world advice.
Whether you are new to welding or want to improve your technique, understanding the push and pull methods will help you get better results.
What Is Mig Welding?
Mig welding, or Metal Inert Gas welding, uses a wire electrode fed through a gun to join metals together. A shielding gas, usually argon or a mix with carbon dioxide, protects the weld from air. This process is fast and works well with different metals, including steel, stainless steel, and aluminum.
Mig welding is popular in car repair, construction, and manufacturing. It is known for its clean, strong welds and for being easier to learn than many other welding methods.
Understanding Push And Pull Techniques
Before deciding which is better, it is important to understand what each method means.
Push Technique
With the push technique, you point the gun in the direction you want to weld. You “push” the gun away from the weld pool. The angle is usually around 10–15 degrees away from the weld. This method is sometimes called “forehand welding.”
Pull Technique
With the pull technique, you point the gun back toward the weld bead you just made. You “pull” the gun toward yourself, dragging it along the weld joint. The angle is still 10–15 degrees, but now it is pointing back.
Both methods have their uses, and each has strengths and weaknesses. Knowing the difference helps you choose the right one for your work.
Effects Of Push And Pull On The Weld
The way you hold the gun changes your weld’s appearance, penetration, and strength. Here is how each method affects your results:
Push Technique Effects
- Wider bead: The weld will look wider and flatter.
- Less penetration: The weld does not go as deep into the metal.
- Cleaner appearance: There is less spatter, and the surface looks smoother.
- Better for thin metal: Since there is less heat, you are less likely to burn through.
Pull Technique Effects
- Narrower bead: The weld is more focused and higher.
- Deeper penetration: The weld melts deeper into the metal.
- More spatter: The weld can be messier, with more sparks and small metal drops.
- Better for thick metal: Deep penetration gives a stronger weld on thick materials.
Both methods can make strong welds, but the best choice depends on your goal and material.
When To Push Or Pull In Mig Welding
Choosing the right method depends on what you are welding and what result you want. Here are the main situations where each method works best:
When To Use The Push Technique
1. Thin Metal Sheets
Pushing helps avoid burn-through because it creates less heat and penetration.
2. Welding Aluminum
Aluminum is easy to burn through. The push technique gives a cleaner bead and less chance of holes.
3. Welding For Looks
If you want a flat, smooth bead with little spatter—like on visible car panels—pushing is often better.
4. Sheet Metal Fabrication
In jobs where metal is thin and appearance matters, push is usually preferred.
When To Use The Pull Technique
1. Thick Steel Or Structural Welds
Pulling gives deeper penetration, which is important for strength in thick materials.
2. Root Passes
In pipe welding or deep grooves, pulling helps the weld reach the bottom.
3. Welding Outdoors
Pulling can sometimes help the shielding gas stay over the weld in windy conditions, but this depends on technique.
4. Repair Work
For strong repairs, especially when joining thick or dirty metal, pulling gives a more secure bond.

Credit: yeswelder.com
Push Vs Pull: A Direct Comparison
Sometimes it helps to see the differences side by side. Here is a clear comparison:
| Feature | Push | Pull |
|---|---|---|
| Bead Shape | Wide, flat | Narrow, high |
| Penetration | Less | Deeper |
| Spatter | Less | More |
| Appearance | Smoother | Rougher |
| Best For | Thin metal, clean welds | Thick metal, strong welds |
How Gun Angle Changes Weld Quality
Gun angle is just as important as push or pull. The standard angle is 10–15 degrees from vertical, whether pushing or pulling. Too much angle can cause problems:
- Too much angle: Can cause undercut (a groove next to the weld) or poor shielding gas coverage.
- Too straight: Can trap gas and cause porosity (small holes in the weld).
Always keep a steady angle and distance for best results.
Common Mistakes In Push And Pull Mig Welding
Many beginners make the same errors with these techniques. Here are common mistakes and how to fix them:
1. Wrong Angle
Holding the gun at a steep angle can cause the shielding gas to miss the weld, leading to weak joints or holes.
2. Moving Too Fast
If you move the gun too quickly, the bead will be thin, with poor fusion.
3. Moving Too Slow
Moving too slowly can make the bead too wide and cause burn-through, especially with push technique.
4. Poor Visibility
If you cannot see the weld pool, it is easy to lose control. Adjust your position so you always see the arc and weld pool clearly.
5. Not Adjusting Settings
Different methods need different settings. For example, pulling may need a higher voltage for thick steel.
6. Not Matching Technique To Material
Using push on thick steel or pull on thin sheet can make weak or ugly welds.
Real-world Examples: When Push Or Pull Matters
Understanding theory is good, but real-life examples make things clearer.
Car Body Panel Welding
Most car panels are thin steel or aluminum. Here, the push technique is almost always best. It makes smooth, clean welds that are easier to grind and paint. Pulling on thin panels often burns holes or creates rough beads.
Building A Steel Frame
Welding thick steel beams for a frame requires deep penetration for strength. The pull technique does this well, making sure the weld melts deeply into both pieces. Using the push technique here could lead to weak joints.
Pipe Welding
In pipe welding, the first weld (root pass) must melt deep into the joint. Many pipe welders use the pull technique for the root and then push for later passes to make the bead look better.
Repairing A Broken Gate
If you are fixing a thick, rusty gate, you need the strength from deep penetration. The pull method works better, especially if the surfaces are not perfectly clean.
How Shielding Gas Affects Push And Pull
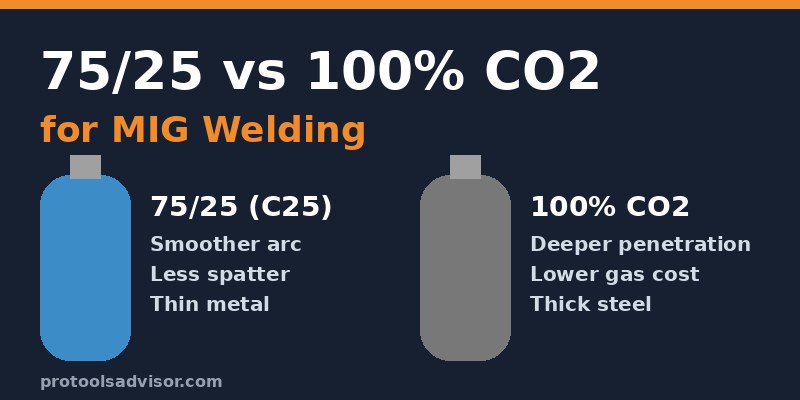
The type of shielding gas you use can change the results. Most mig welding uses a mix of argon and CO2. Pure CO2 gives deeper penetration and more spatter, while more argon gives a smoother bead.
- With more argon: Push gives a very smooth bead, good for thin metals.
- With more CO2: Pull may be needed to get enough penetration on thick materials.
If you are having trouble with spatter or penetration, check your gas mix as well as your technique.
Welding Positions: Does Push Or Pull Matter?
Mig welding is not always done flat. Sometimes you weld on a wall (vertical) or overhead. The choice between push and pull can change in these positions.
Flat Position
Both push and pull work well. Use push for clean looks, pull for strength.
Vertical Up
Pulling (from bottom to top) gives better control and penetration. Pushing in vertical up can make the bead drip or sag.
Vertical Down
Pushing (from top to bottom) is easier and gives a smoother bead. Pulling can cause the weld to fall out and create holes.
Overhead
Use a slight push, keep the bead small, and move quickly to avoid drips.
Safety Tips For Push And Pull Mig Welding
Welding creates heat, UV light, and fumes. Here are key safety steps:
- Always wear a welding helmet with the right shade.
- Use protective gloves and a long-sleeved jacket.
- Work in a well-ventilated area to avoid breathing fumes.
- Keep a fire extinguisher nearby.
- Never weld near flammable materials.
Both push and pull methods create sparks, so protect yourself and your work area.
Equipment Setup: Best Practices For Push And Pull
Getting the best results depends on more than just technique. Here’s how to set up your welder for each method:
For Push Technique
- Use slightly lower voltage and wire speed.
- Keep gas flow steady (20–25 cubic feet per hour).
- Use a short stick-out (the length of wire from the tip to the metal), around 3/8 inch.
For Pull Technique
- Increase voltage and wire speed for deep penetration.
- Check gas coverage, as more spatter can disturb the shield.
- Use a slightly longer stick-out if needed, up to 1/2 inch.
Always test on scrap metal before starting your main welds.

Credit: www.youtube.com
Special Cases: Aluminum And Stainless Steel
Different metals need different techniques.
Aluminum
Aluminum is soft and melts quickly. Push technique works best to prevent burn-through and get a clean bead. Always use pure argon gas.
Stainless Steel
Both push and pull can work. Push is common for a smooth look. Use a mix of argon and CO2 or a special gas blend for stainless steel.
How Experience Level Affects Technique Choice
If you are new to mig welding, start with the push technique. It is easier to control, makes a better-looking bead, and is more forgiving on thin metals. As you get more skilled, practice the pull technique on thicker pieces to learn how to control penetration.
Advanced welders often switch between push and pull, even on the same weld, to get the best of both worlds.
Two Key Insights Beginners Miss
- Shielding gas position matters as much as gun angle. Many new welders focus on angle but forget that the gas must cover the weld pool at all times. Even a perfect push or pull technique fails if the gas is blown away.
- Changing technique can fix problems fast. If your welds look bad or are too weak, switching from push to pull (or vice versa) often solves the issue. You do not always need to adjust machine settings—sometimes, just changing your hand movement is enough.
Push And Pull Myths
Some myths confuse welders:
- “One method is always best.” Not true. Both methods have a place.
- “Pulling is only for stick welding.” Many pros use pull with mig for strength.
- “Push is for looks, pull is for strength.” This is often correct, but not always. Material, position, and gas matter too.
- “Settings never change.” You may need to change voltage, wire speed, or gas flow when switching methods.

Credit: yeswelder.com
How To Practice Push And Pull Techniques
Improving your welding means regular practice. Here’s how to get better:
- Start with scrap metal. Try both techniques on the same piece and compare beads.
- Change angles. Use 5, 10, and 15 degrees to see the difference.
- Test on different thicknesses. Use thin sheet, medium plate, and thick steel.
- Check bead shape and penetration. Cut a test weld in half to see how deep it goes.
- Keep notes. Write down settings and results to remember what works.
Mig Welding Push Or Pull: Results In Numbers
Professional welders and studies show real differences between the two methods. Here’s a summary of typical weld results:
| Weld Type | Average Bead Width (mm) | Average Penetration Depth (mm) | Spatter Level |
|---|---|---|---|
| Push | 9–12 | 2–3 | Low |
| Pull | 6–8 | 4–5 | High |
These numbers show why push is good for clean, wide beads on thin metal, and pull is better for deep, strong welds.
Expert Tips For Better Push And Pull Welds
- Always clean your metal. Dirt and rust cause weak welds, no matter the technique.
- Hold steady. Keep the gun moving at a constant speed.
- Watch the weld pool. The bright spot shows if you are getting good fusion.
- Adjust settings as needed. Do not be afraid to change voltage or wire speed.
- Test often. Small changes can make a big difference in quality.
Push Or Pull For Different Joint Types
Each joint type can benefit from a different technique:
Butt Joint
Pushing works well on thin butt joints for a flat, smooth bead. Pulling is better for thick plates needing strong fusion.
Lap Joint
Push for thin overlaps, especially if appearance matters. Pull for thicker overlaps or for more strength.
T-joint
Either method works. Use push for cosmetic welds, pull for deep penetration in structural work.
Corner Joint
Push is easier for beginners and gives a nice bead. Pull is better if strength is most important.
Environmental Factors: Wind, Temperature, And Work Area
Working outside or in a drafty shop can blow away shielding gas, which affects both techniques. Pulling can sometimes keep the gas over the weld longer, but the best solution is to use windbreaks or higher gas flow.
High temperatures can make thin metal burn through easily, so pushing becomes safer. In cold weather, pulling can help get enough penetration.
Choosing The Right Wire And Gas For Each Technique
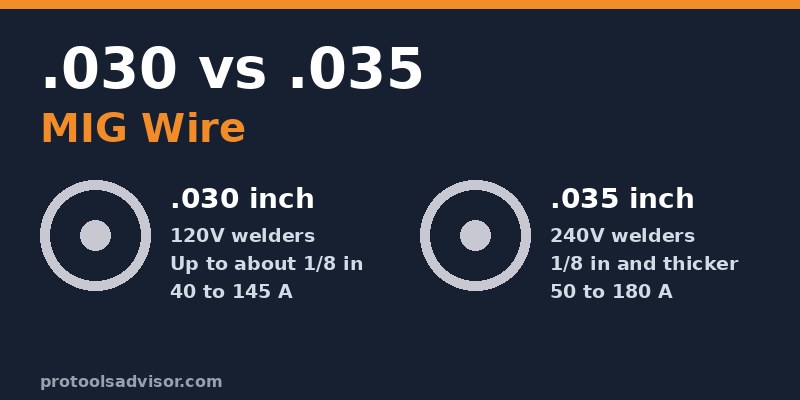
- For push: Use thinner wire (like 0.023–0.030 inch) and more argon for smooth beads.
- For pull: Thicker wire (0.035 inch or more) and more CO2 for stronger, deeper welds.
The right match of wire and gas improves your results with both techniques.
Testing Weld Strength: Push Vs Pull
Weld strength can be tested in several ways:
- Bend test: Bend the welded piece until it breaks or shows cracks.
- Tensile test: Use a machine to pull the weld apart.
- Visual inspection: Check for holes, cracks, and bead shape.
Most experts find that pull technique welds are stronger on thick steel, but push welds look better on thin metal.
Advanced Techniques: Switching Between Push And Pull
Some advanced welders switch between push and pull in a single weld. For example:
- Start with a pull to get deep penetration at the beginning.
- Switch to push to finish with a smooth bead.
This approach is useful in repair work or custom fabrication.
Table: Quick Guide To Push Or Pull
Here is a quick summary to help you decide:
| Material | Thickness | Best Method | Reason |
|---|---|---|---|
| Steel | Thin (under 1/8″) | Push | Less heat, clean bead |
| Steel | Thick (over 1/8″) | Pull | Deeper penetration |
| Aluminum | Any | Push | Clean, prevents burn-through |
| Stainless steel | Thin | Push | Smoother bead |
| Stainless steel | Thick | Pull | Stronger weld |
Where To Learn More
If you want to go deeper, welding handbooks and trade schools are good sources. You can also check the Gas Metal Arc Welding entry on Wikipedia for technical details.
Frequently Asked Questions
What Is The Main Difference Between Push And Pull In Mig Welding?
The push technique points the gun away from the weld pool, making a wider, smoother bead with less penetration. The pull technique points back toward the weld, making a deeper, narrower bead with more spatter.
Which Method Is Better For Beginners?
Most beginners find push easier to control, especially on thin metal. It produces a cleaner-looking bead and is less likely to burn holes.
Can I Switch Between Push And Pull In One Weld?
Yes, many skilled welders do this to get both deep penetration and a good appearance. Start with pull for strength and finish with push for looks.
Why Does My Weld Have Holes Or Cracks?
This can happen if the shielding gas does not cover the weld, if the gun angle is wrong, or if the settings are off. Check your technique and make sure you are using the right push or pull method for your material.
Is Push Or Pull Better For Aluminum?
Push is almost always better for aluminum. It reduces spatter and prevents burn-through, giving a cleaner and stronger weld.
Mig welding offers flexibility and speed, but small choices like push or pull make a big difference. Try both techniques, match them to your project, and pay attention to your results. With practice and the right method, your welds will be stronger and look better.