Disclosure: This post contains affiliate links and I will be compensated if you make a purchase after clicking through my links. Learn More
TIG welding is the top choice for working with stainless steel. The process gives strong, clean welds with good control. But to get the best results, you must use the right amperage. Many welders, even those with experience, struggle to set the correct amps for each job. The wrong amperage can create weak joints, warping, or even burn through the metal. This is where a TIG amp chart for stainless steel becomes important. By following accurate amp settings, you can make your work better, reduce mistakes, and save time.
Many guides give only rough numbers or suggest “try and see. ” This leaves beginners guessing. But stainless steel needs exact settings. It reacts fast to heat and can change color or crack if you use the wrong amps. You need a practical, clear chart and advice that fits real-world welding—not just theory.
This article explains TIG amp charts for stainless steel in detail. You will learn how to read a TIG amp chart, what settings work for different thicknesses, and how to adjust for joint type, position, and electrode size. We will look at practical examples, give detailed tables, and highlight points even experienced welders sometimes miss.
By the end, you will know how to set the right amps for each job, avoid common errors, and get clean, strong welds every time.
Why Tig Amperage Matters For Stainless Steel
Amperage is the amount of electric current. In TIG welding, it controls how much heat you put into the metal. Stainless steel is sensitive to heat. If you use too much amperage, you can burn through, warp the part, or create ugly welds with discoloration.
Too little amperage can make the weld bead sit on top of the metal without melting it fully. This makes a weak joint that can crack later.
The correct amperage does more than just melt the metal. It keeps the weld pool stable. It also helps control the size and shape of the bead. For stainless steel, using the right amps means you get a shiny, even finish, and the metal keeps its strength.
How A Tig Amp Chart Works
A TIG amp chart shows the recommended amperage for welding different thicknesses of stainless steel. The main factors are:
- Material thickness (measured in millimeters or inches)
- Tungsten electrode size
- Type of joint (butt, fillet, etc.)
- Shielding gas (often argon)
The chart gives a range of amps for each thickness. It is a starting point. You may need to adjust a little for your machine, technique, or the exact job.
Here is a basic TIG amp chart for stainless steel:
| Material Thickness (mm) | Material Thickness (inches) | Tungsten Electrode Size (mm) | Amperage Range (A) |
|---|---|---|---|
| 0.5 | 0.020 | 1.0 | 15–30 |
| 1.0 | 0.040 | 1.0–1.6 | 30–55 |
| 1.5 | 0.060 | 1.6 | 55–75 |
| 2.0 | 0.080 | 2.4 | 75–95 |
| 3.0 | 0.120 | 2.4–3.2 | 95–130 |
| 5.0 | 0.200 | 3.2 | 130–180 |
These numbers are for DC (direct current) welding with pure argon shielding gas. For AC (alternating current), the settings are different, but AC is rare for stainless steel.
Choosing The Right Amperage: Key Factors
1. Material Thickness
Thicker metal needs more amperage. Thin metal needs less. This is the most important rule. Most welders use about 1 amp per 0.001 inch of thickness as a base. But for stainless steel, many reduce the setting a bit to prevent overheating.
Example: For 1/16” (1.6 mm) stainless steel, you might start at 45-65 amps.
2. Tungsten Electrode Size
If you use a small electrode with high amps, it can overheat and melt. If you use a large electrode with low amps, the arc becomes unstable. Match the electrode size to the amp range. Here is a quick guide:
| Tungsten Size (mm) | Recommended Amperage Range (A) |
|---|---|
| 1.0 | 5–50 |
| 1.6 | 20–80 |
| 2.4 | 50–150 |
| 3.2 | 100–250 |
If you need to weld at 90 amps, use at least a 2. 4 mm tungsten.
3. Joint Type
A butt joint (edge to edge) may need less heat than a fillet joint (corner). Open joints or gaps need more amps to fill. Tight joints may need less. If you are welding a T-joint or lap joint, increase the amps by 10–15% from the base setting.
4. Welding Position
Flat welding lets you use higher amperage. For vertical or overhead, reduce amps by 10–15% to keep the weld pool from running.
5. Filler Rod Size
A large filler rod can cool the pool and may need a little more amps. A small rod can melt too fast if amps are too high.
Example Tig Amp Settings For Common Stainless Steel Jobs
Welding shops face many different jobs. Here are sample settings for common stainless steel TIG welds:
Welding Thin Sheet (0.5–1.0 Mm)
- Amperage: 20–40 A
- Tungsten: 1.0 mm
- Filler rod: 1.0 mm (308L)
- Gas: 100% argon, 8–10 L/min
- Notes: Use a small, sharp tungsten and a tight arc. Too much amps will cause warping or holes.
Welding 1.6 Mm Stainless Steel
- Amperage: 45–65 A
- Tungsten: 1.6 mm
- Filler rod: 1.6 mm (308L or 316L)
- Gas: 100% argon, 10 L/min
- Notes: Good for sheet metal, exhaust pipes, or kitchen equipment.
Welding 3 Mm Stainless Steel Plate
- Amperage: 90–115 A
- Tungsten: 2.4 mm
- Filler rod: 2.4 mm (308L or 316L)
- Gas: 100% argon, 12 L/min
- Notes: Preheat not needed. Use a small weave for good tie-in.
Welding 5 Mm Stainless Steel
- Amperage: 130–160 A
- Tungsten: 3.2 mm
- Filler rod: 3.2 mm (316L)
- Gas: 100% argon, 12–14 L/min
- Notes: Use a multi-pass weld for strong joints.
Understanding Stainless Steel Grades And Their Effect On Amperage
Most stainless steel welding uses 304 or 316 grades. Both respond well to standard amp settings. But ferritic grades (like 430) and martensitic grades (like 410) can be more sensitive to heat. They may crack if overheated. For these, start at the lower end of the amp range and make short welds.
Tip: Always check the steel grade before starting. Some steels, like duplex stainless, need special filler rods and careful heat control.
Adjusting Amperage For Different Welds
Butt Joints
These need careful fit-up. If the gap is tight, you can use the lower amp value. If there is a gap, use the higher value.
Fillet Joints
Increase amps by 10–15% compared to a butt joint of the same thickness. This helps to fill the corner and get good penetration.
Lap Joints
Lap joints often need a little more heat, as you are welding two layers. Use the high end of the chart.

Credit: www.scribd.com
Using Pulse Tig For Stainless Steel
Many modern TIG welders have a pulse function. Pulse TIG switches between a high (peak) and low (background) amperage. This helps control heat and reduce warping on thin stainless steel.
A typical pulse setup:
- Peak amps: Base amp setting (from the chart)
- Background amps: 30–50% of peak
- Pulse frequency: 1–2 Hz for manual welding
- Pulse time: 0.5–1.0 seconds
Pulse TIG makes it easier to weld thin stainless without burn-through. It also gives a nice “stacked dime” look.
Common Mistakes With Tig Amperage On Stainless Steel
- Using too much amperage. This is the most common mistake. It causes warping, discoloration, and even holes.
- Using too little amperage. The weld bead sits on the surface and does not fuse well.
- Wrong tungsten size. This leads to an unstable arc or melted tip.
- Forgetting to adjust for joint type. Not adding amps for fillet or lap joints can cause lack of fusion.
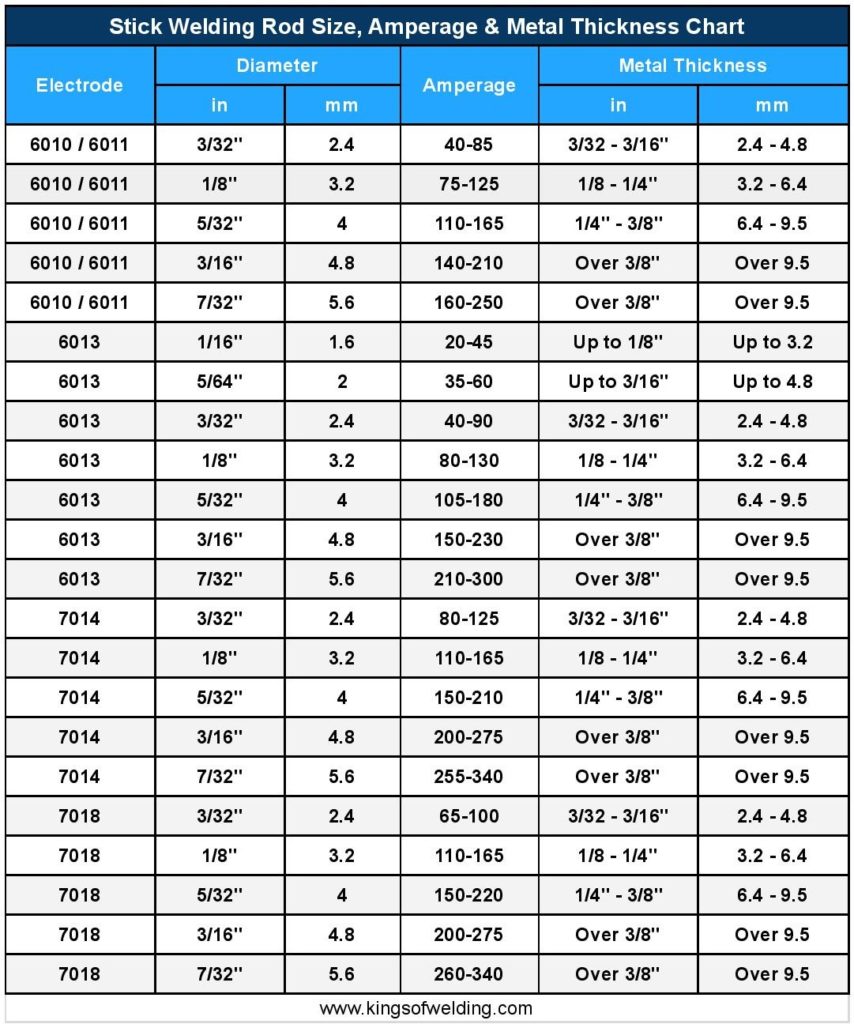
- Not testing first. Always test your settings on scrap before welding the actual part.
Credit: www.kingsofwelding.com
Advanced Tips For Setting Tig Amps On Stainless Steel
- Start at the low end of the chart for new jobs. Increase slowly if needed.
- For very thin metal, use a foot pedal or fingertip control. This lets you adjust amps as you weld.
- Watch the weld pool. If it grows too fast, reduce amps. If it does not wet out, increase amps.
- If you see blue, gold, or purple colors, you are using too much heat. Lower amps or move faster.
- Use a clean, sharp tungsten tip for a stable arc.
- If you weld pipe, rotate the part or move your hand to keep the angle and distance the same.
Tig Amp Chart For Stainless Steel Pipe Welding
Pipe welding needs exact amp control. Here is a guide for pipe wall thickness and amps:
| Pipe Wall Thickness (mm) | Tungsten Size (mm) | Amperage Range (A) | Typical Application |
|---|---|---|---|
| 1.5 | 1.6 | 35–50 | Food industry, small tubes |
| 2.0 | 2.4 | 50–75 | Process piping |
| 3.0 | 2.4 | 75–95 | Water lines |
| 5.0 | 3.2 | 120–150 | High-pressure pipe |
For pipe, always use a purge gas (argon inside the pipe) to prevent oxidation.

Credit: www.scribd.com
The Role Of Gas Flow In Tig Amperage
Amp settings work best with the right shielding gas flow. For stainless steel, use pure argon at 8–14 liters per minute. Too little gas gives a dirty weld. Too much can create turbulence and suck in air.
Key Insights Beginners Often Miss
- Amps alone do not make a good weld. Travel speed, arc length, and torch angle are just as important. If you set amps correctly but move too slow, you still get overheating.
- Room temperature matters. Welding in a cold shop means the metal draws heat away faster. You may need to increase amps slightly.
- Cleanliness is critical. Any oil, rust, or fingerprints can change how the weld pool reacts. Always clean stainless steel with acetone or alcohol before welding.
How To Test And Fine-tune Amperage
- Cut a small piece of the same stainless steel.
- Set amps from the chart.
- Weld a short bead.
- Check the bead for penetration, shape, and color.
- If the bead sits on top, increase amps. If it burns through, lower amps.
- Check the back side for full penetration on thin materials.
Hand Control Vs. Machine Control
Most professional welders use a foot pedal to control amperage. This lets you start high, then reduce as the part heats up. Some machines have a fingertip control. Beginners often set a fixed amperage, but having control during the weld is better.
Tip: For thin stainless steel, start with a little more amps to start the arc, then back off as you move.
The Effect Of Ac Vs. Dc Welding
TIG welding for stainless steel uses DCEN (direct current electrode negative) almost always. AC is used for aluminum, not stainless. If your machine is set to AC by mistake, the arc will be unstable, and the weld will be poor.
Matching Amperage To Welding Speed
Travel speed affects how much heat goes into the metal. If you weld slow, reduce amps. If you weld fast, you may need to increase amps a little. Practice on scrap to find the right balance.
How To Avoid Warping And Distortion
Stainless steel can warp if overheated. To avoid this:
- Use the lowest amps that give full penetration.
- Move quickly but steadily.
- Clamp or fixture the parts if possible.
- Weld in short sections (stitch weld) and let the part cool between passes.
Why Color Matters In Stainless Steel Welds
Stainless steel changes color if overheated. Blue, purple, or gold colors show too much heat. Good welds should be silver or light straw color. If you see dark colors, reduce amps or move faster. These colors do not just look bad; they show the metal is weaker in that area.
Amperage Settings For Different Types Of Welds
- Root pass: Use lower amps to prevent burn-through.
- Fill passes: Increase amps slightly.
- Cap pass: Lower amps again for a smooth finish.
Example: For 3 mm stainless, root at 80 A, fill at 100 A, cap at 85 A.
Amperage And Filler Rod Addition
Push the filler rod into the leading edge of the weld pool. If the rod melts too fast, lower amps. If it does not melt, increase amps. Use a steady rhythm to keep the bead even.
Safety Tips For Tig Welding Stainless Steel
- Wear gloves and a welding helmet with at least shade 10.
- Use a fume extractor; stainless steel fumes are dangerous.
- Keep your hands dry and insulated.
- Check cables for damage before starting.
Environmental Factors Affecting Tig Amperage
Wind or drafts can blow away shielding gas. This makes the weld dirty, no matter the amp setting. Weld in a sheltered area, or use barriers if needed.
Comparing Tig Amp Chart Recommendations
Different sources give slightly different amp ranges. Here is a comparison:
| Source | 1 mm Stainless Steel | 2 mm Stainless Steel | 3 mm Stainless Steel |
|---|---|---|---|
| Lincoln Electric | 25–40 A | 50–70 A | 90–110 A |
| Miller Welds | 30–50 A | 60–80 A | 100–120 A |
| This Guide | 30–55 A | 75–95 A | 95–130 A |
Always start at the low end and increase if needed. Your results may vary based on your machine and technique.
Learning To Read The Weld Pool
The best welders watch the weld pool closely. If it is wide and flat, amps are right. If it is narrow and sits on top, increase amps. If it is too deep or the edges sag, lower amps. Adjust as you go for each pass.
Summary: Mastering Tig Amps For Stainless Steel
TIG welding stainless steel is about control. The right amperage depends on material thickness, electrode size, joint type, and position. Use amp charts as your guide, but always test and adjust for your exact setup. Watch the weld pool, listen to the arc, and check the color of your welds.
With practice, you will set your machine by feel and get the results you want every time.
Frequently Asked Questions
What Happens If I Use Too Much Amperage When Tig Welding Stainless Steel?
Using too much amperage will overheat the metal. This can cause warping, burn-through, and blue or purple discoloration. The weld may look rough and lose its strength. Always start with the lower end of the amp chart and increase only if you need more penetration.
Can I Use The Same Amperage Chart For Carbon Steel And Stainless Steel?
No. Stainless steel usually needs slightly less amperage than carbon steel of the same thickness. This is because stainless holds heat longer and is more sensitive to warping. Always use a TIG amp chart for stainless steel.
How Do I Choose The Right Tungsten Electrode Size For My Amperage?
Match the tungsten size to your amp setting. For example, use 1. 6 mm tungsten up to 80 amps, 2. 4 mm for 80–150 amps, and 3. 2 mm above 150 amps. A small electrode with high amps can melt or cause an unstable arc.
Is Pulse Tig Better For Thin Stainless Steel?
Yes. Pulse TIG helps control heat and reduces warping on thin stainless steel. It switches between high and low amps, giving time for the metal to cool. This is helpful for welds under 1. 5 mm thick.
Where Can I Find More Detailed Amp Charts And Welding Advice?
You can find detailed amp charts and welding advice at Miller Welds. They have calculators and charts for different metals, thicknesses, and welding processes.
Welding stainless steel with TIG is a skill that grows with practice. Use the right amp chart, test your settings, and pay attention to the weld pool. This will help you make strong, clean, and safe welds every time.