Disclosure: This post contains affiliate links and I will be compensated if you make a purchase after clicking through my links. Learn More
Mig welding is one of the most popular methods for joining metal. It is fast, versatile, and works well for both beginners and professionals. But even experienced welders can face a common problem called cold lap. This welding defect can make a weld weak and sometimes even dangerous. Many people do not notice cold lap until it is too late, and the weld fails under pressure. Understanding why cold lap happens and how to prevent it is important for anyone who wants strong, reliable welds.
This article will explain how to avoid cold lap in MIG welding. You will learn what cold lap is, why it happens, and how to spot it. You will also find easy-to-follow tips for preventing cold lap. By the end, you will know how to make better welds and avoid mistakes that beginners and even skilled welders sometimes make.
What Is Cold Lap In Mig Welding?
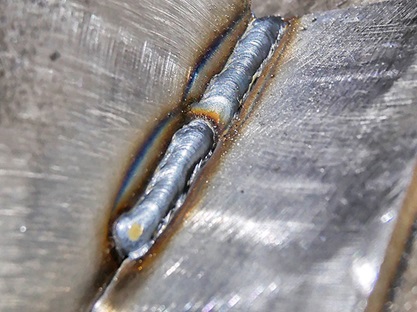
Cold lap is a welding defect that happens when the weld metal does not fuse properly with the base metal. Instead of melting together, the filler metal sits on top or beside the surface without bonding. This creates a weak point that can break under stress. Cold lap is also called lack of fusion.
Cold lap can look smooth from the outside, but inside, the joint is not strong. This hidden problem makes it risky, especially for parts that must hold weight or pressure. Cold lap can cause cracks, leaks, or even accidents in important structures.
Why Cold Lap Happens
Many factors can cause cold lap in MIG welding. Here are the most common reasons:
- Low welding current: If the amperage is too low, the arc does not create enough heat to melt the base metal fully.
- Fast travel speed: Moving the welding gun too quickly means the metal does not have time to fuse.
- Wrong torch angle: Holding the torch at the wrong angle can make the arc miss the joint.
- Poor joint preparation: Dirty, rusty, or oily surfaces make it hard for the weld to bond.
- Wrong wire feed speed: Too much or too little wire can affect how the weld pool forms.
- Incorrect shielding gas: Using the wrong gas or a poor gas flow can lead to weak arcs and bad fusion.
Many beginners think that just feeding more wire or moving faster will save time. In fact, these actions often cause cold lap. Even professionals sometimes get cold lap when they rush or do not check their settings carefully.
Credit: www.millerwelds.com
How To Identify Cold Lap
Spotting cold lap is not always easy. Sometimes the weld looks fine on the outside. But there are some signs to watch for:
- The weld bead looks raised or sits on top of the metal.
- There are visible gaps or lines at the edge of the weld.
- Chipping or brushing the bead shows areas that did not melt into the base metal.
- Cracks form under stress or after cooling.
If you are not sure, you can use more advanced checks, such as:
- Grinding or cutting the weld to see the cross-section.
- Using dye penetrant or ultrasonic testing for important welds.
Missing cold lap during inspection can lead to serious failures. Always check your welds, especially on parts that will be under pressure or load.
Essential Steps To Avoid Cold Lap In Mig Welding
Avoiding cold lap requires attention to detail. Here are the key steps you should follow for strong, safe welds.
1. Use The Correct Welding Parameters
Set your welding current (amperage) and voltage to match the material thickness and wire size. If your settings are too low, the weld will not penetrate. If too high, you may burn through.
| Material Thickness | Wire Diameter | Recommended Amperage | Voltage Range |
|---|---|---|---|
| 1/16″ (1.6mm) | 0.030″ (0.8mm) | 60-90A | 16-18V |
| 1/8″ (3.2mm) | 0.035″ (0.9mm) | 100-140A | 17-19V |
| 1/4″ (6.4mm) | 0.045″ (1.2mm) | 180-220A | 22-26V |
Always check the machine settings before starting. Use the settings suggested by the wire or machine manufacturer as a guide, but adjust as needed for your work.
2. Prepare The Joint Properly
Clean the metal before welding. Remove rust, oil, paint, or dirt. Use a wire brush, grinder, or chemical cleaner. A dirty surface creates a barrier that prevents fusion.
Fit the parts tightly. Gaps or poor alignment can cause the weld metal to sit on the surface instead of fusing. For thick materials, bevel the edges so the arc can reach both pieces.
3. Choose The Right Wire And Gas
Select the correct wire type and size for your material. For mild steel, ER70S-6 is common. Stainless steel and aluminum need different wires.
Pick the right shielding gas. For most steel, use a mix of 75% argon and 25% CO2. Pure CO2 can work but may increase spatter and make fusion harder. For aluminum, use pure argon.
Wrong wire or gas makes it harder for the arc to transfer heat, causing cold lap.
4. Maintain Proper Travel Speed
Move the torch at a steady, moderate speed. If you go too fast, the weld does not have enough time to fuse. If you go too slow, you risk burn-through or a bulky bead.
A good rule is to watch the weld pool and keep it just behind the arc. Practice keeping a consistent pace on scrap metal before working on the actual part.
5. Hold The Torch At The Correct Angle
The torch angle affects how heat enters the joint. For most MIG welding, a 10-15 degree push angle is best. This means you tilt the torch slightly in the direction you are moving.
If you angle the torch too much or point it away from the joint, the arc will not reach both sides. This causes cold lap on one side.
6. Set The Right Wire Feed Speed
The wire feed speed should match your amperage and voltage. Too much wire can create a cold, lumpy bead. Too little wire can cause the arc to cut in and out.
Most machines have a chart or guide for wire feed speed. Start with the recommended setting and adjust as you work. Listen for a steady “hissing” sound, not popping or sputtering.
7. Use Good Welding Technique
Keep a short stickout (distance from the tip to the work). Usually, 3/8″ (10mm) is ideal. A long stickout cools the wire before it hits the weld, causing cold lap.
Keep your hands steady. Avoid weaving or moving the torch too much unless the joint needs it. Focus on making even, straight beads.
8. Watch The Weld Pool
Do not just watch the arc; watch the weld pool. You want to see the edges of the pool melting into the base metal. If the edges look cold or do not spread, slow down or increase power.
Some welders miss cold lap because they only watch the bright arc, not the actual molten metal.
9. Inspect Your Welds Carefully
After welding, look closely at the bead. Check for signs of cold lap: raised beads, cracks, or lines. Use a chipping hammer or brush to see if the weld sticks well.
Cut and check a test weld if possible. Seeing the inside can show problems before they become serious.
10. Practice On Scrap Metal
Before welding important parts, practice your settings and technique on scrap pieces of the same material. This helps you dial in the right speed, angle, and power.
New welders often skip this step and have problems later. Practicing first saves time and prevents mistakes.
Common Mistakes That Cause Cold Lap
Understanding what causes cold lap helps you avoid it. Here are mistakes even experienced welders sometimes make:
- Ignoring machine settings: Not checking voltage or amperage before starting.
- Welding dirty metal: Trying to weld over rust or paint.
- Rushing the job: Moving the torch too fast to finish quickly.
- Wrong stickout: Letting the wire get too far from the tip.
- Incorrect joint fit-up: Welding over gaps or poor alignment.
- Using the wrong gas mix: Choosing pure CO2 when a mix is needed.
- Not checking welds: Skipping inspection or testing.
Many beginners believe that MIG welding is “point and shoot. ” But every weld needs careful setup and attention.
Advanced Tips For Avoiding Cold Lap
If you want to make professional-quality welds, go beyond the basics. Here are some advanced tips:
1. Use Preheat For Thick Materials
If you weld thick steel (over 1/4″ or 6mm), preheat the metal to 200-400°F (93-204°C) with a torch. Preheating helps the weld pool stay hot and improves fusion.
2. Apply The Stringer Bead Technique
Use straight, narrow beads instead of wide weaving. Wide beads can cool too fast on the edges, causing cold lap.
3. Adjust For Position
Welding overhead or vertical can make cold lap more likely. Use higher power, keep the bead small, and watch the pool closely in these positions.
4. Monitor Shielding Gas Flow
Set the gas flow to 20-30 cubic feet per hour (CFH). Too little gas causes porosity and weak fusion. Too much gas can cause turbulence and pull air into the weld.
| Gas Flow (CFH) | Effect on Weld |
|---|---|
| 10-15 | Poor coverage, risk of porosity, cold lap |
| 20-30 | Good coverage, strong fusion |
| 40+ | Gas turbulence, risk of contamination |
5. Keep Equipment In Good Condition
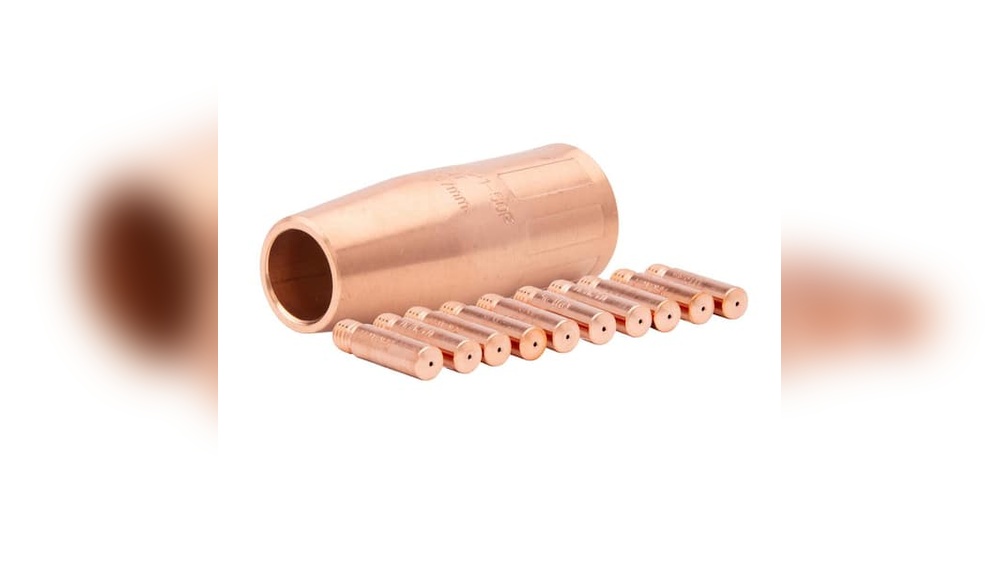
Check the contact tip, nozzle, and liner regularly. A blocked tip or dirty liner causes uneven feeding and a weak arc, leading to cold lap.
6. Learn To Read The Bead
A good MIG weld bead is slightly convex, shiny, and smooth. Cold lap beads look raised, uneven, or have undercut edges. Train yourself to notice these differences.
7. Use Pulse Mig For Difficult Materials
Pulse MIG welding uses controlled pulses to deliver more heat when needed. This is useful for thin materials or aluminum, which can get cold lap easily.
8. Control Your Environment
Welding outdoors in wind can blow away shielding gas, causing poor fusion. Use windbreaks, or weld inside if possible.
9. Take Breaks To Avoid Fatigue
Welding when tired leads to mistakes. Take short breaks to keep your hands steady and your focus sharp.
10. Record Your Best Settings
Keep a notebook of settings that work for each material and thickness. This saves time and improves consistency.
Examples Of Cold Lap And Good Welds
It helps to compare cold lap with good welds. Here’s a table showing the differences:
| Feature | Cold Lap Weld | Good Weld |
|---|---|---|
| Bead Height | Raised, sits on surface | Slightly convex, blends in |
| Edge Fusion | Poor, visible lines | Smooth, melted into base metal |
| Crack Resistance | Low, cracks under stress | High, resists cracking |
| Cross-Section | Gaps between weld and base | Full fusion, no gaps |
Seeing and feeling the weld is the best way to learn. Check your welds often, and compare them to known good examples.
Non-obvious Insights For Avoiding Cold Lap
Most guides cover the basics, but here are tips many people miss:
- Metal temperature matters: If the base metal is cold (such as in winter or on thick parts), fusion is harder. Warm the metal before starting.
- Short arc length is better: Keeping the arc length short focuses heat and improves fusion. Many welders use too long an arc, especially with auto-darkening helmets.
- Joint design influences fusion: Joints with sharp corners or poor access make cold lap more likely. Use joint designs that allow good torch access and heat distribution.
- Using the right polarity: For MIG welding steel, use DCEP (Direct Current Electrode Positive). Using the wrong polarity weakens fusion.

Credit: www.reddit.com
The Role Of Training And Practice
Even with the best equipment, cold lap can happen if you do not have enough experience. Practice helps you develop the right speed, angle, and technique.
Take welding classes if possible. Ask experienced welders to watch you and give feedback. Record your welds and review them later.
Over time, you will learn to spot cold lap before it happens and adjust your technique quickly.
Safety And Quality Control
Cold lap not only weakens the weld but can also cause safety risks. Welds that fail can lead to injuries, leaks, or property damage. Always check your welds, especially on parts that will carry weight or pressure.
Follow industry standards such as those from the American Welding Society (AWS). These standards explain how to test and inspect welds for problems like cold lap.
If you weld for work, follow your company’s quality control procedures. Use destructive and non-destructive tests when needed.
Real-world Example: Cold Lap In Structural Welding
A construction company was building a steel frame for a small bridge. The welder set the machine too low and moved too fast to finish quickly. The welds looked fine at first. But during inspection, an engineer found cold lap using ultrasonic testing.
The company had to cut out and redo several welds, costing time and money. The cold lap could have caused the bridge to fail under heavy loads.
This example shows why avoiding cold lap is not just about good looks—it is about safety and reliability.
Frequently Asked Questions

Credit: www.reddit.com
What Is The Main Cause Of Cold Lap In Mig Welding?
Cold lap is usually caused by low welding current or fast travel speed. These settings do not create enough heat for the weld metal to fuse with the base metal. Other causes include wrong torch angle, dirty surfaces, and poor wire feed.
Can You Repair A Weld With Cold Lap?
Yes, but you must remove the defective weld first. Grind or cut out the area with cold lap, clean the metal, and weld again with the correct settings. Never try to weld over a cold lap defect.
How Can I Tell If My Weld Has Cold Lap Without Cutting It?
Look for signs such as raised beads, visible lines at the edge, or cracks. Use a chipping hammer to see if the weld breaks away easily. For important welds, use dye penetrant or ultrasonic testing.
Does Shielding Gas Type Affect Cold Lap?
Yes. The wrong shielding gas or poor gas flow can cause weak arcs and poor fusion, which leads to cold lap. Use the recommended gas mix for your wire and material, usually 75% argon and 25% CO2 for steel.
Where Can I Learn More About Welding Standards And Defects?
You can read more about welding standards and defects on the American Welding Society website. They provide guides and resources for welders of all levels.
Strong welds come from good preparation, correct settings, and careful inspection. By following these steps and avoiding common mistakes, you can prevent cold lap and make your MIG welds safe and reliable. Keep learning, practice often, and always check your work for the best results.