Disclosure: This post contains affiliate links and I will be compensated if you make a purchase after clicking through my links. Learn More
Welding thin steel can frustrate even skilled welders. The steel warps easily, burns through fast, and makes a mess if you use the wrong settings. Lap joints are common in auto body repair, sheet metal work, and fabrication. They give extra strength and a clean look if done right.
But to get smooth, strong lap joints on thin steel, you must set your MIG welder correctly. This article explains the best MIG settings for lap joints on thin steel, with clear guidance for both beginners and those who want reliable results.
You will learn how voltage, wire speed, shielding gas, and welding technique all work together. This is not just about numbers; you will see why each setting matters. You will also find out what mistakes to avoid, and get practical tips to help you weld thin steel lap joints with confidence.
Understanding Lap Joints On Thin Steel
A lap joint means one piece of thin steel overlaps another and you weld along the edge. This joint is popular because it is simple, strong, and easy to fit up. Thin steel, usually between 0. 6 mm (24 gauge) and 2 mm (14 gauge), is used in car panels, ducts, and furniture.
Lap joints on thin steel need careful heat control. If you use too much heat, you burn holes or warp the metal. Too little heat, and the weld sits on top but does not join both layers. Both problems mean weak joints that can fail.
Key factors for lap joints on thin steel:
- Overlap size: 10–12 mm (⅜–½ inch) is best for strong welds.
- Clean edges: Clean both surfaces to bare metal before welding.
- Tight fit: Clamp the pieces so they do not move or gap.
Why Mig Welding Is Good For Thin Steel Lap Joints
MIG welding (also called GMAW) is popular for thin steel because it is easy to learn and works fast. The welder feeds wire automatically, so you can focus on moving the torch and controlling the weld pool.
Main reasons to use MIG for thin steel lap joints:
- Low heat input: You can set low amps and volts, so you do not burn through.
- Smooth welds: The bead is flatter and cleaner than stick welding.
- Good for long seams: MIG allows you to make longer welds without stopping often.
- Works with gas: Shielding gas protects the weld from air, which helps avoid porosity.
Key Mig Settings Explained
Each MIG welder has three main settings for thin steel: voltage, wire feed speed, and shielding gas. Sometimes, you must also adjust inductance or arc length. Understanding each one helps you get better lap joints.
Voltage
Voltage controls how hot and wide the arc is. For thin steel lap joints, set a low voltage. Too high, and you melt holes or create a wide bead that warps the steel.
- Typical voltage for 1 mm (18 gauge) steel: 16–17 volts
- For 1.5 mm (16 gauge) steel: 17–18 volts
- Go lower for 0.8 mm (22 gauge): 14–15 volts
Wire Feed Speed
Wire feed speed (WFS) controls how fast the wire goes into the weld. Higher speed gives more metal but can cause excess spatter or a tall bead. Low speed gives less metal but can lead to burnback (wire sticking).
- For 0.6 mm (0.023 inch) wire: 4–7 meters/min (160–275 inches/min)
- For 0.8 mm (0.030 inch) wire: 3–6 meters/min (120–235 inches/min)
Start at the low end and increase until the arc sounds smooth, like frying bacon.
Shielding Gas
The gas protects the weld from oxygen and nitrogen in the air. For thin steel, use a mix of 75% argon and 25% CO2. This gives a stable arc, less spatter, and a cleaner bead.
Pure CO2 can be used, but it makes the arc hotter and increases spatter. Use it only if you have experience and need more penetration.
Wire Size And Type
For thin steel lap joints, use small diameter wire. It melts faster and needs less heat. The best choice is ER70S-6 solid wire.
- Wire size: 0.6 mm (0.023 inch) or 0.8 mm (0.030 inch)
- Larger wire (0.9 mm/0.035 inch): Only for steel above 2 mm (14 gauge)
Inductance And Arc Length
Some advanced MIG welders let you set inductance. Higher inductance makes a softer arc and less spatter—good for thin steel.
Arc length is set by the distance from the tip to the work. Keep the tip 6–8 mm (¼–⅜ inch) from the metal for best results.
Recommended Mig Settings For Common Thin Steel Thicknesses
Below is a summary of suggested settings for typical thin steel thicknesses when making lap joints. Always test on scrap first.
| Steel Thickness | Wire Size | Voltage (V) | Wire Feed Speed (m/min) | Shielding Gas |
|---|---|---|---|---|
| 0.8 mm (22 ga) | 0.6 mm (0.023″) | 14–15 | 4–5 | 75% Ar / 25% CO2 |
| 1 mm (18 ga) | 0.6 mm (0.023″) | 16–17 | 5–6 | 75% Ar / 25% CO2 |
| 1.5 mm (16 ga) | 0.8 mm (0.030″) | 17–18 | 6–7 | 75% Ar / 25% CO2 |
| 2 mm (14 ga) | 0.8 mm (0.030″) | 18–19 | 7–8 | 75% Ar / 25% CO2 |
Setting Up Your Mig Welder For Thin Steel Lap Joints
A good setup makes welding easier and prevents problems. Follow these steps for reliable lap joints:
- Clean the metal: Remove all rust, paint, and oil from both pieces. Use a wire brush or grinder. Even small dirt can cause weak welds.
- Fit and clamp: Overlap the steel 10–12 mm (⅜–½ inch). Clamp tightly. Gaps cause burn through.
- Set the welder: Choose the right wire size. Adjust voltage and wire feed speed based on the thickness chart above.
- Check the gas flow: Set to 10–15 liters per minute (20–30 cubic feet/hour). Too little, and you get porosity.
- Test on scrap: Weld two pieces of scrap first. Look for a flat bead that fuses both layers without holes or tall buildup.
- Adjust as needed: If you get burn through, lower voltage or wire speed. If the weld sits on top, increase voltage or slow travel speed.
Welding Technique For Lap Joints On Thin Steel
Good settings are only half the story. How you move the torch and control the weld pool is just as important.
Torch Angle
Hold the torch at a 15-degree push angle (pointing in the direction of travel). This gives better gas coverage and less penetration, which is safer for thin steel.
Stickout
Keep the distance from the contact tip to the work (stickout) short: 6–8 mm (¼–⅜ inch). Longer stickout makes the arc unstable and increases spatter.
Travel Speed
Move the torch at a steady pace. If you go too slow, you burn through. Too fast, and the weld is weak. Aim for about 250–300 mm per minute (10–12 inches/minute).
Stitch Welding
For thin steel, weld short sections (stitches) instead of one long bead. This prevents heat buildup and warping.
- Weld a 12–25 mm (½–1 inch) section.
- Stop, let cool for a few seconds.
- Weld the next section.
Backstep Technique
Weld in the opposite direction to the joint, then move forward. This spreads heat and reduces distortion.
Controlling The Weld Pool
Watch the weld pool closely. On thin steel, it should be small and round. If it grows too large, stop and let it cool.
Tack Welds
Before the main weld, place tack welds every 25–40 mm (1–1. 5 inches). This holds the pieces in place and stops gaps.
Common Problems And How To Fix Them
Even with correct settings, problems can happen. Here’s how to spot and solve the most common ones in thin steel lap joints.
Burn Through
You see holes in the weld or the steel melts away.
- Fix: Lower the voltage, reduce wire speed, or move the torch faster. Use stitch welding and let the joint cool between stitches.
Lack Of Fusion
The bead sits on top but does not melt both layers.
- Fix: Increase voltage a little or move the torch slower. Make sure the metal is clean and clamped tightly.
Excess Spatter
Metal drops fly from the weld, making cleanup hard.
- Fix: Use correct gas (75% Ar / 25% CO2). Lower wire speed or adjust voltage. Shorten stickout.
Warping
The steel bends or distorts after welding.
- Fix: Use stitch welding. Clamp the joint tightly. Let each weld cool before starting the next.
Porosity
Small holes or bubbles inside the weld.
- Fix: Clean the metal better. Increase gas flow. Shield the joint from wind.
Practical Tips For Better Thin Steel Lap Joints
Welding thin steel is not just about numbers. Experience and small tricks make a big difference. Here are some tips even experienced welders sometimes forget:
- Pre-set your welder: Write down good settings for each steel thickness you use often.
- Use a copper backing bar: Place copper under the joint. Copper absorbs heat and stops burn through. The weld will not stick to copper.
- Test gas by welding on scrap: A loud popping sound means not enough gas or wind blowing it away.
- Change ground clamp position: Place the ground clamp close to the weld to reduce voltage drop and get a stronger arc.
- Check for small gaps: Even a 0.5 mm gap between the pieces can cause burn through. Fix gaps before welding.
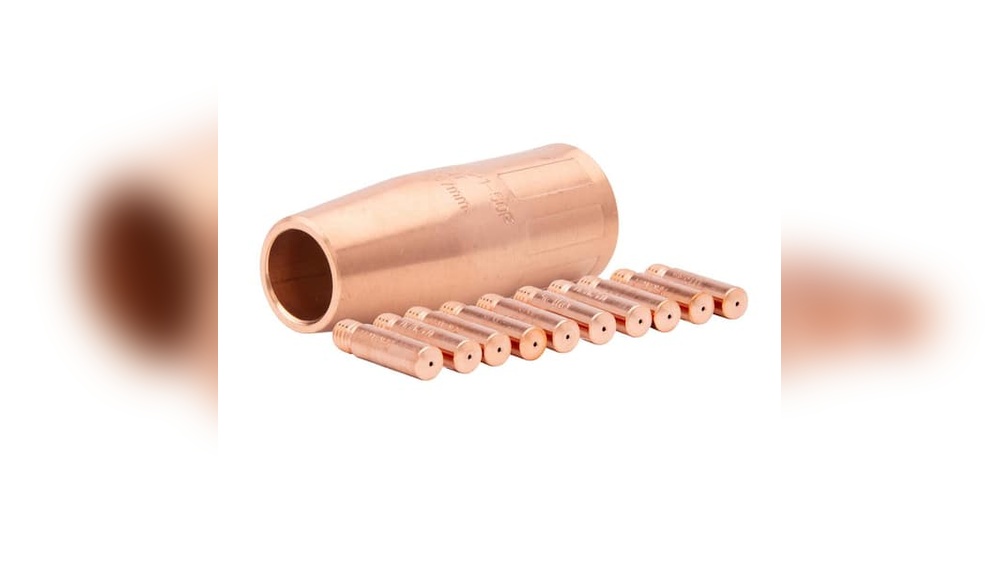
- Keep extra tips and nozzles: Thin steel is hard on tips. Change them if the arc becomes unstable.
How Mig Settings Affect Strength And Appearance
Lap joints on thin steel need both strength and a good look. The right settings help balance these.
- Low voltage and wire speed: Cleaner bead, but risk of poor fusion.
- High voltage and wire speed: Stronger fusion, but risk of burn through and warping.
Here is a comparison of weld quality based on settings:
| Setting Type | Bead Appearance | Joint Strength | Risk Level |
|---|---|---|---|
| Low Voltage/Low Speed | Flat, smooth | Weak (poor fusion) | Low |
| High Voltage/High Speed | Wide, convex | Strong (good fusion) | High (burn through) |
| Balanced | Even, neat | Strong and reliable | Medium |
Aim for a balanced setting that gives full fusion without making the steel too hot.
Choosing The Right Mig Welder For Thin Steel
Not every MIG welder is good for thin steel. Here are the features you need to get clean lap joints:
- Low amperage control: The welder must go down to 30–40 amps.
- Smooth wire feed: A quality drive system prevents wire surges.
- Gas solenoid: Allows you to use argon/CO2 mix for better welds.
- Short circuit transfer mode: Essential for thin steel.
- Inductance adjustment (if possible): Helps control spatter.
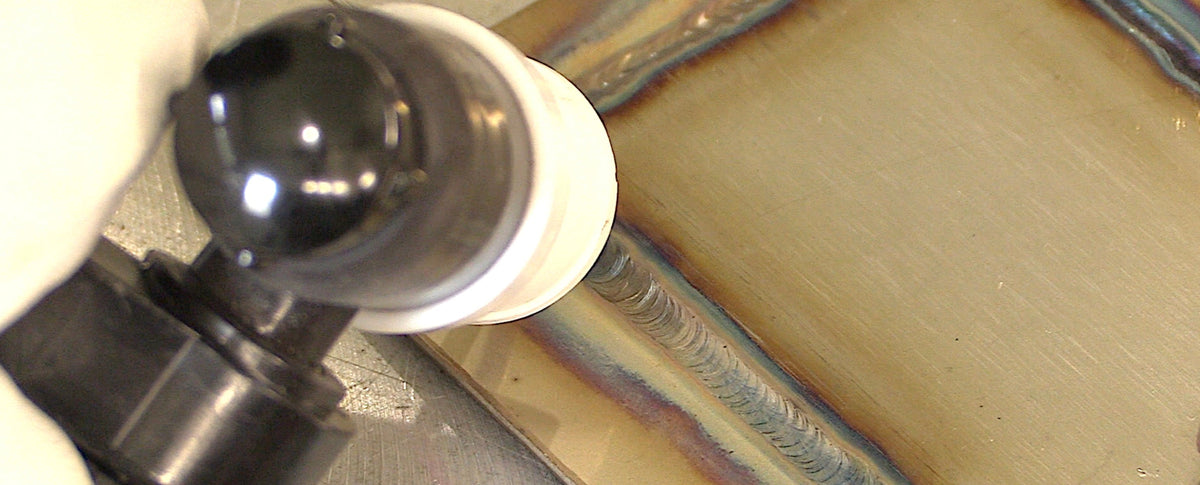
Popular models for thin steel include the Miller Millermatic 141, Lincoln Electric Power MIG 140MP, and ESAB Rebel EMP 215ic. Always check the specs for minimum amperage and wire size range.
Credit: weldmongerstore.com
Safety When Mig Welding Thin Steel Lap Joints
MIG welding is safer than some other methods, but thin steel creates sharp edges and burns easily. Follow these rules:
- Wear welding gloves and a long-sleeve shirt to prevent burns.
- Use a welding helmet with auto-darkening filter (shade 10–12).
- Work in a well-ventilated space. Shielding gas can push away oxygen.
- Keep a fire extinguisher nearby. Thin steel can spark and ignite nearby items.
- Clamp the work solidly. Loose pieces can fly or shift.
Mistakes Beginners Make And How To Avoid Them
Many new welders repeat the same errors on thin steel lap joints. Knowing these can save time and money:
- Using too much heat: Beginners often set the welder too high. Always start low and increase as needed.
- Not cleaning the steel: Even small rust spots cause porosity and weak welds.
- Welding in long beads: This causes warping. Use short stitches.
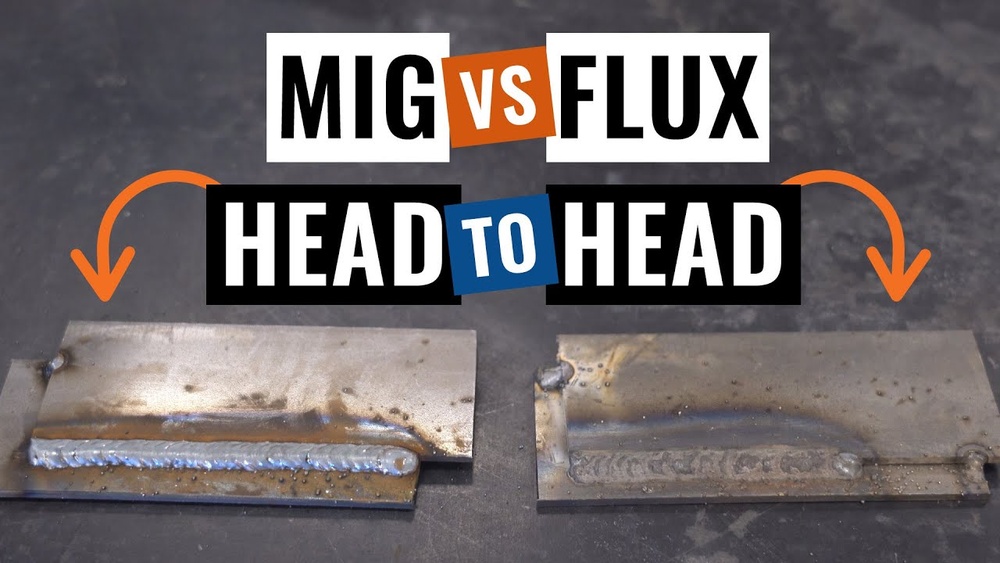
- Wrong wire type or size: Thick wire or flux-cored wire is hard to control on thin steel.
- Poor fit-up: Gaps or misalignment lead to burn through and ugly welds.

Credit: www.mig-welding.co.uk
Advanced Tricks For Better Results
Experienced welders use a few extra tricks for perfect lap joints on thin steel:
- Pulse MIG: Some welders allow pulsed MIG, which gives short bursts of heat. This is ideal for thin steel, as it reduces warping and burn through.
- Double tacking: Place two tacks at each end before welding the lap joint. This locks the pieces in place and helps control heat.
- Heat sink under joint: Use aluminum or copper under the weld to draw away excess heat.
- Move the ground: If the arc becomes weak, move the ground clamp closer to the joint.
- Use anti-spatter spray: Apply a light spray on the area to make cleaning easier.
Real-world Example: Auto Body Lap Joint Repair
Consider repairing a rusted car door with 1 mm steel. You overlap the new patch by 12 mm. You set your welder to 16 volts, 5 m/min wire speed, with 75% argon/25% CO2, and use 0. 6 mm wire.
You tack the patch every 25 mm, then stitch weld in 20 mm sections, letting each one cool. The bead is smooth, flat, and fuses both layers. The steel does not warp or burn through. After grinding, the joint is almost invisible, and the door is as strong as new.

Credit: www.youtube.com
Welding Lap Joints On Galvanized Thin Steel
Galvanized steel has a zinc coating. This protects against rust but can cause health risks and poor welds.
- Remove zinc: Grind off zinc from the weld area (at least 20 mm around the joint).
- Ventilate well: Zinc fumes are toxic. Use a fan or weld outdoors.
- Clean after welding: Remove weld spatter and re-coat the joint with zinc spray.
Never weld directly over thick zinc. It creates porosity and weakens the joint.
Testing Your Welds
Never assume your weld is strong just by looking. Test your lap joint by:
- Peeling with pliers: Try to peel the overlapped pieces apart. A strong weld will bend the steel, not break at the weld.
- Bend test: Hammer the joint over a hard edge. The weld should not crack.
- Visual check: Look for a flat, even bead with no holes or undercut.
If the weld fails, adjust your settings and try again on scrap.
Summary Table: Best Mig Settings For Lap Joints On Thin Steel
Below is a quick guide for your workshop wall.
| Steel Gauge | Voltage | Wire Speed | Wire Size | Shielding Gas | Travel Speed |
|---|---|---|---|---|---|
| 22 (0.8 mm) | 14–15 V | 4–5 m/min | 0.6 mm | 75% Ar / 25% CO2 | 10–12 in/min |
| 18 (1.0 mm) | 16–17 V | 5–6 m/min | 0.6 mm | 75% Ar / 25% CO2 | 10–12 in/min |
| 16 (1.5 mm) | 17–18 V | 6–7 m/min | 0.8 mm | 75% Ar / 25% CO2 | 10–12 in/min |
Frequently Asked Questions
What Is The Best Wire Size For Mig Welding Thin Steel Lap Joints?
The best wire size is 0.6 mm (0.023 inch) for steel below 1.5 mm. Use 0.8 mm (0.030 inch) for steel closer to 2 mm. Smaller wire melts with less heat and gives more control.
Can I Use Flux-cored Wire For Thin Steel Lap Joints?
It is possible, but not recommended. Flux-cored wire runs hotter and makes more spatter. It is harder to control and can burn through thin steel. Use solid wire with shielding gas for best results.
How Do I Prevent Warping When Welding Lap Joints On Thin Steel?
Use stitch welding: short welds with pauses. Clamp the pieces tightly. Let each section cool before welding the next. Use lower heat settings and move fast.
What Shielding Gas Is Best For Thin Steel Mig Welding?
A mix of 75% argon and 25% CO2 gives a stable arc, less spatter, and clean welds. Pure CO2 is hotter and more spattery. Do not use 100% argon—it will not penetrate enough.
Is Mig Or Tig Better For Thin Steel Lap Joints?
Both work, but MIG welding is faster and easier for long seams and beginners. TIG gives more control but is slower and needs more skill. For most thin steel lap joints, MIG is the better choice.
Getting strong, neat lap joints on thin steel takes practice, but the right MIG settings make a big difference. Use the settings in this guide, start low, and adjust as you test. With a good setup, you will get welds that last and look clean. For more on MIG welding standards and safety, visit the Wikipedia page on MIG welding.