Disclosure: This post contains affiliate links and I will be compensated if you make a purchase after clicking through my links. Learn More
Setting up a Lincoln stick welder can seem confusing if you are new to welding. Many people buy a Lincoln welder because these machines last long, work reliably, and handle tough jobs. But to use one safely and get good welds, you must set it up the right way. This guide will show you every step, from unpacking the box to striking your first arc. You will learn about the tools you need, how to connect parts, how to adjust settings, and how to check everything before you start welding. This article also explains common mistakes, safety tips, and how to get the best results from your Lincoln stick welder.
You do not need advanced skills or special knowledge to follow this guide. Whether you want to weld for home repairs, small projects, or start learning for a job, you will find clear answers here. Many beginners miss simple steps or guess at settings, which can cause poor welds or even damage the welder.
This guide will help you avoid those problems. By the end, you will know how to set up your Lincoln stick welder in a safe, correct, and efficient way.
Understanding Your Lincoln Stick Welder
Before you start setting up, you should know the basic parts and how this machine works. A stick welder, also called a SMAW (Shielded Metal Arc Welding) machine, uses a short metal rod called an electrode. The machine creates an electric arc between the electrode and the metal you want to join. This arc melts both metals so they stick together when cooled.
Lincoln makes several models, such as the AC225, Idealarc 250, and Ranger 225. While details may change, most stick welders share the same main features:
- Power switch
- Amp control knob or dial
- Electrode holder (stinger)
- Ground clamp
- Power cord
- Output terminals (marked + and –)
Some machines use only AC (alternating current), some use only DC (direct current), and some offer both. DC is often better for thinner metals, smoother welds, and less spatter.
Main Parts Explained
- Electrode holder: This clamps the welding rod. It connects to the positive or negative terminal.
- Ground clamp: This attaches to your workpiece or worktable. It completes the circuit.
- Amp control: This sets how much current flows. More amps melt thicker metal, fewer amps for thin.
- Output terminals: Marked + (positive) and – (negative). Connecting the stinger and ground here sets the polarity.
Knowing these names helps you follow the next steps.
Unboxing And Preparing The Welder
Start with a careful check before you plug in the machine. Take the welder out of the box. Place it on a flat, dry surface with enough space for air to move around it. Good air flow prevents overheating.
Inspecting The Contents
Check for these items:
- Lincoln stick welder unit
- Electrode holder with cable
- Ground clamp with cable
- Power cord
- User manual (keep this for reference)
Some kits include starter electrodes or a face shield. If anything is missing or damaged, contact your seller before using the welder.
Choosing The Right Location
Put the welder in a well-ventilated area. Stick welding makes fumes, so do not weld in small, closed spaces. Keep flammable items at least 10 feet away. The area should be dry to reduce shock risk.
Set up your workbench or table so the ground clamp can reach your workpiece. Make sure the power outlet is close by, but do not stretch the cords.
Gathering Tools And Safety Gear
You need more than just the welder to work safely and efficiently. Here are the basics:
- Welding helmet (auto-darkening is best)
- Welding gloves
- Long-sleeve cotton shirt or jacket
- Pants (no shorts or synthetic fabrics)
- Leather boots or closed shoes
- Safety glasses
- Wire brush or chipping hammer
- Welding rods (electrodes), correct size and type
- Fire extinguisher (Type ABC)
Never skip safety gear. Stick welding creates intense light, heat, and sparks. Bare skin can burn in seconds.
Connecting The Cables
Now set up the main electrical parts. This part is simple but must be done right for safe welding.
Plugging In The Welder
Most Lincoln stick welders for home use run on 220V (some small ones on 110V). Check your model. Use a grounded outlet. Do not use an extension cord unless it is heavy-duty and short. Plug in the welder but keep it switched off.
Connecting The Electrode Holder And Ground Clamp
Find the output terminals on your welder. They will be labeled + (positive) and – (negative).
- DC Electrode Positive (DCEP): Most stick welding uses this. Connect the stinger (electrode holder) to +, ground to –.
- DC Electrode Negative (DCEN): Sometimes used for thin metal or special rods. Stinger to –, ground to +.
- AC: If your machine only has AC, just connect both cables.
Insert the cable lugs into the terminals and tighten them firmly by hand, then with a wrench if needed. Loose cables can cause hot spots and poor welds.
Attaching The Ground Clamp
Clip the ground clamp to a clean, bare spot on your workpiece or the worktable. Paint, rust, or dirt will make a weak or unstable arc. Clean the metal with a wire brush if needed.
Selecting The Right Electrode
Lincoln stick welders work with many types of electrodes. The most common for mild steel are:
- E6011: Good for dirty or rusty steel, deep penetration.
- E6013: Easy to use, smooth arc, less spatter.
- E7018: Strong welds, low hydrogen, for clean steel.
Pick an electrode that matches your metal and job. The diameter of the rod controls how much current you need. Popular sizes are 3/32″, 1/8″, and 5/32″.
Matching Electrode To Metal Thickness
Use this as a quick guide:
| Metal Thickness (inches) | Electrode Size | Amps Range |
|---|---|---|
| 1/16 to 1/8 | 3/32″ | 40-90 |
| 1/8 to 1/4 | 1/8″ | 80-130 |
| Over 1/4 | 5/32″ | 110-180 |
Most beginners use E6013 or E7018 in 1/8″ size for practice.
Setting The Amperage
Setting the correct amperage is key for strong, clean welds. Too low, and the rod will stick or the arc will cut out. Too high, and you burn holes or create lots of spatter.
Find the amp control knob or dial on your machine. It may have a chart nearby showing rod sizes and recommended amps.
How To Choose Amps
A good rule is 30-40 amps per 1/32″ of rod diameter. For example, a 1/8″ rod (which is 4/32″) needs about 120-150 amps. Fine-tune as you weld; if the rod sticks, increase amps a little. If the metal melts too fast or there is too much spatter, reduce the amps.
Some Lincoln models have a digital display. Others use a dial with numbers. Always start at the low end for thin metal, and test on scrap first.
Checking Polarity And Power
Before welding, double-check your setup:
- Polarity: For most rods, use DCEP (electrode holder to positive).
- Cables: Are they tight and in good condition?
- Ground: Is the clamp secure and on clean metal?
- Power: Is the welder plugged in but switched off?
If you use AC only (such as the Lincoln AC225), skip the polarity step.
Preparing The Workpiece
Good welds start with clean metal. Dirt, oil, paint, and rust make poor welds or cause arc problems.
Cleaning The Metal
Use a wire brush or grinder to remove rust and paint near the weld area. Wipe off oil or grease with a rag and a little acetone or alcohol.
Positioning Your Workpiece
Set up your pieces so you can reach the joint easily. Use clamps if needed to hold the parts steady. The ground clamp must touch the metal you will weld, not just the table.
Safety Checks Before Welding
Welding is safe if you follow the rules. Do these checks:
- Wear all your PPE (helmet, gloves, jacket, pants, boots).
- Keep a fire extinguisher nearby.
- Make sure no children or pets are near.
- Check that your cables will not trip you.
- Remove flammable items.
- Make sure you have enough light to see the work clearly.
Striking The Arc
Now you are ready to weld. Striking the arc is the first challenge for many beginners.
How To Start The Arc
- Hold the electrode holder in your dominant hand.
- Touch the rod tip gently to the metal, then pull it back slightly (like striking a match).
- The arc will start. If it sticks, twist gently to break it free.
- Hold the rod about 1/8″ from the metal as you move.
Do not hit the rod hard or drag it too far, or the arc will not start.
Common Problems When Starting
- Rod sticks: Amps too low, or metal dirty.
- No arc: Rod too far from metal, or bad ground.
- Arc jumps: Amps too high.
Practice on scrap metal to get a feel for the arc.
Making Your First Weld
Once the arc is started, move the rod smoothly along the joint.
Basic Welding Technique
- Keep the rod angle at about 15 degrees from vertical, pointing in the direction of travel.
- Move at a steady speed.
- Keep the arc length (distance between rod and metal) short—about the width of the rod.
- Watch the puddle, not the arc light.
The weld bead should look even, not too tall or too flat.
Controlling The Bead
If your bead is too thin, slow down. If it piles up, speed up. Practice makes a big difference.
Checking And Cleaning The Weld
After welding, the bead will have a layer of slag on top. This protects the weld as it cools.
- Let the weld cool a bit.
- Use a chipping hammer to tap off the slag.
- Brush the bead with a wire brush.
Check for cracks, holes, or weak spots. A good weld looks even, with no large holes or heavy spatter.
Adjusting For Different Jobs
You may need to change settings for different metals, thicknesses, or positions.
Welding Vertical Or Overhead
Vertical and overhead welds are harder. Use lower amps and thinner rods. Hold the rod at a steeper angle and move in a small zigzag or weave pattern.
Welding Thin Metal
Thin metal burns through easily. Use small rods (3/32″), lower amps, and move fast. Practice on scrap before your real project.
Welding Different Metals
Lincoln stick welders can weld steel, stainless, and sometimes cast iron. Use the right rod (E6011 or E7018 for steel, special rods for stainless or cast iron) and match the amps.
Troubleshooting Common Problems
Many beginners run into the same issues. Here’s how to fix them:
- Rod sticks to metal: Increase amps a little, clean metal, or use a different rod.
- Porous welds: Clean the metal better, use new rods, check for drafts (wind blows away shielding gas).
- Lots of spatter: Reduce amps, use a different rod, or hold a shorter arc.
- Weak welds: Check your ground clamp, clean the metal, use the correct rod and amps.
Caring For Your Lincoln Stick Welder
A well-maintained welder lasts for years.
Daily Maintenance
- Check all cables for damage.
- Wipe dust off the machine.
- Store rods in a dry place.
Regular Maintenance
- Inspect fans and vents for dust buildup.
- Tighten cable connections.
- Check the power cord for cuts or cracks.
Storing The Welder
Keep your welder in a dry, cool place. Moisture can damage the electronics and rods.
Comparing Lincoln Stick Welder Models
Lincoln makes many stick welders. Here’s a comparison of three popular models for home and small shop use:
| Model | Input Voltage | Max Output Amps | Weight | Best For |
|---|---|---|---|---|
| AC225 | 220V | 225A | 96 lbs | Home/General Use |
| Idealarc 250 | 220/440V | 250A | 172 lbs | Heavy Duty/Shop |
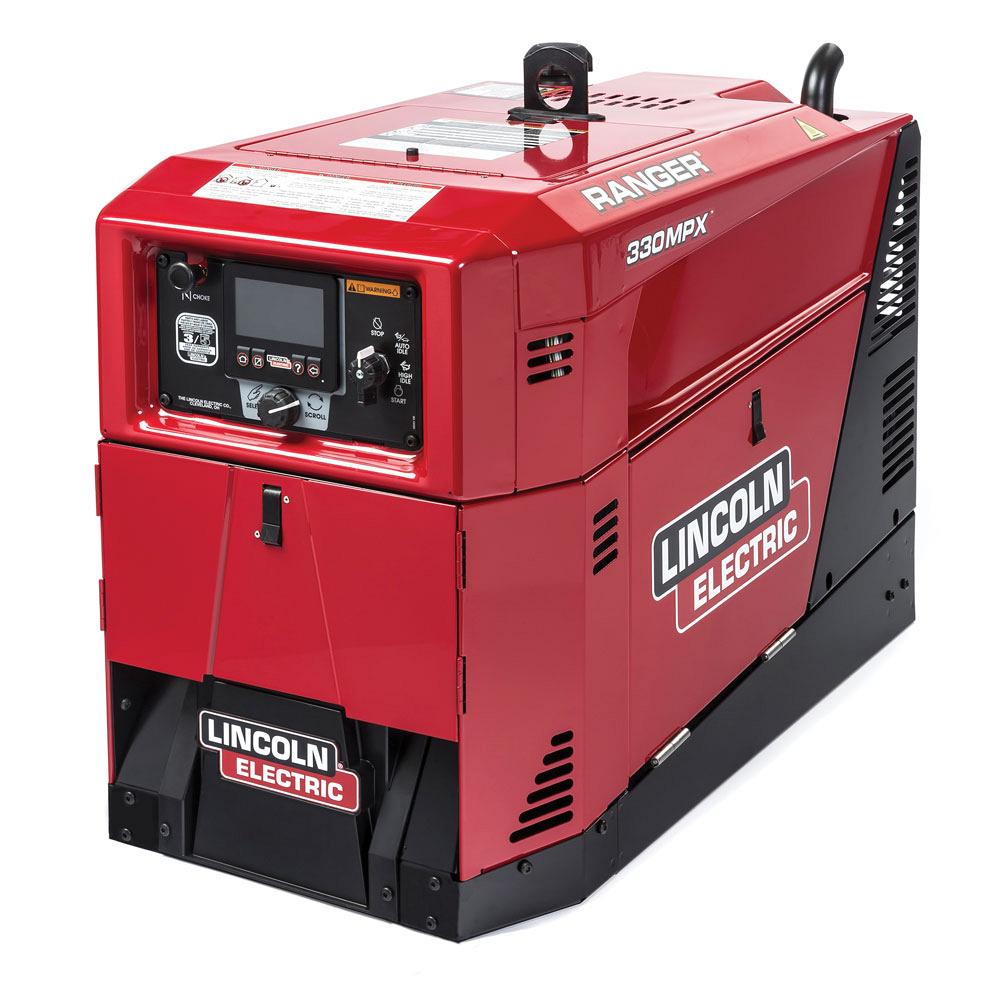
| Ranger 225 | Engine Driven | 225A | 514 lbs | Field/Construction |
Choose a model based on your power supply, job size, and how often you will move the welder.

Credit: weldmongerstore.com
Safety Tips And Common Mistakes
Welding is safe if you respect the rules, but small mistakes can cause injury or damage.
Key Safety Tips
- Never weld near flammable liquids.
- Do not touch the electrode or metal with bare skin when welding.
- Wear a helmet with the correct shade lens (usually #10-#12 for stick welding).
- Work in a well-ventilated area.
- Check cables and connections before every use.
- Do not weld in wet conditions.
Mistakes Beginners Make
- Forgetting to clean the metal
- Using the wrong rod or amps
- Not wearing full PPE
- Poor ground clamp connection
- Letting cables cross hot metal (melts insulation)
- Starting with large rods on thin metal
Always double-check each step before you weld.
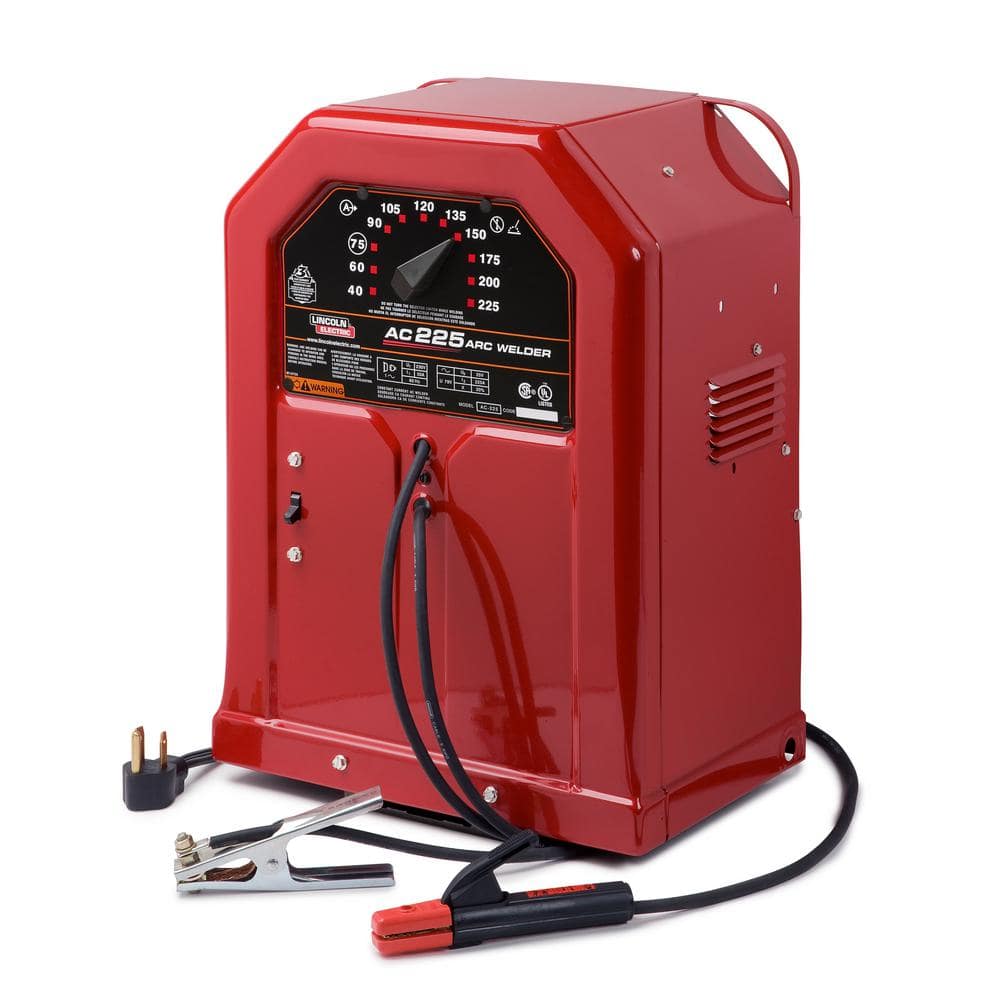
Example: Setting Up A Lincoln Ac225
Here’s a real-world example for the AC225, one of the most common models.
- Place the welder near your workbench, plug into a 220V outlet.
- Attach the electrode holder to the “work” terminal, ground clamp to the other.
- Set the amp dial to 90 for 3/32″ E6013 rods.
- Clamp the ground to clean steel.
- Insert a rod into the holder, put on all safety gear.
- Turn on the machine, strike the arc on scrap steel.
- Adjust amps up or down as needed, then weld your joint.
Always turn off the machine when finished.
Credit: www.homedepot.com
Lincoln Stick Welder Setup Checklist
Before every weld, run through this quick list:
- Welder on a dry, flat surface
- Correct power supply and plugged in
- Cables connected tight to correct terminals
- Ground clamp on clean metal
- Rod in electrode holder
- Amps set for rod and metal
- All PPE on
- Fire extinguisher nearby
- Area clear of flammable items
Advanced Tips For Better Results
Once you are comfortable with the basics, try these for stronger, neater welds:
- Preheat thick metal: Use a torch to warm thick steel before welding for better fusion.
- Back-step technique: For long welds, start in the middle and weld in short steps outward.
- Keep rods dry: Store electrodes in a sealed container or rod oven. Damp rods cause bad welds.
- Use both hands: Rest your non-dominant hand on the workpiece for better control.
Many beginners miss that even small drafts can blow away the shielding gas from the rod. Welding outdoors on a windy day often causes bad welds. Also, always strike the arc on scrap metal first to fine-tune your settings before working on the real piece.
Credit: www.canadianmetalworking.com
Lincoln Stick Welder Setup: Quick Reference Table
For easy reference, here’s a summary of common settings:
| Rod Type | Size | Polarity | Amps | Position |
|---|---|---|---|---|
| E6011 | 1/8″ | DCEP/AC | 75-125 | All |
| E6013 | 1/8″ | AC/DCEN/DCEP | 90-140 | All |
| E7018 | 1/8″ | DCEP/AC | 110-150 | Flat/Vertical |
Keep this table near your welder for quick help.
Frequently Asked Questions
What Size Breaker Do I Need For A Lincoln Stick Welder?
Most Lincoln stick welders (like the AC225) need a 50-amp breaker if used on a 220V circuit. Always check your model’s manual for the correct breaker size, as using a smaller one may trip the power, and a larger one can be unsafe.
Can I Use My Lincoln Stick Welder On A Regular Household Outlet?
Some small Lincoln welders run on 110V and can be used on a standard outlet, but most larger models require 220V. Plugging a 220V machine into a regular outlet can damage the welder and your wiring. Check your welder’s label or manual to know which voltage it uses.
Why Does My Rod Stick To The Metal When I Try To Weld?
Usually, the rod sticks because the amperage is too low or the metal is dirty. Try increasing the amps or cleaning the metal better. Using the correct rod type and size for your job also helps prevent sticking.
Is It Safe To Weld Outside With My Lincoln Stick Welder?
You can weld outdoors, but avoid wet conditions or rain. Wet ground increases the risk of electric shock. Also, wind can blow away the arc’s shielding gas, causing poor welds. If you must weld outside, shield your work from the wind.
Where Can I Find More Information About Stick Welding?
Lincoln Electric has an official site with manuals, safety guides, and detailed welding advice. You can visit the Lincoln Electric Stick Welding Guide for more help and advanced tips.
Setting up a Lincoln stick welder does not have to be confusing. With careful steps, the right safety gear, and a little practice, you can start making strong, reliable welds at home or in your shop. Take your time, check every connection, and always put safety first.
Soon, you will be confident every time you strike an arc.