Disclosure: This post contains affiliate links and I will be compensated if you make a purchase after clicking through my links. Learn More
TIG welding is a precise process where control matters at every moment. One key factor that often separates strong, clean welds from weak or messy ones is the size of the weld puddle. The puddle is the pool of molten metal created by the TIG torch. If the puddle grows too large or stays too small, you can face problems like burn-through, poor penetration, or rough appearance. For both beginners and skilled welders, learning how to control puddle size is a core skill that affects every part of the weld.
Many new welders focus only on the torch or filler rod, missing the deeper link between puddle size and weld quality. Even small changes in technique or setup can shift the puddle, sometimes in ways that are hard to see until a problem appears.
This guide explains how to control puddle size in TIG welding, with real examples, clear tips, and practical advice that can help you improve your results—whether you weld at home or in a workshop.
Why Puddle Size Matters In Tig Welding
The puddle size in TIG welding shapes the weld from the inside out. A controlled puddle helps you:
- Maintain consistent penetration so the weld is strong.
- Avoid burn-through on thin metals.
- Produce a neat bead with fewer defects.
- Control heat input to prevent warping.
- Add filler metal smoothly for even buildup.
If you ignore puddle size, your welds can suffer from undercut, excess spatter, or lack of fusion. Small puddle control errors often cause larger problems that are hard to fix later. For example, a puddle that grows too quickly may burn through the workpiece, while a puddle that is too small may not tie the edges together.
Welders who can control the puddle can handle more joint types and metals with confidence.
Factors That Affect Puddle Size
Many things influence how large or small your weld puddle becomes. These factors can work alone or together, and small changes can have a big impact.
1. Amperage (current Level)
The amperage directly controls how much heat reaches the workpiece. Higher amperage melts the metal faster, making a larger puddle. Lower amperage keeps the puddle smaller and cooler. For example, welding thin sheet metal (under 1.5 mm) often uses 35–70 amps, while thick plate (over 6 mm) may need 150 amps or more.
2. Torch Angle
Holding the TIG torch at the correct angle focuses the heat. A steep angle (closer to 90°) puts heat deep into the joint, making a smaller but hotter puddle. A shallow angle spreads the heat, which can make the puddle wider and harder to control.
3. Travel Speed
How fast you move the torch and filler rod affects puddle size. A slow speed lets the heat build up, growing the puddle. Moving too fast gives a thin, narrow puddle, but may cause lack of fusion.
4. Filler Metal Addition
Adding more filler rod increases the volume of the puddle. Feeding the rod too quickly can overwhelm the puddle, while not adding enough can make the weld bead flat or underfilled.
5. Shielding Gas Flow
The shielding gas (usually argon) protects the puddle from contamination. If the flow is too low, the puddle may oxidize and become unstable. If the flow is too high, it can blow the puddle, making it hard to control.
6. Base Metal Type And Thickness
Thicker metals absorb more heat before a puddle forms. Thin metals heat up fast, so the puddle can grow quickly. Metals like aluminum have high thermal conductivity, which means they spread heat fast and need careful control.
7. Electrode Size And Shape
A larger tungsten electrode can handle more current, but it may spread heat more. The tip shape (pointed for DC, rounded for AC) also changes the arc and how the puddle forms.
8. Joint Fit-up
Gaps between parts or poor fit-up change how the puddle forms. A tight joint helps keep the puddle small and stable. Gaps may need more filler, which can make the puddle larger or harder to manage.
9. Cleanliness
Dirt, oil, or oxidation on the metal causes erratic puddle behavior. Clean metal helps the puddle form smoothly and stay the right size.
These factors interact in every weld. For best results, check each one before starting, and adjust as you weld.
How To Control Puddle Size: Step-by-step Guide
Mastering puddle control takes practice, but following these steps can help you improve quickly.
Step 1: Set The Correct Amperage
Choose the right amperage for your metal thickness and type. As a starting point:
- For steel: Use about 1 amp per 0.025 mm (0.001 inch) of thickness.
- For aluminum: Start with 1.5 amps per 0.025 mm.
Adjust up or down if the puddle forms too slowly or grows too fast. Many modern TIG welders have a foot pedal or fingertip control, allowing you to adjust amperage as you weld.
Step 2: Position The Torch Properly
Hold the torch at about 75–85° from the workpiece, with a 10–15° tilt in the direction of travel. Keep the tungsten tip 3–6 mm from the surface for best arc focus.
- Too close: The puddle may become unstable or you can contaminate the tungsten.
- Too far: The arc spreads, and the puddle becomes wide and shallow.
Step 3: Control Travel Speed
Move the torch at a steady speed. Watch the edges of the puddle:
- If the puddle grows wider than the joint, move faster.
- If the puddle stays small and narrow, slow down or increase amperage.
Try to keep the puddle the same width as the joint gap or slightly wider.
Step 4: Add Filler Metal Smoothly
Dip the filler rod into the leading edge of the puddle. Add small amounts, pulling back between dips. Do not push the rod in too quickly, as this can cool the puddle and make it unstable.
Watch how the puddle reacts:
- If it gets larger after adding rod, slow down your addition or raise the amperage.
- If it stays the same or shrinks, you may need to add more rod or reduce travel speed.
Step 5: Adjust Shielding Gas Flow
Set the flow rate to 8–12 liters per minute (16–25 cubic feet per hour) for most TIG jobs. Make sure the gas covers the puddle fully. Too much flow can make the puddle rough; too little can cause contamination.
Step 6: Monitor Metal Response
Pay close attention to the surface of the puddle. A stable, shiny puddle means good control. A dull or boiling puddle often shows too much heat or poor gas coverage.
If the puddle grows or shrinks unexpectedly, check your settings and technique.
Step 7: Practice On Scrap Metal
Before welding a critical part, practice on similar scrap pieces. Try different settings and note how the puddle responds. This builds muscle memory and helps you learn to spot problems early.
Practical Tips For Consistent Puddle Control
Learning from real welding situations speeds up your progress. Here are practical tips that help many TIG welders get better puddle control.
Use A Foot Pedal Or Remote Control
A foot pedal lets you adjust amperage while welding. This is helpful if the puddle grows too large or shrinks as you move over different parts of the joint.
For example, when welding a T-joint, the metal mass changes as you move across. Use the pedal to add heat as needed, keeping the puddle size steady.
Watch The Puddle, Not The Arc
Many new welders stare at the arc, missing subtle changes in the puddle. Instead, focus on the puddle’s edges and surface. This helps you adjust your speed or filler addition before problems start.
Pause To Let The Puddle Catch Up
If you feel the puddle is lagging, pause the torch for a split second. This lets heat build up. If it grows too fast, speed up or reduce amperage.
Use Tacks To Control Heat
For long welds, place small tacks along the joint. This helps hold the parts together and limits how far the puddle can spread.
Adjust For Corners And Edges
Puddle behavior changes at corners or edges. The metal heats up faster here. Reduce amperage slightly, or move the torch faster at these points to stop the puddle from growing too large.
Keep The Filler Rod Tip In The Gas Shield
If you pull the rod out of the gas, it can oxidize and contaminate the puddle. Always keep the tip in the gas shield for cleaner, more stable puddle control.
Clean Between Welds
Wipe or brush the joint between passes. Even small bits of dust or oxide can make the puddle erratic and harder to control on the next pass.
Use The Right Tungsten Shape
For DC welding (steel, stainless), a sharp tip gives a narrow arc and small puddle. For AC welding (aluminum), a rounded tip spreads the arc, which can help on wider joints.
Common Puddle Control Problems And How To Fix Them
Every welder faces puddle problems at some point. Here are common issues, what causes them, and how to solve them.
Puddle Grows Too Large
Possible causes:
- Amperage is too high.
- Travel speed is too slow.
- Too much filler rod is added.
- Joint gap is too wide.
Fixes:
- Lower the amperage.
- Move the torch faster.
- Add filler rod more slowly.
- Check joint fit-up and adjust if needed.
Puddle Is Too Small Or Won’t Form
Possible causes:
- Amperage is too low.
- Travel speed is too fast.
- Metal is too thick for the settings.
- Poor electrical connection.
Fixes:
- Increase amperage.
- Move the torch more slowly.
- Switch to a larger electrode or preheat thick metal.
Puddle Is Unstable Or Boiling
Possible causes:
- Shielding gas flow is too high or too low.
- Contaminated or dirty base metal.
- Wrong electrode type or size.
Fixes:
- Adjust gas flow to the recommended rate.
- Clean the metal surface thoroughly.
- Use the right tungsten for your current and metal.
Puddle Has Porosity Or Black Spots
Possible causes:
- Air is entering the gas shield.
- Filler rod is dirty or oxidized.
- Gas is contaminated.
Fixes:
- Check hoses and connections for leaks.
- Use clean, dry filler rod.
- Use high-purity argon gas.
Puddle Changes Size During Weld
Possible causes:
- Metal thickness varies along the joint.
- Amperage is not adjusted.
- Heat builds up during a long weld.
Fixes:
- Use a foot pedal to change amperage as needed.
- Pause between sections to let the metal cool.
- Use tacks to control heat spread.
How Different Metals Affect Puddle Control
Each metal type reacts to heat in its own way. Knowing these differences helps you adjust your technique.
Steel
Steel is forgiving and holds heat well. The puddle forms smoothly, and you can adjust size by changing amperage or speed. Use a sharp tungsten for a tight arc.
Stainless Steel
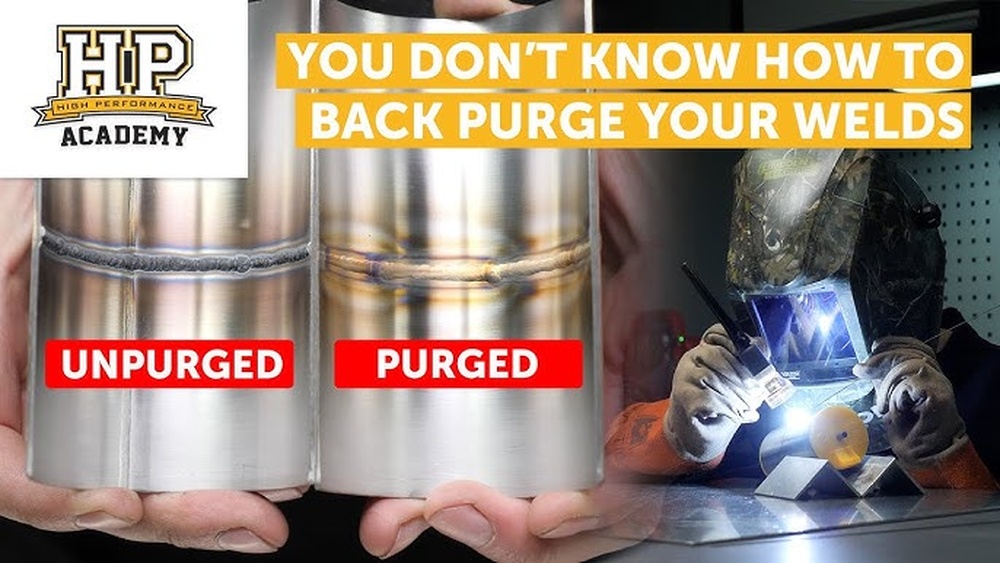
Stainless steel can overheat easily, causing warping or discoloration. Use lower amperage, keep the puddle small, and move quickly to avoid heat build-up. Back-purging with argon can help on critical joints.
Aluminum
Aluminum spreads heat quickly and forms a larger puddle. Use AC current, a rounded tungsten tip, and higher amperage. Watch the puddle closely, as aluminum can go from solid to liquid fast.
Copper
Copper absorbs heat very fast, making puddle control harder. Preheat the metal if possible, and use high amperage. The puddle will be smaller at first, then grow as the metal heats up.
Titanium
Titanium needs very clean conditions and a small, controlled puddle. Use a gas lens for better coverage and keep the puddle small to avoid contamination.
Comparison Of Puddle Size By Metal Type
Here is a summary of how different metals behave during TIG welding:
| Metal Type | Puddle Behavior | Recommended Amperage (per 1mm) | Tungsten Tip |
|---|---|---|---|
| Steel | Stable, moderate size | 30-40A | Sharp |
| Stainless Steel | Small, heats up fast | 25-35A | Sharp |
| Aluminum | Large, spreads quickly | 35-50A | Rounded |
| Copper | Small, grows with heat | 50-80A | Sharp |
| Titanium | Small, sensitive | 20-30A | Sharp |
How Equipment Choices Affect Puddle Size
Picking the right setup helps you control the puddle better. Here is a comparison of common TIG welding equipment choices:
| Equipment Factor | Effect on Puddle Size | Advice |
|---|---|---|
| Amperage Control | Directly changes puddle size | Use a pedal for real-time control |
| Torch Size | Larger torch, more heat | Use small torch for thin metal |
| Shielding Gas | Poor coverage, unstable puddle | Use pure argon for best results |
| Tungsten Electrode | Bigger electrode, larger arc | Match size to amperage |
| Gas Lens | More stable puddle | Use for clean, consistent coverage |

Credit: www.reddit.com
Advanced Tips For Expert Puddle Control
For welders looking to reach the next level, these advanced tips can help you fine-tune puddle size and quality.
Use Pulse Tig Settings
Many TIG machines offer a pulse mode. This alternates the amperage between high and low settings several times per second. Pulse TIG helps:
- Keep the puddle small on thin metals.
- Control heat input for better appearance.
- Reduce distortion.
Try starting with a pulse frequency of 1–2 Hz for thin stainless steel.
Preheat Thick Metals
For metals over 6 mm thick, preheating with a torch or oven helps the puddle form faster and stay consistent. This is common for copper and heavy steel parts.
Use A Gas Lens For Better Shielding
A gas lens spreads the argon more evenly. This makes the puddle more stable, especially on tricky joints or sensitive metals like titanium.
Weld In Short Sections
For long welds, break the work into shorter sections. Let the metal cool between passes. This stops heat buildup and keeps the puddle the right size.
Practice With Different Joint Types
Butt joints, T-joints, lap joints, and corner joints all affect how the puddle forms. Practice on each type to learn how to adjust your technique.
Record Your Settings
Keep a notebook of your best settings for each metal, thickness, and joint type. This saves time and gives you a reference for future jobs.
Puddle Size And Weld Quality: Real-world Examples
Small changes in puddle size can make a big difference in the final weld. Here are two examples:
- Thin Aluminum Sheet (1 mm): If you use too much amperage, the puddle grows wide and can burn through the sheet. Keeping the puddle small with pulse TIG and quick movement gives a clean, strong weld.
- Thick Steel Plate (10 mm): If you keep the amperage low, the puddle stays small and does not penetrate fully. This leads to weak welds. Raising amperage and pausing to let the puddle form ensures strong fusion.
Many welding codes require a certain bead shape and size, which depends on good puddle control. For more detail on welding standards and practices, see the TIG welding article on Wikipedia.
Table: Common Mistakes And How To Fix Them
Here is a quick reference for solving puddle control mistakes:
| Mistake | Result | How to Fix |
|---|---|---|
| Too much amperage | Puddle grows too big, burn-through | Lower amperage, speed up torch |
| Too slow travel | Wide, flat bead | Increase travel speed |
| Dirty metal | Unstable puddle | Clean metal with brush or solvent |
| Poor gas flow | Porosity, rough bead | Check hose, adjust flow |
| Incorrect filler rod | Puddle won’t build up | Use correct rod size/material |
Two Common Myths About Puddle Control
Many welders hear advice that can slow their progress. Here are two common myths:
1. “higher Amperage Always Makes A Better Weld.”
In fact, too much amperage often makes the puddle too large, causing poor control and weak welds on thin metals.
- “If the puddle is hard to see, just turn up the gas.”
High gas flow can blow the puddle or create turbulence, making control harder. It’s better to adjust your torch position and check for drafts.
Credit: www.thefabricator.com
How To Improve Puddle Control Faster
Some welders take years to master puddle size. You can speed up learning with these proven methods:
- Film your welds with a phone or welding camera. Watch the puddle and see where you change speed or angle.
- Ask for feedback from more experienced welders. They can spot problems you may not notice.
- Try different settings on scrap before working on real parts. Test until the puddle forms the way you want.
- Work on one variable at a time. Change only amperage or speed, not both, to see the effect clearly.
- Practice regularly. Short sessions a few times a week build skill faster than long, rare sessions.
Frequently Asked Questions
What Is The Ideal Puddle Size In Tig Welding?
The ideal puddle size matches the joint width and thickness. For thin metals, the puddle should be just wide enough to melt both edges—usually 2–4 mm. For thicker metals, it can be wider, but should never overflow the joint.
Why Does My Puddle Keep Growing During The Weld?
This often happens because heat builds up in the metal. Try using a foot pedal to lower amperage as you go, or pause between sections to let the metal cool.
How Do I Control The Puddle On Aluminum?
Use AC current, higher amperage, and move quickly. Watch for the shiny surface that shows the puddle is ready. Use a rounded tungsten tip and pure argon gas.
Can I Control The Puddle Without A Foot Pedal?
Yes, but a foot pedal makes control easier. If your machine does not have a pedal, practice steady torch movement and adjust settings before you start. Use short welds to avoid heat buildup.
What Is The Most Common Mistake In Puddle Control?
The most common mistake is using too much amperage, which makes the puddle too large and hard to control. Start with lower settings and increase only if needed.
Mastering puddle size control in TIG welding is a skill that pays off with every weld you make. By understanding the key factors, practicing with purpose, and learning from your results, you can make cleaner, stronger, and more professional welds every time.

Credit: www.youtube.com