Disclosure: This post contains affiliate links and I will be compensated if you make a purchase after clicking through my links. Learn More
Cleaning mild steel before welding is a step many people skip or rush. Yet, the quality of your weld depends heavily on how well you prepare the steel. Dirt, rust, oil, and old paint can ruin your work, leading to weak or ugly welds.
Even if you use the best welding machine and technique, poor preparation can cause problems that only show up later. This guide will explain how to clean mild steel for welding in detail, covering all the steps, tools, and tips you need for strong and safe welds.
Why Cleaning Mild Steel Before Welding Matters
Mild steel is popular because it is strong, easy to shape, and affordable. Still, mild steel often comes with a thin layer of mill scale (a hard, blue-black oxide), as well as rust, oil, grease, and sometimes old paint. When you weld over these, you face several problems:
- Porosity: Small holes form inside the weld, making it weak.
- Inclusions: Dirt or oxides get trapped, causing cracks.
- Poor Fusion: The weld does not fully stick to the steel.
- Excess Spatter: Molten bits jump off, making the area messy and harder to clean later.
A clean surface helps the weld metal join smoothly with the base metal. This means stronger, better-looking welds and fewer repairs.
Understanding Surface Contaminants On Mild Steel
You cannot clean what you do not see or know. Mild steel can have different types of contamination:
- Mill scale: A tough, blue-black layer from hot rolling.
- Rust: Orange or brown spots from exposure to moisture.
- Oil and grease: Left from handling or cutting fluids.
- Paint and coatings: Remnants from earlier projects.
- Dust and dirt: Accumulated from storage or moving.
Each contaminant needs its own cleaning method. Skipping one step can leave hidden problems that only appear during or after welding.
Tools And Materials For Cleaning Mild Steel
To clean mild steel effectively, you need the right tools. Here is a breakdown of common tools and their uses:
| Tool | Use | Best For |
|---|---|---|
| Wire brush (manual) | Scraping off loose rust, dirt, and paint | Light surface work |
| Angle grinder with flap disc | Removing mill scale, thick rust, and paint | Heavy cleaning |
| Sandpaper or sanding block | Smoothing small areas, edges | Finishing touches |
| Degreaser or acetone | Wiping away oil, grease, and some adhesives | Final cleaning |
| Soap and water | Initial cleaning of dirt and dust | First step |
| Scraper | Removing thick paint or large debris | Old painted steel |
You do not need all these tools for every job, but using the right one saves time and gives the best results.
Step-by-step Guide: How To Clean Mild Steel For Welding
Cleaning mild steel is a process, not just a single action. Each step helps you remove a different problem.
1. Remove Loose Dirt And Dust
Start with the basics. Brush off any dust, dirt, or loose material. Use a dry rag, a soft brush, or compressed air. This makes later cleaning more effective and prevents grit from scratching the steel during the next steps.
2. Wash With Soap And Water
Mix warm water with a small amount of mild detergent. Use a sponge or cloth to scrub the steel. This removes light oil, grease, and more stubborn dirt. Rinse with clean water and let the steel dry fully. Water left on the steel can start new rust, so use a clean towel or let it air dry in a low-humidity area.
3. Remove Oil And Grease
If you see fingerprints, oily spots, or greasy patches, clean these before moving on. Use a clean rag and a solvent like acetone or a commercial degreaser. Wipe the surface until the rag comes away clean. Never skip this step, as oil can cause the weld to bubble and fail.
4. Remove Rust And Mill Scale
Most mild steel has some level of rust or mill scale. Here’s how to remove them:
- For light rust: Use a wire brush (manual or on a drill) to scrub away spots.
- For heavy rust or thick mill scale: Use an angle grinder with a flap disc or grinding wheel. Move steadily but gently to avoid digging into the steel.
- For edges and small spots: Use sandpaper or a sanding block for better control.
Some people use chemical rust removers, but these can leave residues or be dangerous. Always read the label and rinse well if you use chemicals.
5. Remove Paint And Old Coatings
Paint stops the weld from bonding. Use a scraper to peel off thick paint, then follow with a wire brush or grinder. Keep cleaning until you see bare, shiny steel.
6. Final Degreasing
Even after grinding and brushing, some oil or grease can remain. Wipe the area with a clean rag soaked in acetone or a similar solvent. Let the steel dry for a minute or two. This step ensures that nothing is left to cause porosity in your weld.
7. Inspect The Surface
Look closely at the cleaned area. The steel should be bright, smooth, and free of rust, paint, oil, and dust. If you see any dull or dark spots, clean them again. A small missed area can ruin your weld.
Comparing Cleaning Methods
Each cleaning method has strengths and weaknesses. Here is a comparison to help you choose:
| Method | Speed | Effectiveness | Best Use |
|---|---|---|---|
| Wire brushing | Medium | Good for light rust/paint | Quick jobs, small areas |
| Angle grinding | Fast | Very good, aggressive | Heavy rust, mill scale, large areas |
| Sanding | Slow | Good for fine finish | Edges, corners, detail work |
| Chemical cleaning | Medium | Good, but can leave residue | Delicate parts, hard-to-reach spots |
| Degreasing | Fast | Excellent for oils/grease | All jobs (final wipe) |
Choose the method that matches the level of contamination and the tools you have.
Safety Tips While Cleaning Mild Steel
Cleaning steel can be dirty and sometimes risky. Follow these tips:
- Wear safety glasses or a face shield to protect your eyes from dust and sparks.
- Use gloves when handling solvents or rough tools.
- Work in a well-ventilated space. Solvents and grinding dust can harm your lungs.
- Wear a dust mask or respirator, especially when sanding or grinding.
- Keep flammable cleaners away from open flames or sparks.
- Check your tools before use. Loose wires from brushes or old grinding wheels can break and cause injury.
- Store chemicals safely, out of reach of children and pets.
Cleaning is important, but your safety comes first. Never rush or ignore basic protection.
Common Mistakes When Cleaning Mild Steel For Welding
Many welders, even experienced ones, make mistakes when cleaning steel. Here are some to avoid:
- Skipping the degreasing step because the steel “looks clean”.
- Using a dirty rag for final cleaning, which just spreads oil or dust.
- Not removing all mill scale, leading to weak welds.
- Using only a wire brush for heavy rust or thick coatings.
- Grinding too hard, which can thin or gouge the steel.
- Letting water or solvent dry on the steel, causing new rust.
- Not checking the cleaned area under good light.
A little extra care saves time and money later. Clean steel welds easier, looks better, and lasts longer.
How Surface Preparation Affects Welding Quality
The link between surface preparation and welding quality is clear. Studies show that welding over rust or mill scale can reduce weld strength by up to 30%. Poor cleaning increases the risk of porosity, cracks, and lack of fusion. These problems may not show right away but can cause failure in use.
For example, a test by the American Welding Society found that welds on uncleaned steel failed at much lower loads than those on properly cleaned steel. Good preparation is the cheapest way to improve your welding.
Cleaning Mild Steel: Real-world Examples
Let’s look at a few real situations:
- Repairing a garden gate: The steel has surface rust and dirt. Start with a wire brush, then sand the weld areas. Finish with a degreaser. Your weld will be strong and last longer.
- Building a trailer frame: The steel comes with mill scale. Use an angle grinder with a flap disc to clean all weld joints. Wipe with acetone before welding.
- Joining new to old steel: The old steel has paint, rust, and oil. Scrape off paint, grind away rust, and degrease both pieces before welding.
In each case, the steps may change a bit, but the goal is always clean, bare steel.
How To Clean Mild Steel For Different Welding Processes
Different welding methods react differently to surface contamination.
Mig Welding
MIG welding is more forgiving but still works best on clean steel. Oil and rust can cause spatter and weak spots. Always grind or brush the weld joint and wipe with solvent.
Tig Welding
TIG welding needs the cleanest steel. Even a small bit of oil or rust can ruin the weld. Clean at least 1 inch beyond the joint on all sides. Use a grinder, then wipe with acetone.
Stick Welding (smaw)
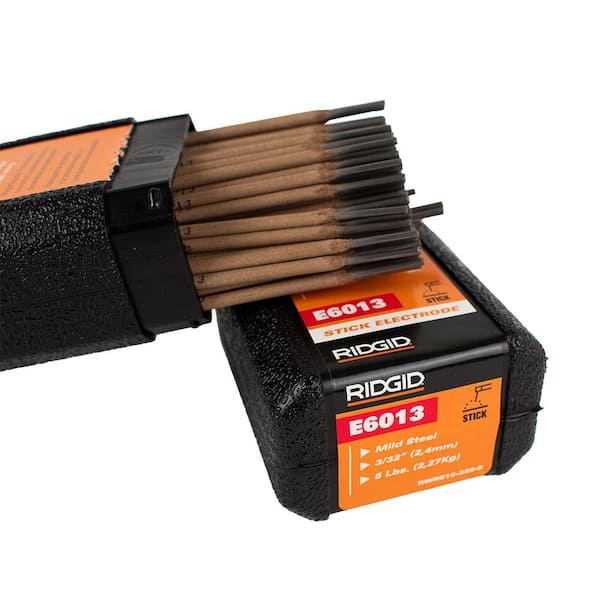
Stick welding can handle a little more contamination, but for best results, clean the steel as much as possible. Remove all oil, thick rust, and paint.
Flux-cored Arc Welding (fcaw)
Flux-cored wires are made to handle dirty steel, but you still get better results with clean metal. Remove heavy rust, oil, and paint for stronger welds.
Credit: www.homedepot.com
How To Clean Mild Steel In Tight Spaces And Odd Shapes
Sometimes you work with steel that has bends, holes, or hard-to-reach spots. Here are some tips:
- Use a wire brush attached to a drill for corners and holes.
- Try a Dremel or rotary tool with a small sanding disc.
- Use sandpaper wrapped around a stick or file for narrow gaps.
- Use compressed air to blow out dust before degreasing.
Do not skip these areas. Even a small dirty spot can cause a big problem.
Cleaning Mild Steel: Cost, Time, And Practical Tips
How much time and money should you spend on cleaning? Here is a quick look:
| Cleaning Level | Time (per sq. ft.) | Cost (tools & materials) |
|---|---|---|
| Basic (brush & degrease) | 5-10 minutes | $5–$20 |
| Heavy (grinding, sanding, degrease) | 10–20 minutes | $20–$60 |
| Professional (chemical, power tools) | 15–30 minutes | $50–$200 |
Practical tips:
- Clean only the area you plan to weld plus 1 inch around.
- Replace worn-out wire brushes and sanding discs often.
- Store cleaned steel away from dust and water until welding.
- Label cleaned steel if you work in a shared space.
Two Non-obvious Insights For Better Cleaning
Many guides miss these points:
- Use separate brushes and rags for steel only. If you use a brush or rag that was used on aluminum, stainless, or another metal, you risk cross-contamination. This can cause unexpected weld defects.
- Clean after cutting or shaping. Cutting steel with a saw or grinder can leave a thin film of oil or tiny burrs. Always clean again after shaping the steel, not just before welding.
These steps are often missed but can make a big difference in weld quality.
What To Avoid When Cleaning Mild Steel
Some cleaning methods can cause more harm than good. Avoid these:
- Using water-based cleaners and leaving the steel wet. This causes quick rust.
- Using sandblasting without proper cleanup. Sand or grit can stay on the steel and cause inclusions.
- Using steel wool from other metals. Tiny pieces can get stuck and cause problems.
- Mixing chemical cleaners. This can create dangerous fumes.
- Skipping safety gear. Eyes and lungs are easy to damage with dust and solvents.
Stick to simple, safe methods for the best results.
Cleaning Mild Steel For Welding In Large Projects
Large projects, like building frames or structural work, need extra care. Here is how to handle them:
- Set up a cleaning station with all tools ready.
- Clean steel in batches to save time.
- Assign one person to inspect cleaned areas before welding starts.
- Store cleaned steel on dry, clean racks.
- If possible, weld soon after cleaning to avoid new rust.
Planning helps you avoid delays and costly rework.
How Environmental Factors Affect Cleaning
Humidity, temperature, and workplace dust can change how you clean:
- High humidity causes new rust quickly. Dry steel fast and store in a dry place.
- Cold temperatures can make oil harder to remove. Warm the steel gently if needed.
- Dusty shops mean more cleaning before welding.
If you work outdoors, cover cleaned steel or move it inside before welding.
Cleaning Mild Steel: Quality Control Checks
Before you weld, do a quick quality check:
- Look for a shiny, smooth surface.
- Run a clean, white rag over the steel. If it stays clean, you are ready.
- Check for missed spots in corners or holes.
- Make sure the steel is dry and cool.
If you find a problem, clean the area again. Do not rush this step.
Extra Precautions For Critical Welds
For jobs that must not fail (load-bearing, pressure vessels), take these extra steps:
- Use only fresh, clean tools and rags.
- Clean at least 2 inches beyond the weld area.
- Double-check with a second person.
- Keep a record of your cleaning steps for quality control.
This level of care reduces risk and meets higher safety standards.

Credit: www.homedepot.com
How To Store Cleaned Mild Steel Before Welding
Steel starts to rust again as soon as you finish cleaning. To keep it clean:
- Store it inside, away from water and dust.
- Cover with plastic or clean cloth if you must store outside.
- Avoid touching cleaned areas with bare hands (wear gloves).
- Weld as soon as possible after cleaning.
Even a few hours in bad conditions can undo your hard work.
Cleaning Mild Steel For Welding: Final Checklist
Before striking your first arc, go through this checklist:
- All visible rust, oil, paint, and dirt are gone.
- The surface is bright, smooth, and dry.
- You used a clean rag for final wiping.
- You wore safety gear during cleaning.
- You checked all corners and edges.
- Steel is ready and at the right spot for welding.
This short check saves time and ensures strong, safe welds.

Credit: tigbrush.com
Frequently Asked Questions
How Clean Does Mild Steel Need To Be Before Welding?
Mild steel should be as clean as possible, especially in the weld zone. All rust, oil, grease, paint, and mill scale should be gone. The surface should look bright and metallic. Even small spots of dirt or oil can cause weld problems.
Can I Weld Mild Steel Without Removing Mill Scale?
You can weld over mill scale, but it weakens the weld and can cause defects like porosity and cracks. For strong, reliable welds, always remove mill scale at least 1 inch around the joint.
What Is The Best Solvent For Cleaning Mild Steel Before Welding?
Acetone is a top choice because it removes oil, grease, and some adhesives, and it dries quickly with no residue. Isopropyl alcohol or commercial degreasers also work well.
Is Grinding Always Necessary Before Welding Mild Steel?
Grinding is not always necessary, but it is the fastest way to remove thick rust, mill scale, and heavy coatings. For light cleaning, a wire brush or sanding may be enough.
Where Can I Find More Technical Information About Welding Mild Steel?
You can read detailed guides and standards from the American Welding Society, which covers cleaning, preparation, and welding techniques for mild steel.
Cleaning mild steel well before welding is a smart investment. It leads to stronger, safer, and better-looking welds. Take the time to do it right, and your projects will last longer and need fewer repairs. A few extra minutes spent cleaning can save hours of trouble later.