Disclosure: This post contains affiliate links and I will be compensated if you make a purchase after clicking through my links. Learn More
Why do my MIG welds look bad? In most cases the cause is one of 3 things: voltage and wire speed that don’t match, travel speed that’s too fast or too slow, or poor gas coverage on dirty metal. The shape of the bead tells you which one, so look at the bead before you touch a knob.
A tall, ropey bead points to low voltage or fast travel. A flat, wide bead with burn-through points to too much heat. Spatter, holes and beads that sit on top of the joint each have their own fixes, and every one of them is a setting or technique change you can make in your own shop. If you are still learning the basics of MIG welding, start with the quick-fix table and work down.
Why Do My MIG Welds Look Bad? Match the Bead to the Cause
Bad-looking MIG welds come from a short list of causes, and each one leaves a clear sign on the bead. Find your symptom in this table, make the one change in the Fix column, and run a test bead on scrap of the same thickness.
| Symptom | Likely cause | Fix | DIY or pro |
|---|---|---|---|
| Tall, narrow, ropey bead | Voltage too low for the wire speed, or travel too fast | Raise voltage 1 volt at a time, slow down a little | DIY |
| Flat, wide bead, burn-through or undercut | Too much heat: voltage or wire speed too high, travel too slow | Lower voltage or wire speed, speed up | DIY |
| Heavy spatter around the bead | Low voltage, long stickout, 100% CO2, dirty metal or wrong polarity | Raise voltage, hold 3/8 inch tip-to-work distance, clean metal, check polarity | DIY |
| Holes and pinholes (porosity) | Gas missing, flow too low, drafts, leaks or dirty metal | Check cylinder valve and flow, block wind, clean to bright metal | DIY |
| Bead sits on top with no tie-in (cold lap) | Settings too cold or arc behind the puddle | More voltage and wire speed, keep the arc on the leading edge | DIY |
| Wavy, uneven bead width | Unsteady travel or inconsistent wire feed | Brace your hands, check liner, drive rolls and tip size | DIY |
| Cracks in or next to the weld | Wrong filler, fast cooling or high-carbon steel | Stop and check the metal type and filler wire | Pro for structural parts |
Brown, glassy spots on top of a good bead are usually silicon islands from ER70S-6 wire. They are normal, and they chip or brush off before paint. Don’t chase them with setting changes.
Tall, Ropey Bead: Voltage Too Low or Travel Too Fast
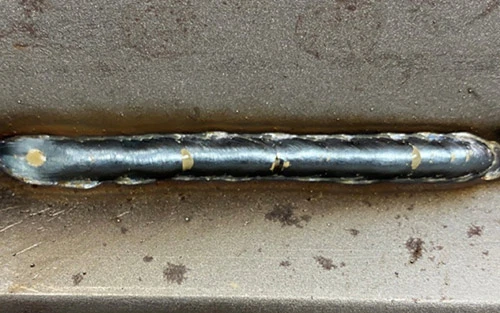
A tall, narrow, rope-like bead is the most common bad MIG weld. Miller lists a convex bead with poor tie-in at the toes as the result of voltage that is too low, and a narrow, convex bead as the result of travel that is too fast.
How to check: listen to the arc. A low-voltage arc stubs and pops as the wire pushes into the plate. A good short-circuit arc sounds like steady frying bacon.
How to fix:
- Raise voltage 1 volt at a time and run a short bead after each change.
- Slow your travel so the puddle wets out to both toes before you move on.
- If the bead is still tall, drop wire speed slightly so it matches the voltage.
Use your welder’s door chart or a MIG wire speed and voltage chart as the starting point. Miller’s rule of thumb is about 1 amp per 0.001 inch of steel thickness, so 1/8 inch (0.125 inch) steel needs about 125 amps.
Credit: contenthub.itwwelding.com
Flat, Wide Bead and Burn-Through: Too Much Heat
A wide, flat bead that sags, undercuts the edges or blows holes in thin metal means the weld is too hot. Miller ties a very wide bead and burn-through to wire speed or amperage that is too high, and an overly wide bead to travel that is too slow.
How to fix:
- Lower voltage or wire speed one step at a time.
- Speed up so the arc stays at the leading edge of the puddle.
- On sheet metal, switch to .023 inch wire and stitch weld in short tacks.
- Keep a steady 45 degree work angle on fillet welds, as Miller suggests, so heat goes into both plates.
Too Much Spatter Around the Weld
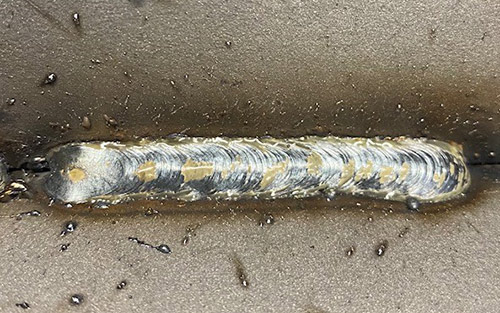
Spatter is the BB-sized balls of metal stuck around the bead. Short-circuit MIG makes some spatter by nature. Heavy spatter points to settings or setup.
Check these in order:
- Voltage too low: Miller lists excess spatter as a sign of low voltage. Raise it 1 volt.
- Stickout too long: hold about 3/8 inch contact-tip-to-work distance for short circuit, per Miller.
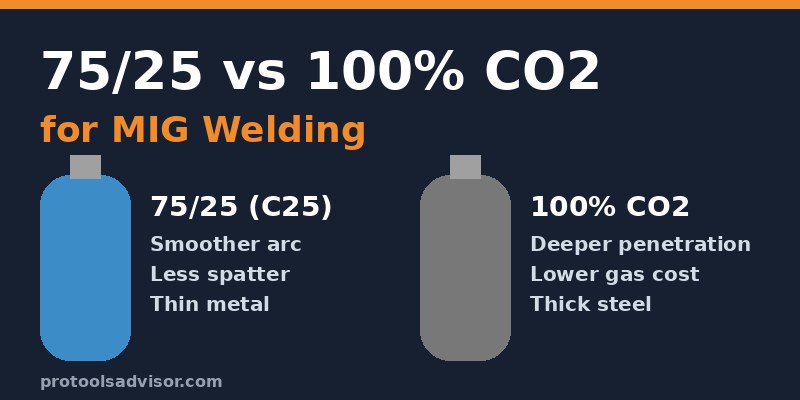
- Gas: 100% CO2 throws more spatter than 75/25 argon/CO2.
- Dirty metal: mill scale, rust, paint and oil make the arc unstable.
- Polarity: solid wire with gas runs on DCEP. Self-shielded flux core wire runs on DCEN. Flux core on the wrong polarity spatters badly and looks rough.
Credit: contenthub.itwwelding.com
Holes and Pinholes in the Bead (Porosity)
Small holes on the face of the weld mean gas didn’t protect the puddle. Miller links porosity and pinholes to missing or poor shielding gas.
How to check and fix:
- Open the cylinder valve fully and confirm the flowmeter reads about 25 to 35 cfh, the range Miller lists for short-circuit MIG.
- Block fans and open doors. A light breeze can blow the gas away.
- Spray soapy water on hose fittings and the regulator to find leaks.
- Clean the joint to bright metal with a flap disc or wire wheel.
- Clean spatter out of the nozzle so gas flows evenly.
If holes keep showing up after these fixes, see our full guide to weld porosity.
Bead Sits on Top of the Joint (Cold Lap)
Cold lap is a bead that looks like it was laid on top of the metal instead of fused into it. The edges roll over the plate with a visible line. Miller names welds that are too cold as the main cause of lack of fusion.
How to fix:
- Turn up voltage and wire speed together to the chart setting for the plate thickness.
- Keep the arc on the leading edge of the puddle, not on top of the bead you just laid.
- Watch for a teardrop-shaped puddle. A strung-out puddle means you are moving too fast.
Cold lap is the most dangerous bad-looking weld, because it can look neat and still have little strength.
Wavy or Uneven Bead Width
A bead that gets wide, then narrow, then wide again usually comes from your hands or the wire feed. Rest your forearm or glove on the table and drag your hand along a steady path.
If your travel is steady and the arc still surges, check the wire feed. Miller lists worn or plugged liners, the wrong contact tip size and incorrect drive roll pressure as causes of poor bead appearance. Also check that your MIG wire stickout stays the same through the whole weld.
How to Dial In Your Settings on Scrap
The fastest way to fix bad-looking MIG welds is a 10-minute test plate. Use scrap of the same thickness and joint type as the real job.
- Clean the scrap to bright metal and set the machine from the door chart for that thickness and gas.
- Run a 2 inch bead at the chart setting.
- Run a second bead 1 volt higher and a third bead 1 volt lower, with the same wire speed.
- Compare the 3 beads. Pick the one that is flat to slightly crowned and wets out at both toes.
- Fine-tune wire speed by sound, then write the setting on a strip of tape on the machine.
This also builds a set of your own reference settings, which beats guessing on every new project.
When to Call a Pro
Most bad-looking MIG welds are a settings or technique fix you can make at home. Call a certified welder or a welding shop when:
- The part carries weight or people: trailer hitches, frames, ladders, lifting points.
- You see cracks in or next to the weld.
- You are welding on a vehicle frame, a pressure vessel or a fuel tank.
- The machine shows a fault, trips the breaker or won’t hold a steady arc after you have checked the gas, tip and liner.
How to Prevent Bad-Looking MIG Welds
- Clean every joint to bright metal before you weld.
- Start every job from the door chart, then run a test bead on scrap.
- Use 75/25 argon/CO2 for most short-circuit work on mild steel.
- Keep 3/8 inch tip-to-work distance for short-circuit MIG.
- Replace worn contact tips and clean the nozzle often.
- Brace your hands and practice steady travel on scrap.
Safety note: Grinding and wire brushing to clean metal throws sparks and dust. Wear safety glasses rated ANSI Z87.1 under your helmet, keep a fire extinguisher close, and weld with ventilation so fumes from coatings and spatter spray don’t build up.
Frequently Asked Questions
Why Are My MIG Welds Lumpy?
Lumpy MIG welds usually come from voltage that is too low for the wire speed, or from travel that stops and starts. The puddle can’t wet out, so it piles up. Raise voltage 1 volt at a time, keep a steady pace, and check that the wire feeds smoothly.
How Do I Know If My MIG Weld Is Good?
A good MIG weld has a flat to slightly crowned bead, even width and smooth tie-in at both toes. It has no holes, cracks or cold lap. Light spatter and small brown silicon spots are normal. On the back of thin metal, look for an even heat line.
Why Does My MIG Weld Look Like Bird Poop?
A MIG weld that looks like scattered blobs usually means the wire is too slow, the voltage is wrong, or the arc has no gas. Check the gas flow first, then set voltage and wire speed from the door chart. Practice moving at a steady, slower pace.
Does Gas Type Change How a MIG Weld Looks?
Yes, gas type changes bead shape and spatter. 75% argon and 25% CO2 gives a flatter, cleaner bead with less spatter. 100% CO2 penetrates deeper but leaves more spatter and a rougher bead. Pure argon gives a tall, poorly fused bead on mild steel and is the wrong gas.
Should I Push or Pull When MIG Welding?
For solid wire with gas, a slight push angle of about 10 to 15 degrees gives a flatter bead and a better view of the joint. Pulling gives a taller bead with a little more penetration. Self-shielded flux core wire is usually dragged, which helps keep slag behind the puddle.
Final Words
Why do my MIG welds look bad is a question the bead answers for you. Tall and ropey means more voltage or slower travel. Flat and wide means less heat. Holes mean gas, and spatter usually means voltage, stickout or dirty metal.
Change one thing at a time and test on scrap of the same thickness. Ten minutes on a test plate fixes most bad-looking MIG welds before they reach the real project.