Disclosure: This post contains affiliate links and I will be compensated if you make a purchase after clicking through my links. Learn More
Working on auto body projects means getting the right finish, and sandpaper grit plays a huge part in this process. If you use the wrong sandpaper, you can ruin the car’s surface or spend much longer getting smooth results. Many beginners struggle with choosing the correct grit sandpaper for each step, from removing old paint to polishing the final coat. This guide will explain everything you need to know about sandpaper grits for auto body work, breaking down each stage with clear examples and expert tips.
Why Sandpaper Grit Matters In Auto Body Work
Sandpaper grit refers to the size of the abrasive particles on the sandpaper. Lower numbers mean larger, rougher particles, while higher numbers mean finer, smoother particles. The grit you pick affects how much material you remove and how smooth the surface becomes. Using the right grit helps you:
- Remove scratches and dents efficiently
- Smooth surfaces for painting
- Avoid deep scratches that show up under paint
- Get a professional finish
For car body work, grit choice can make the difference between a clean, smooth finish and a surface full of visible flaws.
Understanding Sandpaper Grit Numbers
Sandpaper comes in many grits, usually from 36 up to 3000 or more. Here’s what the main grit ranges mean:
- Coarse (36–80 grit): Removes heavy material fast; leaves deep scratches.
- Medium (100–180 grit): Smooths out rough surfaces; good for shaping filler.
- Fine (220–400 grit): Prepares surfaces for primer and paint.
- Very Fine (600–1000 grit): Used for wet sanding primer or paint.
- Ultra Fine (1200–3000+ grit): Used for final polishing and removing tiny imperfections.
The right grit depends on the stage of your project and the material you work on.
Sandpaper Types For Auto Body Use
Not all sandpapers are the same, even if the grit number matches. Auto body professionals use sandpapers made from different materials, each with unique strengths:
- Aluminum oxide: Lasts long, works well on metal and filler.
- Silicon carbide: Best for wet sanding, gives a smooth cut.
- Ceramic: Very tough, used for hard surfaces or aggressive removal.
- Garnet: Softer, less common in auto body work.
Wet/dry sandpaper is common in car work because it can be used with water to reduce dust and heat.
Choosing Grit Sandpaper For Each Step
Each stage of auto body repair or painting needs a specific grit range. Using the correct grit at each point saves time and avoids mistakes.
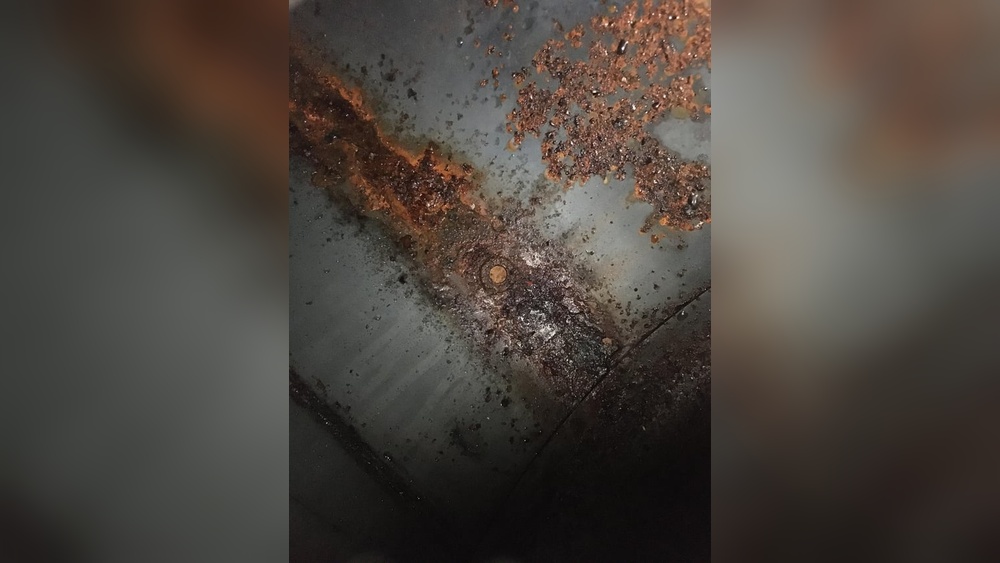
1. Removing Old Paint And Rust
To strip old paint, rust, or heavy corrosion, use a coarse grit. This stage is about removing material quickly. Start with 36–80 grit sandpaper.
- 36–40 grit: For thick layers, major rust, or heavy sanding.
- 60–80 grit: For lighter paint removal or surface smoothing.
Tip: Do not use these coarse grits on areas you want to keep smooth. They leave deep scratches, which need further sanding.
2. Shaping Body Filler
After removing damage, you often apply body filler (like Bondo). Shaping this filler requires the right grit.
- 80–120 grit: For shaping and rough-sanding filler.
- 150–180 grit: For smoothing and blending filler edges.
Example: Use 80 grit to start shaping a filled dent, then switch to 150 grit to blend with the surrounding metal.
3. Smoothing Metal Before Primer
Once the surface is clean and shaped, you need to prepare it for primer. Medium grits work best here.
- 180–220 grit: For smoothing the surface before primer application.
- 220 grit: Helps remove any remaining minor scratches from earlier steps.
Tip: Always sand in even strokes and check your work under light. Uneven sanding shows up after painting.
4. Sanding Primer
Primer fills small scratches and prepares the surface for paint. Sanding primer requires finer grits to avoid damaging the primer layer.
- 320–400 grit: For dry sanding primer to a smooth finish.
- 400–600 grit: For wet sanding primer, especially before basecoat.
Example: After primer dries, use 400 grit wet/dry sandpaper with water to get a glassy smooth surface.
5. Preparing For Basecoat Paint
Before applying the basecoat (main color), the surface must be very smooth. Fine grit is essential.
- 600–800 grit: For final prep before basecoat paint.
- Wet sanding: Use water to prevent heat and reduce dust.
Non-obvious insight: Many beginners skip wet sanding here, but it prevents dust in your paint and helps the basecoat stick better.
6. Between Basecoat And Clearcoat
Sometimes, you need to lightly sand the basecoat if there are imperfections like dust nibs or runs.
- 1000–1500 grit: For correcting small flaws before clearcoat.
Tip: Always use these grits wet. Dry sanding at this stage can burn through paint.
7. Polishing Clearcoat
After spraying clearcoat, you may see orange peel (surface texture) or fine dust. Polishing requires ultra-fine grits.
- 1500–2000 grit: For wet sanding clearcoat to remove texture.
- 2500–3000 grit: For final polishing before buffing.
Non-obvious insight: Use a block or soft pad when sanding clearcoat. Sanding by hand without support leads to uneven results.
Sandpaper Grit Recommendations By Task
Here’s a quick reference to match sandpaper grit to each auto body task:
| Task | Recommended Grit |
|---|---|
| Paint/Rust Removal | 36–80 |
| Body Filler Shaping | 80–180 |
| Feather Edging | 180–220 |
| Sanding Primer | 320–600 |
| Basecoat Prep | 600–800 |
| Paint Correction | 1000–1500 |
| Clearcoat Polishing | 1500–3000 |
Dry Sanding Vs. Wet Sanding
Both dry and wet sanding have roles in auto body work. Knowing when to use each makes your job easier and your results better.
Dry Sanding
- Quicker for removing material
- Used for initial sanding and shaping
- Creates more dust
- Good for rough work and early stages
Wet Sanding
- Uses water to lubricate and cool
- Reduces dust and heat
- Gives a finer finish
- Used before painting and for final polishing
Expert advice: Always use wet sanding with grits above 400. It prevents clogging and gives a smoother finish.
Credit: www.nainc.org
Sanding Tools And Techniques
Sanding by hand works for small areas, but larger projects need tools for even and efficient results.
- Sanding blocks: Help keep surfaces flat and prevent uneven spots.
- Orbital sanders: Electric or air-powered, they save time and give smooth results.
- Foam pads: Useful for curves and edges.
Example: Use a rigid sanding block on flat doors, but a soft pad for rounded fenders.
Common Mistakes With Sandpaper Grit
Many people make errors when choosing or using sandpaper. Avoid these to get a professional finish:
- Skipping grits: Jumping from coarse to fine grit leaves scratches that show under paint.
- Using too coarse grit: Creates deep scratches that require extra work.
- Not using a block: Sanding without support causes wavy or uneven surfaces.
- Not cleaning between grits: Leftover dust or grit from previous sanding can scratch your work.
- Sanding too much: Over-sanding can remove too much material, especially on thin metal.
Advanced Tips For Better Sanding Results
- Check your work often: Use a work light or guide coat (a mist of contrasting paint) to spot low spots or scratches.
- Sand in multiple directions: This helps to even out scratches and avoid grooves.
- Use proper pressure: Let the sandpaper do the work. Pressing too hard wears out the paper and creates uneven surfaces.
- Keep sandpaper clean: Tap or rinse sandpaper often to remove clogged material.
- Replace sandpaper regularly: Worn-out sandpaper scratches instead of smoothing.
Comparing Sandpaper Grits For Auto Body Work
Understanding the differences between grits helps you plan your project. Here’s a side-by-side comparison of common grits:
| Grit | Surface Result | Best For |
|---|---|---|
| 36–40 | Very rough, deep scratches | Paint/rust removal, heavy sanding |
| 80–120 | Rough, visible scratches | Body filler shaping |
| 180–220 | Smooth, minor scratches | Feather edging, pre-primer |
| 320–400 | Very smooth, slight scratches | Sanding primer |
| 600–800 | Silky smooth, almost no scratches | Pre-basecoat sanding |
| 1000–1500 | Ultra-fine, smooth | Paint correction, clearcoat prep |
| 2000–3000 | Polished, glass-like | Final polishing, buffing |
Examples: Real Auto Body Projects
Fender Repair
Suppose you have a rusted fender. Start with 40 grit to remove rust. Next, apply body filler and shape it with 80 grit. Blend the filler edges with 180 grit, then sand the entire area with 220 grit before applying primer. After primer, use 400 grit wet/dry for a smooth base. Before painting, finish with 800 grit wet sanding.
Full Car Repaint
For a full repaint, use 80 grit to strip the old paint. Repair dents and use 120 grit on filler. Smooth everything with 220 grit. After primer, work with 400–600 grit wet sanding. Before the basecoat, use 800 grit. After painting, if you spot dust or runs, sand with 1500 grit wet, then polish the clearcoat with 2500 grit.
Spot Repair
For a small scratch or chip, sand the area with 320 grit. Apply primer, sand with 600 grit wet, and finish with 800 grit before blending in the new paint.
How To Store And Handle Sandpaper
Proper storage keeps sandpaper working well. Moisture, dirt, or bending can ruin the abrasive surface.
- Keep sandpaper flat in a dry place.
- Store in a sealed container or bag to avoid moisture.
- Do not stack different grits together; dust from coarse paper can contaminate fine paper.
- Label grits clearly, especially if you cut sheets into smaller pieces.

Credit: www.youtube.com
How Long Does Sandpaper Last?
Sandpaper wears out as you use it, but how long it lasts depends on:
- Surface type (metal wears sandpaper faster than primer)
- Pressure applied
- Use with water (wet sanding helps sandpaper last longer)
- Clogging (clean or replace when clogged)
A single sheet can last anywhere from a few minutes (on rough metal) to an hour (on primer or with water). Always check the surface and change paper when it stops cutting smoothly.
Buying Guide: What To Look For In Auto Body Sandpaper
Choosing quality sandpaper makes your work easier and your results better. Here’s what matters:
- Backing material: Paper, cloth, or film. Film-backed sandpaper lasts longer and resists tearing.
- Abrasive type: Aluminum oxide and silicon carbide are best for auto body.
- Wet/dry capability: Choose sandpaper marked for wet/dry use for versatility.
- Sheet size: Common sizes are 9×11 inches, but discs for sanders come in various sizes.
- Brand reputation: Trusted brands usually offer more consistent grit and longer life.
Common mistake: Buying only one grit. You need a range for each stage of your project.

Credit: afruxy.com
Environmental And Safety Tips
Sanding produces dust that can be harmful if breathed in. Always use protective equipment:
- Wear a dust mask or respirator.
- Use goggles to protect eyes from dust.
- Work in a well-ventilated area.
- Use water for wet sanding to reduce airborne dust.
Dispose of used sandpaper and dust safely, especially if you remove old paint containing lead or other hazardous materials.
The Cost Of Sandpaper For Auto Body Work
Sandpaper is inexpensive compared to other auto body supplies, but costs add up if you use the wrong grits or low-quality brands.
- Coarse grits: Used up faster, often sold in packs of 5–10 sheets.
- Fine grits: Last longer, especially when used with water.
- Specialty grits (2000+): More expensive, but you need fewer sheets.
Buying bulk packs of common grits can save money if you work on multiple projects.
Professional Vs. Diy: Do You Need Specialty Sandpaper?
Most DIY car repairs can be done with standard wet/dry sandpaper in the right grits. Professionals may use specialty products like film-backed discs or foam-backed pads for speed and precision. If you do auto body work often, investing in higher-quality sandpaper and sanding tools pays off in better results and less effort.
Example: Professional shops often use dust-free sanding systems, which use special sandpapers and vacuums to keep the workspace clean and extend sandpaper life.
Table: Quick Grit Guide For Common Auto Body Steps
For fast reference, here is a summary of recommended grits for each step:
| Step | Grit Range |
|---|---|
| Remove Rust/Paint | 36–80 |
| Shape Filler | 80–150 |
| Feather Edge | 180–220 |
| Sand Primer | 320–600 |
| Final Prep (Basecoat) | 600–800 |
| Paint Correction | 1000–1500 |
| Polish Clearcoat | 1500–3000 |
Frequently Asked Questions
What Is The Best Grit Sandpaper For Removing Car Paint?
For removing car paint, 40–80 grit sandpaper works best. Use coarser grits (40–60) for heavy layers or thick paint, and 80 grit for lighter removal. Always finish with a finer grit before moving to the next step.
Can I Use Regular Sandpaper For Auto Body Work?
Standard sandpaper can work, but wet/dry sandpaper designed for auto body use is better. It lasts longer, gives a smoother finish, and works with water, which helps prevent dust and overheating.
Why Do I Need To Use Several Grits Instead Of Just One?
Each grit removes scratches from the last step and prepares the surface for the next stage. Skipping grits leaves deep scratches that show under paint or primer. Using several grits ensures a smooth, professional finish.
How Do I Know When To Change Sandpaper?
Change sandpaper when it stops cutting effectively, feels smooth, or gets clogged with material. Using worn sandpaper wastes time and can scratch the surface.
What Is The Difference Between Wet And Dry Sanding?
Wet sanding uses water to reduce dust, keep the surface cool, and improve the finish. Dry sanding is faster for removing material but creates more dust and heat. Wet sanding is best for fine grits and final steps.
Getting the right sandpaper grit for auto body work is not complicated, but it does make a huge difference in your results. Take the time to choose the proper grit for each stage, use good tools, and follow basic safety steps. Your finished car will look smoother, last longer, and you’ll spend less time fixing mistakes. If you want detailed technical standards for abrasive materials, see the Wikipedia article on sandpaper. Choose wisely, and your next auto body project will have a finish you can be proud of.