Disclosure: This post contains affiliate links and I will be compensated if you make a purchase after clicking through my links. Learn More
Setting up a MIG welder with gas can seem complex if you are new to welding. The right setup is key for strong, clean welds and safe operation. Many beginners make mistakes that cause poor results, wasted gas, or even safety risks. In this guide, you will learn every step with clear explanations, simple terms, and helpful tips to avoid problems. Whether you want to weld for home projects, auto repair, or fabrication, this guide will help you get started with confidence.
Understanding Mig Welding With Gas
MIG welding stands for Metal Inert Gas welding. It uses a wire that feeds through a gun and melts to join two pieces of metal. The process also uses a shielding gas to protect the weld area from air. The gas is important because it stops contamination and helps you make smoother, stronger welds.
Why Use Gas For Mig Welding?
Some MIG welders use *flux-cored* wire, which does not need gas. But using a gas-shielded setup has big advantages:
- Cleaner welds – Less spatter and fewer holes or defects.
- Better control – You can weld thinner metals without burning through.
- Stronger results – Gas prevents oxidation, so the metal stays pure.
Common Shielding Gases
The most common gases for MIG welding are:
- 100% CO2 – Cheap, gives deep welds, but more spatter.
- 75% Argon / 25% CO2 (also called C25) – Best mix for mild steel. Clean, smooth welds with less spatter.
- 100% Argon – Used for aluminum welding.
- Special mixes – Sometimes used for stainless steel or other metals.
Tools And Materials You Need
Before you start, make sure you have all the right tools and materials. Missing something can stop your work or lead to mistakes.
| Item | Purpose | Notes |
|---|---|---|
| MIG welder | Welds the metal | Must support gas input |
| Shielding gas cylinder | Protects the weld | Usually Argon/CO2 mix |
| Gas regulator and flow meter | Controls gas pressure | Essential for safety |
| Gas hose | Connects gas to welder | Check for leaks |
| Welding wire | Forms the weld bead | Match to your metal |
| Welding helmet | Protects eyes and face | Auto-darkening is best |
| Protective gloves and jacket | Protects skin from burns | Leather is preferred |
| Wire brush or grinder | Cleans the metal | Essential for quality welds |
Non-obvious tip: Always check that your gas cylinder is upright and secured before you attach anything. A falling cylinder can be very dangerous.
Choosing The Right Gas And Wire
The shielding gas and welding wire must match your project. The wrong choice can cause weak welds, poor appearance, or wasted gas.
Gas Selection By Metal Type
| Metal Type | Best Gas | Why Use It? |
|---|---|---|
| Mild steel | 75% Argon / 25% CO2 | Low spatter, nice bead |
| Stainless steel | Tri-mix (Argon/CO2/Helium) | Protects from corrosion |
| Aluminum | 100% Argon | Cleaner welds on aluminum |
Beginner mistake: Using pure CO2 for thin sheet metal can cause burn-through. Go with a mix instead.
Wire Size And Type
- ER70S-6 is a common wire for mild steel.
- Use 0.030 inch wire for most thin materials (car panels, sheet metal).
- Use 0.035 inch or 0.045 inch for thicker materials (frames, heavy brackets).
Practical tip: If you are unsure, start with 0.030 inch wire and C25 gas for mild steel. This works for most beginner projects.
Setting Up Your Mig Welder With Gas
Follow these steps carefully. Skipping or rushing can cause gas leaks, poor welds, or injury.
1. Secure The Gas Cylinder
Place the gas cylinder on a solid floor. Use a chain or strap to hold it upright. Never lay a cylinder on its side. If the valve breaks, it can shoot like a rocket.
- Remove the protective cap only when you are ready to connect.
- Check the label to confirm the gas type.
2. Connect The Regulator And Flow Meter
Screw the regulator onto the cylinder valve by hand. Tighten with a wrench, but do not overtighten.
- Attach the flow meter if it is separate from the regulator.
- Make sure the regulator matches the gas (argon fittings are different from CO2).
Non-obvious insight: Some regulators have left-handed threads (they turn opposite of normal screws). Check before forcing.
3. Attach The Gas Hose
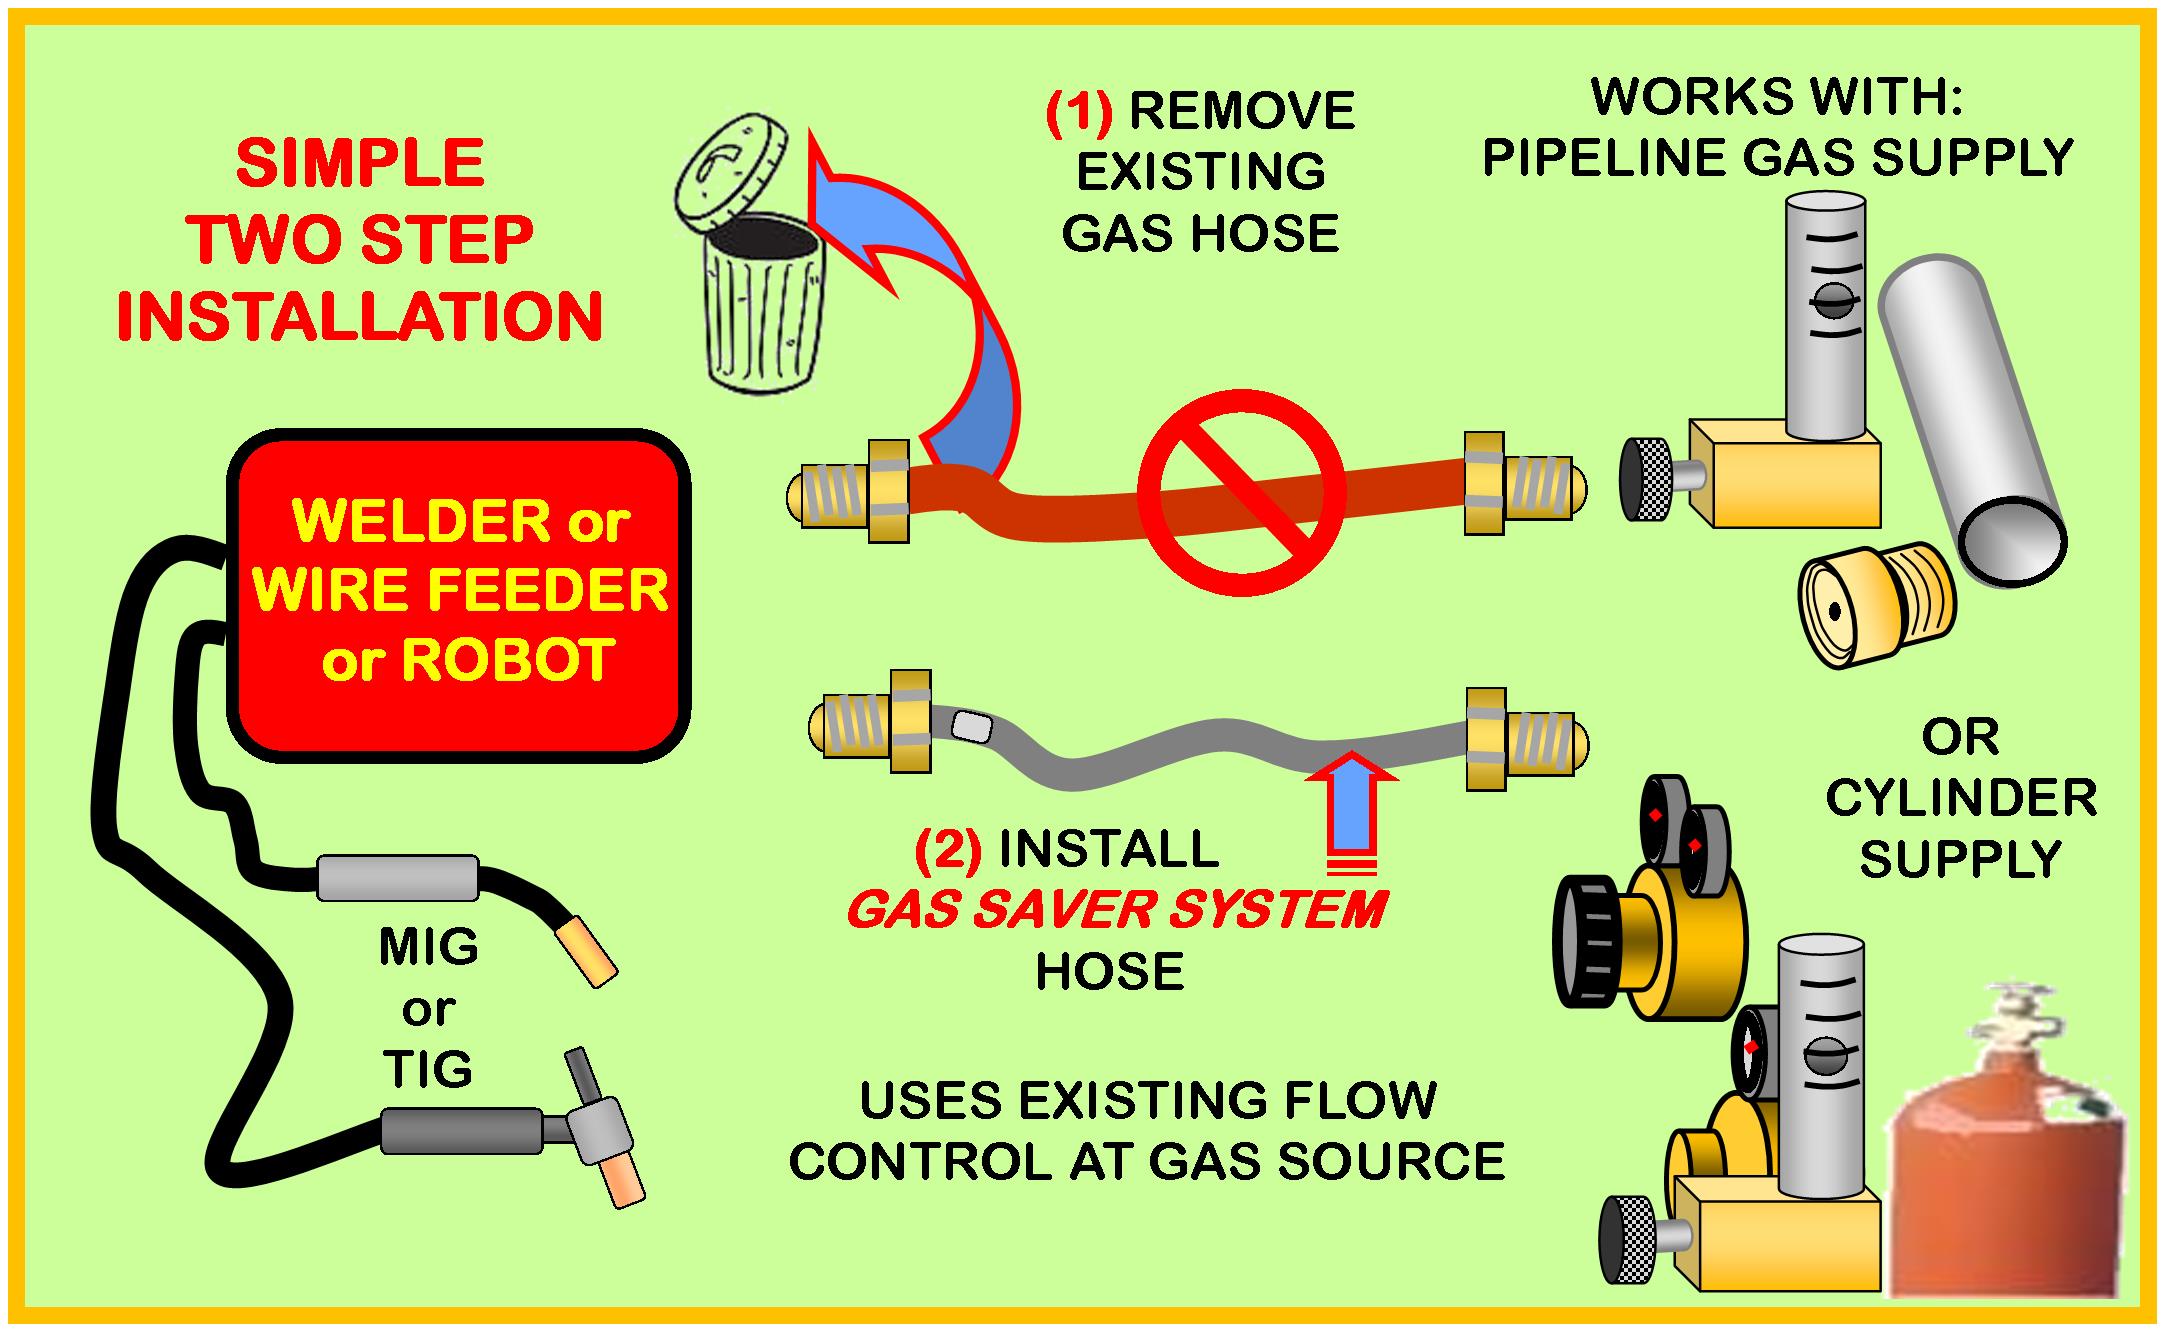
Connect one end of the gas hose to the regulator outlet. Connect the other end to the input on your welder.
- Push the hose on firmly.
- Use a hose clamp if needed.
- Check for cracks or old hoses.
Pro tip: Spray soapy water on the connections and open the gas slowly. If you see bubbles, you have a leak that must be fixed.
4. Install The Welding Wire
Open the wire feed cover on your welder. Place the wire spool on the spindle.
- Feed the wire through the drive rolls and into the gun liner.
- Close the cover.
- Squeeze the trigger until the wire comes out of the gun tip.
If the wire jams, check for kinks or wrong size rollers.
Beginner mistake: Using rusty or dirty wire causes feeding problems and poor welds. Store wire in a dry place.
5. Set Polarity For Gas Mig Welding
For most solid wire MIG welding with gas, set your welder to DCEP (Direct Current Electrode Positive). This means the gun is positive, and the ground clamp is negative.
- Double-check your welder’s manual.
- Wrong polarity leads to weak welds and lots of spatter.
6. Turn On The Gas
Stand to one side of the cylinder valve (not in front of it). Turn the main valve counterclockwise to open.
- Open the valve all the way for argon and mixes. Only a turn or two for CO2.
- Listen for hissing—if you hear it, close the valve and check for leaks.
7. Adjust Gas Flow
Set your flow meter to the correct rate. For most indoor welding, 20 to 25 cubic feet per hour (CFH) is enough.
- Too little gas allows air in—your welds will look porous.
- Too much gas wastes money and can cause turbulence.
If you are welding outdoors, you may need more gas to protect the weld from wind.
8. Check Gun And Ground Connections
Make sure the ground clamp is on clean, bare metal. A poor connection causes erratic arcs and weak welds.
- Clean the spot with a grinder or wire brush.
- Attach the clamp firmly.
Check the gun nozzle for spatter. Clean or replace if clogged.
9. Test The Setup
Before welding your main piece, make a few test welds on scrap metal of the same type and thickness.
- Check for a smooth arc, steady wire feed, and proper shielding.
- Adjust voltage, wire speed, or gas flow as needed.
- Look for clean, shiny welds without holes or dark spots.
Fine-tuning Your Mig Welder Settings
Getting the best weld is not just about setup. You may need to adjust voltage, wire speed, and gas flow for different jobs.
Voltage And Wire Speed
Most welders have a chart inside the door. Use it as a starting point, but always adjust for your project.
- Voltage controls how hot the arc is.
- Wire speed controls how much wire feeds out.
If the wire “stubs” or the arc stops, increase wire speed. If it spits and hisses, slow the wire down.
Example: For 1/8” steel, you might start at 18 volts and 250 inches per minute wire speed.
Gas Flow Adjustments
If your welds have dark spots or holes, increase the gas flow slightly. If you hear a rushing sound, lower it.
- Indoors: 20–25 CFH
- Outdoors: Up to 35 CFH (but try to block wind instead)
Nozzle Distance And Angle
Hold the nozzle about 3/8 to 1/2 inch from the work. A longer stick-out cools the arc and wastes gas.
- For flat welding, a slight angle (10–15 degrees) helps control the bead.
- Too steep an angle exposes the weld to air.
Common Problems And How To Fix Them
Even with the right setup, things can go wrong. Here’s what to watch for and how to fix it.
Porosity (holes In Weld)
- Cause: Not enough gas, leaks, or wind.
- Fix: Check flow rate, seal leaks, shield from wind.
Excessive Spatter
- Cause: Wrong voltage or wire speed, pure CO2 gas.
- Fix: Adjust settings, switch to Argon/CO2 mix.
Weak Welds
- Cause: Wrong polarity, dirty metal, poor ground.
- Fix: Set to DCEP, clean the metal, check ground clamp.
Wire Feed Stops Or Jams
- Cause: Wrong roller size, dirty wire, tangled spool.
- Fix: Match rollers to wire, use clean wire, rewind spool.
Burn-through (holes In Metal)
- Cause: Too much voltage, wire speed, or pure CO2 gas on thin metal.
- Fix: Lower settings, use C25 gas.

Credit: yeswelder.com
Safety Tips For Mig Welding With Gas
Safety is more than just wearing gloves. Gas cylinders and electricity can cause serious injury if ignored.
- Keep cylinders upright and chained.
- Wear fire-resistant clothes. Never weld in shorts or synthetic fabrics.
- Ventilate your work area. Shielding gases can displace oxygen.
- Never weld near flammable materials. Sparks travel far.
- Check for leaks with soapy water, not a flame.
- Turn off the gas when done. This saves gas and prevents leaks.
- Keep a fire extinguisher nearby.
Non-obvious insight: Even small leaks can add up to a big gas bill over time. Always close the valve tightly after use.
Comparing Gas And Flux-cored Mig Welding
Some people ask if they can skip the gas and use flux-cored wire. Here’s a direct comparison to help you decide.
| Feature | Gas MIG Welding | Flux-Cored MIG Welding |
|---|---|---|
| Weld quality | Cleaner, smoother | More spatter, rougher |
| Outdoor use | Wind can blow gas away | Works better outdoors |
| Metal thickness | Good for thin to medium | Better for thick, rusty |
| Cost | Higher (need gas) | Lower (wire only) |
| Learning curve | Easier for beginners | More cleanup needed |
Bottom line: For clean, high-quality welds on new metal, use gas. For outdoor or dirty work, flux-cored may be better.
Credit: www.netwelding.com
Practical Tips For A Better Mig Welding Experience
Many new welders focus on machine settings and forget about work habits. These tips can make your results more professional.
- Always clean the metal. Paint, rust, and oil ruin welds.
- Check the gas supply before starting. Running out mid-weld wastes time and wire.
- Store cylinders in a cool, dry place away from heat or sun.
- Use short welds (“stitch welds”) on thin metal to avoid warping.
- Practice on scrap before your real project.
- Listen to the arc. A steady “sizzle” means good settings.
- Replace contact tips if wire feeding becomes erratic.
- Inspect hoses and clamps every time you set up.
- Read the welder’s manual for specific advice about your model.
- Keep a logbook of your settings for future reference.
Non-obvious tip: If your welds always look dull or gray, try moving the gun slightly faster. Slow travel can overheat the weld and change its color.
Maintenance For Your Mig Welder And Gas Setup
A well-maintained welder lasts longer and works better. Do these checks after every session:
- Turn off the gas and release pressure from the hose.
- Clean the nozzle with pliers or a wire brush.
- Check the feed rollers for dust or wear.
- Inspect cables for burns or cracks.
- Store wire spools in a sealed bag to prevent rust.
- Wipe down the machine to remove dust and metal bits.
Schedule a full inspection every few months, especially if you weld often.

Credit: www.instructables.com
Troubleshooting Gas Mig Welds
Even with good setup, some problems need quick fixes:
- If you see lots of sparks and the weld is rough, lower voltage or switch to a better gas mix.
- If the wire burns back into the tip, your wire speed is too slow or voltage too high.
- If the arc wanders or goes out, check for a bad ground or loose connections.
Non-obvious insight: Shielding gas is invisible. Sometimes you may think you have enough flow, but a small leak or blockage can ruin your welds. Always test on scrap first.
Where To Get Help And Learn More
If you struggle with your setup, do not guess. Ask other welders or look for help online. Many welding forums and YouTube channels have detailed guides. You can also check the manufacturer’s website or manual for support.
For deep technical details on MIG welding, the Wikipedia article on Gas Metal Arc Welding is helpful.
Frequently Asked Questions
How Much Gas Should I Use For Mig Welding?
Most jobs need 20 to 25 CFH (cubic feet per hour) for indoor work. If you weld outdoors or in a drafty area, you may need up to 35 CFH. Too much gas wastes money and can cause turbulence.
What Happens If I Use The Wrong Gas?
Using the wrong gas can cause spatter, weak welds, or poor appearance. For example, pure CO2 is cheap but messy. The best all-around gas for mild steel is 75% Argon and 25% CO2. Always match your gas to your metal.
How Do I Know If My Gas Regulator Is Leaking?
Spray soapy water on all connections and open the gas. If you see bubbles, there is a leak. Tighten the fittings or replace faulty parts. Never use a flame to check for leaks.
Can I Use Flux-cored Wire With Gas?
It is possible, but not recommended. Flux-cored wire is made for use without gas. Using both wastes gas and can make the weld worse. Use solid wire with gas, and flux-cored wire without gas.
How Often Should I Replace My Mig Gun Nozzle?
Replace the nozzle when it is clogged with spatter or damaged. Clean it after every welding session. A blocked nozzle can cause poor gas coverage and bad welds.
Setting up a MIG welder with gas takes care, but it pays off in clean, strong welds. With the right setup and a bit of practice, you can handle many projects safely and with good results. Always follow safety steps, check for leaks, and fine-tune your settings as you go. Good preparation leads to better welding and fewer problems down the road.