Disclosure: This post contains affiliate links and I will be compensated if you make a purchase after clicking through my links. Learn More
Many people use their garage as a workshop. This is a space for woodworking, metalworking, car repair, or music practice. But garage workshops can be very noisy. Sound travels through walls and doors, disturbing family, neighbors, and sometimes even yourself. That’s why soundproofing your garage workshop is important. Good soundproofing lets you work longer, focus better, and avoid complaints.
This article will guide you through practical ways to reduce noise in your garage workshop. You’ll learn what works, what does not, and how to avoid common mistakes. Even if you have a small budget, you will find options here.
This guide focuses on simple words and clear steps so anyone can follow it. By the end, you will know how to make your garage workshop quieter and more comfortable.
Why Soundproof Your Garage Workshop?
Many people think garages are separate enough. But most garages share at least one wall with the house, and thin walls let sound pass through. Even if your garage is detached, noise can reach neighbors, especially at night or early morning.
Power tools, compressors, and hammers all create loud sounds. Over time, these sounds can cause stress and even hearing problems.
Soundproofing is not just about blocking noise. It can also keep your workshop warmer in winter and cooler in summer. Proper soundproofing adds value to your home if you ever sell. It protects your privacy too. If you record music or podcasts, good soundproofing improves audio quality by reducing echo.
Understanding Sound: How Noise Travels In A Garage
Sound moves as vibrations through air, walls, floors, and ceilings. In a garage, sound escapes through:
- Walls (especially thin ones)
- Garage doors and gaps around them
- Windows
- Ceilings (if there is a room above)
- Floors (less common, but possible)
- Small gaps (cracks, vents, electrical outlets)
Soundproofing aims to block, absorb, or dampen these vibrations. Blocking means making a barrier. Absorbing means using soft materials that soak up sound. Damping means using materials that reduce vibrations.
Understanding this helps you see why just adding foam on the wall is not enough. You need to treat the main weak spots.
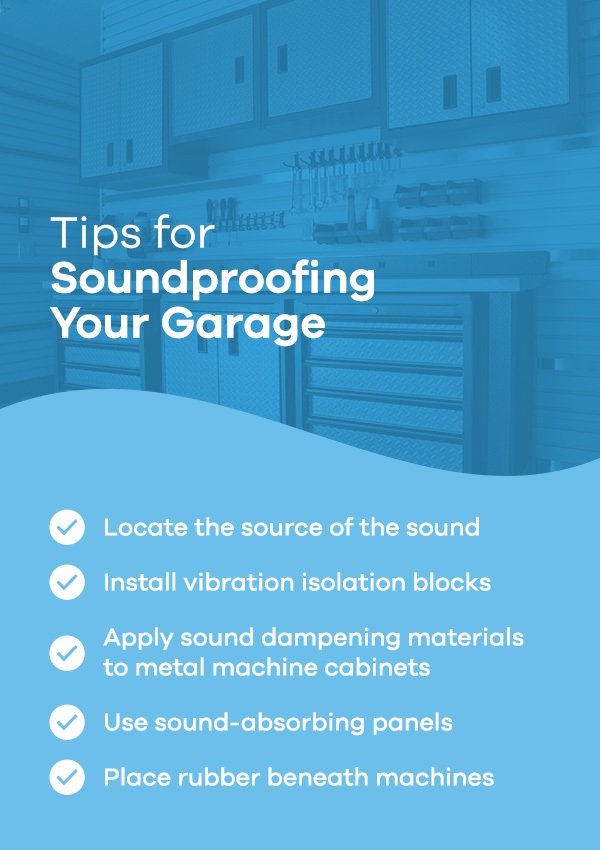
Credit: www.soundproofcow.com
Assessing Your Garage Workshop
Before starting, look at your garage closely. Ask these questions:
- What kind of noise do you make? (e.g. Saws, drills, music)
- What surfaces are hardest? (e.g. Concrete, metal)
- Are there windows or vents?
- Is the garage attached or separate from the house?
- Do you have a ceiling or open rafters?
- What is your budget?
Walk outside and listen while someone uses the loudest tool. This test will show where most noise escapes. Check for cracks, gaps, or old, thin doors.
Key Soundproofing Methods
You don’t need to rebuild your garage to reduce noise. Focus on the most important areas. The main soundproofing methods are:
- Sealing gaps and cracks
- Upgrading the garage door
- Adding mass to walls
- Insulating the ceiling
- Treating windows
- Using soft materials
- Damping vibrations
- Floating floors (if needed)
- Building a room within a room (for serious needs)
Each method works best for certain situations. Let’s look at each in detail.
Sealing Gaps And Cracks
Sound escapes through the smallest openings. You should start by sealing all cracks, gaps, and holes.
- Use acoustic caulk for gaps around window frames, door frames, and where the wall meets the floor.
- Use weatherstripping for doors and around the garage door.
- For large holes (e.g. Old vent holes), use expanding foam or fill with wood and seal.
Check around electrical outlets. You can buy foam gaskets that fit behind outlet covers. This small step can make a big difference.
Non-obvious Insight
Many people forget the bottom of the garage door. Install a high-quality garage door sweep. Some sweeps are made for weather, not sound, so look for one labeled for noise reduction.
Upgrading The Garage Door
Garage doors are often the biggest weak spot. Thin metal doors let noise through. Consider these options:
- Replace with a solid-core door. Wood or insulated steel doors are much better than hollow ones.
- Add mass loaded vinyl (MLV) to the inside of the door. MLV is a heavy, flexible material that blocks sound. Cut to size and glue or screw it onto the door.
- Install insulation panels. Rigid foam panels or fiberglass batts can help. Cover with plywood for a clean look.
- Seal all edges with weatherstripping and a tight-fitting sweep.
If you don’t want to replace the door, focus on adding mass and sealing gaps. For the best results, combine MLV and insulation.
Example
A standard garage door (2″ thick, steel) has an average sound transmission class (STC) rating of 21. After adding MLV and insulation, you can raise the STC to 30–35. This means a reduction of up to 10 decibels for loud noises.
Adding Mass To Walls
Sound moves easily through thin walls. Adding heavy material (mass) makes it harder for sound to pass.
- Install a second layer of drywall. Use 5/8” thick drywall, which is heavier than standard 1/2″.
- Use Green Glue between drywall layers. This special compound dampens vibrations.
- Add MLV behind drywall or over the existing wall.
- Attach plywood or cement board for extra mass, if drywall is not possible.
For garages with bare studs, fill spaces with insulation before adding drywall. Mineral wool works best for both sound and heat.
Data Table: Sound Transmission Class (stc) Values
Below shows how different wall types block sound.
| Wall Construction | STC Rating | Typical Noise Reduction |
|---|---|---|
| Single 1/2″ Drywall on Studs | 34 | Normal speech heard easily |
| 1/2″ Drywall + 1/2″ Drywall (Double Layer) | 40 | Loud speech faintly heard |
| Double Layer + Green Glue | 50+ | Loud sounds barely heard |
Non-obvious Insight
It’s better to use fewer, heavier layers than many thin ones. Also, avoid screwing drywall directly into the same studs if you can use resilient channels. These metal strips create a gap that reduces vibration transfer.
Insulating The Ceiling
If you have a room above the garage, ceiling soundproofing is critical. Even if you don’t, sound can reflect off the ceiling and leak through.
- Install batt insulation (fiberglass or mineral wool) between joists.
- Add a layer of drywall below the insulation.
- Use Green Glue or MLV between layers for more reduction.
- Seal all seams with acoustic caulk.
If your ceiling is open (rafters exposed), close it with drywall or plywood. Sound will escape through any open space.
Example
A ceiling with just drywall (no insulation) has an STC of about 36. Adding insulation raises this to 41–44, a big improvement.
Treating Windows
Windows are often weak points. Even double-pane windows let sound through. Here’s how to improve them:
- Seal gaps with weatherstripping.
- Add window inserts. These are clear panels that fit inside the window frame and block sound.
- Hang heavy curtains. Special acoustic curtains can help, though not as much as inserts.
- Board up unused windows. If you do not need the window, screw plywood or drywall over it.
For music studios, people use double windows with an air gap between them. This is expensive, but for normal workshops, sealing and covering is usually enough.
Data Table: Window Sound Reduction
| Window Type | STC Rating | Notes |
|---|---|---|
| Single Pane | 27 | Poor for soundproofing |
| Double Pane | 32 | Better, but still leaks noise |
| With Acoustic Insert | 38–44 | Much quieter |
Using Soft Materials
Hard surfaces reflect sound, making a room louder. Soft materials absorb sound and reduce echo.
- Rubber mats on the floor help absorb impact sounds.
- Acoustic foam panels on walls or ceiling reduce echo (but do not block sound much).
- Heavy curtains over doors and windows.
- Carpet remnants or old rugs can be used in walking areas.
Don’t cover every surface. Focus on the wall facing your loudest tools and the ceiling above them. Too much foam can make the room sound “dead” and uncomfortable for talking.
Practical Tip
If you want to test how much soft materials help, hang a thick blanket on the wall and see if the room sounds quieter when you use your tools.
Damping Vibrations
Some tools and machines vibrate a lot. These vibrations travel through floors and walls, making noise worse.
- Place tools on rubber pads or anti-vibration mats.
- Bolt machines to a heavy base (like a thick plywood sheet with a rubber layer below).
- Use isolation mounts for compressors or heavy tools.
Vibration damping is often missed by beginners. It’s especially important for metalworking, air compressors, and large saws.
Example
A bench grinder bolted directly to a concrete floor sends noise through the whole house. Adding a 1″ rubber pad under the base cuts the vibration by half.
Floating Floors (advanced)
If your garage has a concrete floor, sound can still travel. For most people, this is not the biggest problem, but if you want maximum soundproofing, consider a floating floor.
- Build a frame of wood sleepers (2x4s on edge).
- Lay rubber strips under the sleepers to separate from concrete.
- Fill spaces with insulation (mineral wool or fiberglass).
- Cover with plywood and thick rubber mat.
This is expensive and reduces ceiling height, but it can cut noise transfer by 8–10 decibels.
Building A Room Within A Room
This is the best way to block sound but also the most work. It means building new walls and a ceiling inside your garage, separated from the existing structure.
- Frame new walls 1–2 inches away from the garage walls.
- Fill with insulation.
- Cover with two layers of drywall and Green Glue.
- Seal all joints with acoustic caulk.
This method is used for music studios and workshops with very loud tools. It can block more than 50 decibels of sound.
Cost Vs. Benefit: Where To Spend
Some soundproofing steps give more value for your money. Here is a quick summary:
| Soundproofing Method | Approximate Cost | Noise Reduction |
|---|---|---|
| Sealing Gaps | $50–$100 | 5–10 dB |
| Garage Door Upgrade | $200–$1,500 | 10–20 dB |
| Extra Drywall & Insulation | $300–$1,000 | 10–20 dB |
| Window Inserts | $150–$400 each | 5–12 dB |
| Room Within a Room | $3,000–$10,000 | 40–50 dB |
If you have a tight budget, start with sealing gaps and upgrading the garage door. These steps give good results for less money.
Common Mistakes And How To Avoid Them
- Ignoring the garage door. Many people focus only on walls, but the door is often the biggest weak spot.
- Thinking foam panels block sound. Foam absorbs echo, but does not stop much noise from leaving the room.
- Missing small gaps. Even tiny cracks let a lot of sound escape.
- Overlooking vibration. Machines on hard floors transfer sound through the building.
- Forgetting airflow. Sealing everything can make the garage stuffy. Plan for quiet vents or use a duct with a sound maze.
Practical Steps: Soundproof Your Garage Workshop
Here’s a plan you can follow, step by step:
- Seal all gaps and cracks with acoustic caulk and weatherstripping.
- Upgrade the garage door with MLV, insulation, and a door sweep.
- Add mass to walls by installing another layer of drywall with Green Glue.
- Insulate the ceiling if you have a room above or open rafters.
- Treat windows with inserts or heavy curtains.
- Lay rubber mats where tools sit or where you walk most.
- Damp vibrations with anti-vibration pads under machines.
- Test and listen. Use your loudest tool and see if the room is quieter. If not enough, add more layers or close more gaps.
- Improve air flow. Install a quiet vent if needed, but seal around it well.

Credit: www.acmetools.com
Materials And Tools You May Need
- Acoustic caulk
- Weatherstripping
- Mass loaded vinyl (MLV)
- Green Glue
- 5/8” drywall sheets
- Mineral wool or fiberglass insulation
- Rubber mats or anti-vibration pads
- Window inserts or acoustic curtains
- Plywood (if boarding up windows or doors)
- Heavy curtains
- Basic hand tools (screwdriver, utility knife, caulking gun, drill)
- Screws and nails
Always wear safety gear when working with insulation or cutting materials.
Improving Sound Inside The Workshop
Soundproofing keeps noise from escaping. But you also want a workshop that sounds good inside. Echo makes it hard to hear music, podcasts, or even your own thoughts.
- Use a mix of hard and soft surfaces. Too much foam makes the room too quiet and strange.
- Arrange tools and benches to break up sound waves.
- Hang a few canvas art pieces or thick blankets for absorption.
- If you record audio, place foam in corners to reduce “boomy” sounds.
Measuring Your Results
You don’t need expensive equipment. Use a free decibel meter app on your phone. Measure noise outside the garage before and after each step. A drop of 10 decibels is a big improvement—a normal conversation is about 60 dB, and a circular saw can be over 100 dB.
If you want more data, search for “STC ratings” for your materials. This helps you plan what to add next.
Maintaining Your Soundproof Workshop
After you finish, check your workshop every few months.
- Inspect weatherstripping for wear.
- Look for new cracks or holes after moving machines.
- Clean rubber mats and pads so they keep working well.
- Test door sweeps and replace if worn out.
Good maintenance keeps your garage quiet for years.

Credit: www.youtube.com
Advanced Tips For Maximum Quiet
- Build a sound maze for any vents you must keep open. This is a box with turns inside, lined with foam, which lets air in but stops sound.
- Use double doors if you want a very quiet space. This means a heavy inner door and the normal garage door.
- Install resilient channels on walls and ceiling before drywall. These metal strips further reduce vibration transfer.
- For music or podcast studios, use staggered stud walls. This means the two sides of the wall do not touch, so less vibration passes through.
When To Get Professional Help
You can do most soundproofing steps yourself. But for complex jobs—like building a room within a room, or for music studio quality—consider hiring a contractor. They can help you avoid mistakes and meet building codes. Always check local fire and safety rules, especially if you cover vents or change wiring.
For more information on building codes and advanced soundproofing, check sources like the Soundproofing Company.
Frequently Asked Questions
How Much Does It Cost To Soundproof A Garage Workshop?
Costs range widely. Sealing gaps and adding weatherstripping can be done for $100 or less. Upgrading the garage door and adding drywall with insulation can range from $500 to $2,000. Full studio-quality soundproofing (room within a room) can cost $5,000 or more.
Start with basic steps and add more as needed.
Can I Soundproof My Garage Workshop Without Rebuilding Walls?
Yes. You can seal gaps, add MLV or extra drywall to existing walls, upgrade doors and windows, and use soft materials inside. These steps reduce noise without major construction.
Do Foam Panels Stop Noise From Leaving The Garage?
No. Foam panels mainly absorb echo inside the room. They do not block much sound from leaving. To stop noise, you need heavy materials like drywall, plywood, or MLV.
Will Soundproofing Make My Garage Too Hot Or Cold?
Extra insulation and sealed gaps often make garages warmer in winter and cooler in summer. But if you seal everything, you need to plan for air flow. Use quiet vents or open the door when working for a long time.
Is It Possible To Fully Soundproof A Garage?
You can reduce noise a lot, but total silence is hard and expensive. With the right materials and careful sealing, you can make most noise too quiet to bother neighbors or family.
A well-soundproofed garage workshop gives you freedom to work anytime, without worry. Start with the easy steps, listen to the results, and keep improving. With careful planning and steady effort, you’ll enjoy a quieter, more private space for years.