
Disclosure: This post contains affiliate links and I will be compensated if you make a purchase after clicking through my links. Learn More
Why Is My Stick Welder Sticking
A stick welder sticks because of poor arc control, wrong amperage, dirty workpieces, or using the wrong electrode. Fixing these problems means adjusting settings, cleaning the metal, and choosing the right rod for the job.
Stick welding is simple, but nothing kills your confidence faster than your electrode sticking to the metal. It sparks, sputters, ruins your weld, and wastes time. This problem can frustrate anyone, from beginners to seasoned pros. You start a weld, the rod glues itself down, and you’re forced to break it off. Why does this happen? The truth: Stick welding is part science, part art. When your stick welder sticks, it’s sending a clear signal that something’s off. The solution is usually straightforward if you know what to look for.
This article breaks down every major cause of electrode sticking in stick welding, how to fix each one, and what to do differently next time. Whether you’re welding mild steel, stainless, or cast iron, these tips work in every shop.
You’ll learn how to set up your machine, pick the right electrode, and keep your rod running smooth. No more guessing. No more ruined welds. Let’s get straight to the root of why your stick welder sticks and how to stop it for good.
What Causes A Stick Welder To Stick?
Sticking happens when the electrode fuses to the workpiece instead of creating a stable arc. Several issues can cause this:
- Low amperage settings
- Dirty or rusty metal
- Poor welding technique
- Wrong electrode angle
- Incorrect electrode type or size
- Faulty ground clamp or bad connections
- Slow travel speed
- Long arc length
- Moisture in electrodes
Each one affects arc control and heat, making it hard for the rod to start or maintain a weld.
Low Amperage: The Most Common Culprit
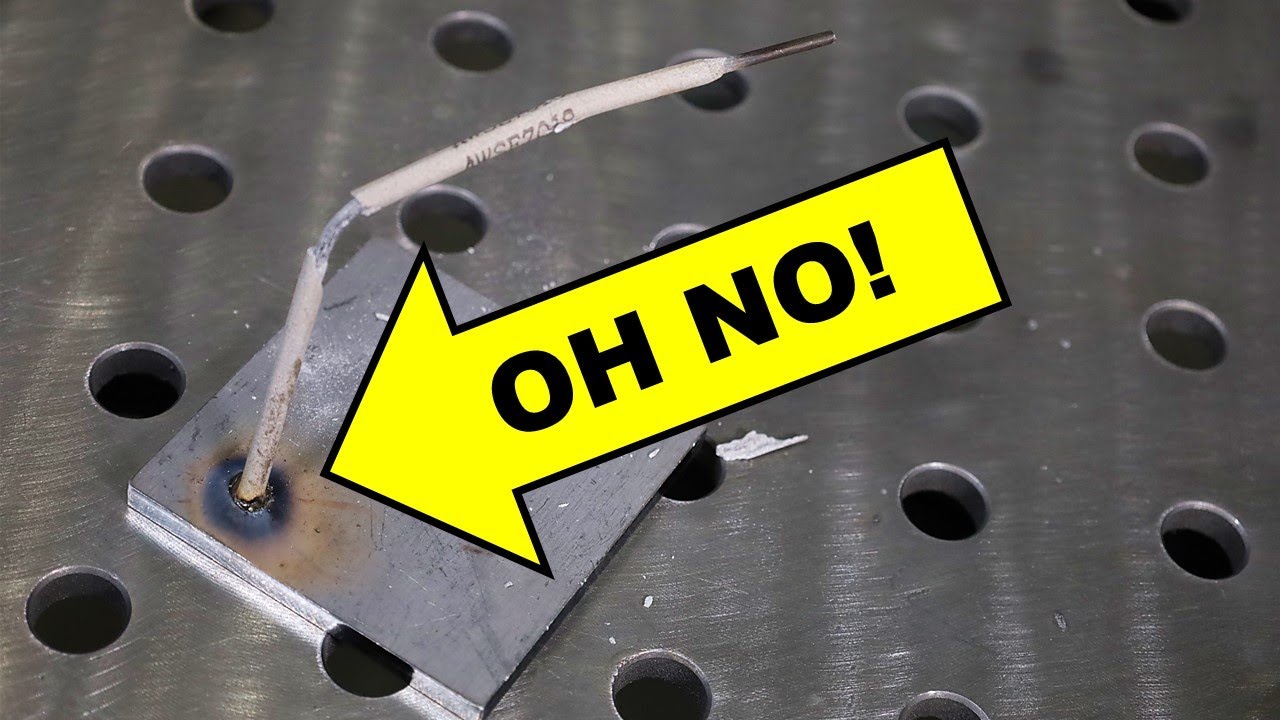
If your welder is set too low, the arc doesn’t get hot enough. The flux coating melts slowly, and the rod glues itself to the metal. Most stick welders work best when the amperage matches the electrode size.
General rule: Use 1 amp for every 0.001 inch of electrode diameter. For example, a 1/8” rod works best around 125 amps.
Example: Try welding 1/8” mild steel with only 60 amps. The rod sticks constantly. Set the machine to 110-130 amps, and the arc runs steady.
Pro tip: If you keep sticking, bump the amperage up by 5-10 amps at a time until the rod lights easily and the bead looks smooth.
Hidden insight: Many beginners fear burning through thin metal. They set the amperage too low, causing more sticking. It’s usually better to go a little hotter and move faster.
Credit: www.youtube.com
Dirty, Rusty, Or Painted Metal
Stick welding is more forgiving than MIG or TIG, but it’s not magic. Dirt, rust, oil, paint, and mill scale all block the arc and make the rod stick.
Solution: Clean the weld area with a grinder, wire brush, or flap disc until you see bright, bare metal. This gives the arc a clear path and prevents sticking.
Pro tip: Grind at least 1 inch beyond your weld area. Paint and rust can cause sticking even if they’re just near the arc.
Non-obvious insight: Even a thin layer of oil or mill scale can ruin arc starts. Clean both the workpiece and the ground clamp area for best results.
Wrong Electrode Angle
Welding at the wrong angle changes how the arc hits the puddle. Too steep or too flat, and you’ll stick the rod.
Best practice: Hold the rod at a 10-15 degree angle, pulling away from the puddle (“drag” technique). Don’t push the rod into the weld.
Example: If you hold the rod almost vertical, you lose arc control and stick more often. Too flat, and slag covers the arc.
Pro tip: Watch the arc, not the rod. Keep your hand steady and let the puddle guide your movement.
Incorrect Electrode Size Or Type
Not all rods are the same. Use the wrong type, and you’ll fight sticking no matter what you do.
Common electrodes:
- 6010/6011: Good for dirty or rusty steel, deep penetration, but can be hard to control for beginners.
- 6013: Easier starts, softer arc, better for thin metal.
- 7018: Smooth arc, great for structural steel, but needs higher amperage and clean metal.
Example: Try starting a 7018 rod on rusty steel with low amps—it’ll stick every time. A 6011 rod does better on dirty metal.
Data Table: Electrode Type vs. Sticking Risk
| Electrode Type | Best Use | Sticking Risk |
|---|---|---|
| 6010/6011 | Dirty steel, deep welds | Medium (needs skill) |
| 6013 | Clean/thin steel | Low (easy starts) |
| 7018 | Structural, clean steel | High (on low amps/dirty metal) |
Hidden insight: Beginners often grab whatever rod is handy. Always match the rod to the job and machine settings.
Poor Arc Striking Technique
Striking an arc is a skill. If you tap or scratch the rod wrong, it sticks before the arc starts.
Methods:
- Tapping: Tap the rod tip on the metal, then lift.
- Dragging/Scratching: Drag the tip lightly, like striking a match.
Pro tip: Hold your hand steady. Don’t press too hard or too light. If you stick, twist the rod gently to break it free.
Non-obvious insight: Worn or chipped rod tips make arc starts harder. Break off the flux at the tip or use a new rod if you keep sticking.
Faulty Ground Clamp Or Poor Connections
A weak ground means less current flows through the weld. The rod sticks often, and the arc sputters.
Check these:
- Ground clamp tight and clean
- No paint, rust, or oil under the clamp
- Cables undamaged and connectors tight
Pro tip: Move the ground clamp close to your weld. Long distances or small clamps cause voltage drop and sticking.
Hidden insight: Many welding issues blamed on rods or machines are actually ground problems. Always check your ground first.
Slow Travel Speed
If you move the rod too slowly, it sits in the puddle and cools down. The arc can’t keep up, and the rod sticks.
Best practice: Keep a smooth, steady pace. Watch the puddle—not just the rod—so you don’t slow down too much.
Example: On a flat weld, aim for about 10 inches per minute with a 1/8” rod.
Pro tip: Practice on scrap metal. Count “one-thousand-one, one-thousand-two,” and match your movement to a consistent rhythm.
Too Short Or Too Long Arc Length
Holding the rod too close or too far from the metal both cause sticking.
- Too short: The rod touches the metal, killing the arc.
- Too long: The arc becomes unstable, spatters, and the rod may stick after a few seconds.
Best practice: Keep the arc length equal to the diameter of the rod’s core wire. For a 1/8” rod, stay about 1/8” above the metal.
Pro tip: Listen for a sharp, steady “crackling” sound. If the arc is quiet or sputters, adjust your distance.
Moisture In Electrodes
Moisture makes flux soft and sticky. Rods stored in humid shops or left outside absorb water and stick badly.
Solution: Store rods in a sealed container or rod oven. If you suspect moisture, dry rods at 250°F (121°C) for a few hours.
Hidden insight: 7018 rods are especially sensitive to moisture. Use rod ovens or small “quiver” boxes to keep them dry on site.
Wrong Polarity
Stick welders offer DC+ (DCEP), DC– (DCEN), and AC. Wrong polarity can cause weak arcs and sticking.
General rules:
- 6010/6011: DC+ or AC
- 6013: DC+, DC–, or AC
- 7018: DC+ or AC
Example: Try 6010 on DC–. The arc is weak, the rod sticks, and penetration is poor. Switch to DC+, and it runs smooth.
Pro tip: Check the rod’s label for recommended polarity. If you’re not sure, try both and see which gives a stronger arc.
Machine Problems
Sometimes the welder itself is the issue:
- Bad internal connections
- Failing capacitors or rectifiers
- Poor voltage regulation
Symptoms: Even with correct settings and clean metal, rods stick and the arc won’t start.
Solution: Test your machine on different outlets. If possible, try another welder with the same setup. If the problem follows the machine, get it serviced.
Non-obvious insight: Extension cords can cause voltage drop. Use heavy-gauge cords under 25 feet for full power.
Electrode Coating Damage
If the rod’s flux coating is chipped or cracked, it won’t start cleanly and often sticks. Dropping rods, banging them around, or rough storage causes this.
Solution: Inspect rods before welding. Discard any with broken or missing flux.
Pro tip: Store rods in their box or a rod tube, not loose in a toolbox.
Comparing Common Welding Issues
Sometimes, sticking isn’t your only problem. Here’s how sticking compares to other stick welding issues.
| Issue | Main Cause | Fix |
|---|---|---|
| Sticking | Low amps, dirty metal, poor technique | Raise amps, clean metal, steady hand |
| Poor Penetration | Low amps, fast travel | Increase amps, slow down |
| Porosity | Moisture, dirty metal | Dry rods, clean work |
| Spatter | High amps, long arc | Lower amps, shorten arc |

Credit: www.weldingtribe.com
Step-by-step: How To Stop Stick Welding Sticking
- Set the right amperage for your rod size. Use manufacturer charts or start at 1 amp per 0.001” of rod.
- Clean your metal. Use a grinder or wire brush. Remove rust, paint, and oil.
- Check your ground clamp. Clamp to bare metal near your weld.
- Pick the right electrode for your job and material.
- Store rods dry and check for damaged coatings.
- Practice arc starting. Try both tapping and scratching. Keep your hand steady.
- Watch your travel speed. Don’t move too slow or too fast.
- Hold the correct angle. About 10-15 degrees, drag technique.
- Keep the right arc length. About the rod’s diameter above the work.
- Check machine settings and polarity. Use the type your rod requires.
Expert tip: If you’re still sticking after all this, try a new rod and a different machine. Sometimes, a worn-out welder or a bad batch of rods causes the issue.
Special Cases: Thin Metal, Overhead, And Vertical Welding
Sticking isn’t just a beginner’s problem. Tough positions make it worse.
- Thin metal: Use smaller rods (3/32” or 1/16”), higher amps, and move fast.
- Overhead/vertical welds: Slightly higher amps, keep the rod angle sharp, and use fast-freeze rods like 6010 or 6011.
- Cast iron or specialty metals: Use specialty rods, clean metal perfectly, and follow manufacturer instructions.
Hidden insight: In overhead and vertical welding, arc control is tougher. Rods stick if you pause or slow down too much.
Electrode Storage And Handling
Rod storage matters more than most welders think. Moisture and damage increase sticking.
- Keep rods in sealed containers or rod ovens.
- Don’t mix rod types in the same box.
- Use rods within 4-8 hours of opening, especially low-hydrogen types (7018).
Expert tip: For field welding, use a portable rod quiver with a heating element to keep rods dry on site.
Troubleshooting Checklist
If your stick welder keeps sticking, run down this list:
- Is my amperage high enough for the rod size?
- Is my metal clean and bare?
- Is the ground clamp on clean metal, close to the weld?
- Are my rods dry and undamaged?
- Am I using the right rod for the job?
- Is my machine set to the correct polarity?
- Am I moving at the right speed and holding the right angle?
- Are my cables, connectors, and machine in good shape?
- Am I practicing steady, consistent arc strikes?
One weak link can cause sticking. Fix each one, and your welding will improve fast.

Credit: www.youtube.com
Real-world Example: Diagnosing A Sticking Electrode
Mike, a fabrication shop owner, noticed his 7018 rods kept sticking on mild steel beams. He had set the welder to 90 amps for a 1/8” rod, thinking lower heat would protect the metal. The result: The rods stuck on every start.
He increased the amperage to 125, cleaned both the workpiece and the ground clamp spot, and switched to a fresh batch of rods stored in a rod oven. The rods struck easily and ran smooth beads. That small change—raising amperage and cleaning contact points—made all the difference.
Key lesson: Don’t be afraid of a hotter arc. Proper settings and prep stop sticking and give a stronger weld.
Data Table: Stick Welding Rods And Ideal Settings
| Rod Size | Amperage Range | Polarity | Best Use |
|---|---|---|---|
| 1/16” | 20-40 | AC/DC+ | Very thin steel, sheet metal |
| 3/32” | 40-90 | AC/DC+ | Light fabrication, thin plate |
| 1/8” | 90-150 | AC/DC+ | General purpose |
| 5/32” | 110-210 | AC/DC+ | Heavy plate, structural |
Pro tip: Always start at the low end of the range and increase until the rod lights easily and the arc feels strong.
Safety Note: What To Do If The Rod Sticks
If your rod sticks, don’t just yank it free. That can damage your machine or the rod holder.
Steps:
- Turn off the welder or release the trigger.
- Wait a few seconds for the rod to cool.
- Twist the rod gently to break it free.
- Clean the tip and restart.
Expert tip: If the rod tip is covered in melted metal, break off the flux and expose new rod before restarting.
Preventing Sticking: Long-term Habits
- Always clean your work. Even stick welding likes clean steel.
- Store rods dry. Rod ovens are a must for 7018 and low-hydrogen rods.
- Set the amperage right. Don’t guess—check a chart or the rod box.
- Check cables and clamps. Bad connections cause more trouble than you think.
- Practice. Good arc striking and travel speed are skills you build with repetition.
Non-obvious insight: Most welders blame rods or machines. But 80% of sticking comes from low amps, dirty metal, or poor ground. Fix these, and you’ll weld like a pro.
When To Seek Help
If you’ve checked everything and rods still stick, it’s time to ask for help. Call a welding supply shop, an instructor, or a trusted pro. Sometimes, a fresh set of eyes spots what you missed.
You can also review industry guides, such as those from the American Welding Society, or visit online forums and resources like Lincoln Electric for expert advice.
Frequently Asked Questions
Why Does My Stick Welder Keep Sticking When Striking An Arc?
Usually, your amperage is too low, or your metal is dirty. Make sure your machine is set correctly for the rod size and clean the weld area. A clean ground connection also helps prevent sticking during arc starts.
Can The Wrong Electrode Cause Sticking?
Yes. Using the wrong rod for your metal or position increases sticking. For example, 7018 rods need clean, dry storage and higher amps. Choose rods that match your project and follow their recommended settings.
Does Humidity Affect Stick Welding Rods?
Absolutely. Moisture in rods, especially 7018 and low-hydrogen types, causes sticking and poor welds. Always store your rods in a sealed container or rod oven to keep them dry and ready for use.
What’s The Best Way To Break A Stuck Rod Free?
Turn off the welder or release the trigger, let the rod cool for a few seconds, then twist it gently. Never yank it or hit the holder. If the tip is damaged, break off the flux before restarting.
How Do I Know If My Machine Is The Problem?
If you’ve tried correct settings, clean metal, and new rods but still have trouble, your machine might have internal issues or voltage drop. Try another welder on the same setup to confirm before seeking service.
Stick welding is a skill that improves with every bead you lay down. Understanding why your stick welder sticks—and fixing it—means less frustration and better welds every time you strike an arc. With the right setup, technique, and a little patience, you’ll get clean, strong welds and enjoy the process from start to finish.

