
Disclosure: This post contains affiliate links and I will be compensated if you make a purchase after clicking through my links. Learn More
Welding 1/4-inch steel is a common job for many workshops, construction sites, and hobbyists. But choosing the right welder size can be confusing, especially for those new to welding. The decision affects the strength, safety, and speed of your work.
Using the wrong size welder can lead to weak joints, wasted time, or even damage to your equipment. This article will explain everything you need to know to select the correct welder size for 1/4-inch steel. You’ll learn about the different types of welders, how much power you need, and what features help you get clean, strong welds.
We’ll also clear up common mistakes and answer the most important questions people ask about this topic.
Why Welder Size Matters For 1/4 Steel
Welder size is not just about the machine’s physical size. It means the power output and duty cycle that match your work. For 1/4-inch steel, you need enough heat and penetration to make sure the weld holds under stress. If your welder is too small, the weld may look fine but break under pressure. If it’s too big, you might waste money and energy, and struggle with thin materials.
Key reasons to choose the right welder size for 1/4 steel:
- Ensures strong welds that won’t fail
- Prevents equipment overload or damage
- Saves electricity and costs
- Makes your work faster and easier
Key Factors That Affect Welder Size
Before you pick a welder, you need to think about a few important points:
- Material Thickness: 1/4-inch (0.25 inch or 6.35mm) steel needs more power than thinner metal.
- Welding Process: MIG, Stick, and TIG are the main options. Each has different needs.
- Welding Position: Flat, vertical, or overhead positions affect how much power you need.
- Duty Cycle: This is how long the welder can run at a set power before it needs to cool.
- Power Supply: Do you have 110V or 220V at your location?
- Project Size: Are you doing small repairs or long production runs?
Understanding these factors helps you avoid buying a machine that is too weak or too powerful for your work.

Credit: metalfusionpro.com
Four Main Types Of Welders For 1/4 Steel
There are four main types of welders people use for 1/4-inch steel. Each type has its own strengths, weaknesses, and best uses. We’ll cover each one in detail:
- MIG (Metal Inert Gas) Welders
- Stick (SMAW) Welders
- TIG (Tungsten Inert Gas) Welders
- Flux-Cored Arc Welders
1. Mig Welders
MIG welding is popular for its speed and ease of use. It uses a wire fed through a gun with a shielding gas to protect the weld from air. For 1/4-inch steel, MIG is often the first choice for beginners and pros.
What size MIG welder do you need for 1/4-inch steel?
- Look for at least 200 amps of output for reliable results.
- 180 amps can work, but you’ll get better penetration and speed at 200 amps.
- Most home and shop MIG welders run on 220V for this thickness.
- Wire size should be 0.035-inch or 0.045-inch for best results.
Duty Cycle Example:
If a MIG welder lists a 30% duty cycle at 200 amps, you can weld for 3 minutes, then wait 7 minutes for cooling.
Advantages of MIG for 1/4-inch steel:
- Fast and easy to learn
- Good for long welds
- Works well in flat and horizontal positions
Limitations:
- Needs clean metal and gas supply
- Not the best for outdoor work unless using flux-cored wire
Real-world example:
If you weld a trailer frame with 1/4-inch steel, a 200-amp MIG welder will give you smooth, strong welds. You can adjust the voltage and wire speed for different joint types.
2. Stick Welders
Stick welding (also called SMAW) is a classic process. It uses a consumable electrode and works well outdoors, even if the metal is a bit rusty or dirty.
What size Stick welder for 1/4-inch steel?
- You need a machine with at least 180 amps of output.
- Most stick welders for this job use 220V.
- Use a 1/8-inch (3.2mm) or 5/32-inch (4.0mm) electrode for best results.
Duty Cycle Example:
A stick welder with a 40% duty cycle at 180 amps lets you weld for 4 minutes, then rest for 6 minutes.
Advantages of Stick welding for 1/4-inch steel:
- Works well on dirty or rusty steel
- Good for outdoor and windy conditions
- Simple and reliable
Limitations:
- More spatter, rougher finish than MIG or TIG
- Harder to learn for complete beginners
Practical insight:
Stick welding is popular for farm repairs or heavy equipment, where you may not have time to clean every piece of steel perfectly. If your project is outside or in a workshop without good ventilation, stick welding is a strong choice.
3. Tig Welders
TIG welding gives the most control and the best-looking welds, but it’s slower and takes more skill. It uses a tungsten electrode with a separate filler rod and shielding gas (usually argon).
What size TIG welder for 1/4-inch steel?
- Look for a machine with at least 200 amps AC/DC output.
- Most TIG welders for this thickness need 220V.
- You may need multiple passes to get a full weld.
Duty Cycle Example:
A 200-amp TIG welder at 20% duty cycle means 2 minutes welding, then 8 minutes cooling.
Advantages of TIG for 1/4-inch steel:
- Clean, precise welds
- Great for detailed or visible work
- Can weld many metals
Limitations:
- Slower than MIG or Stick
- Needs clean metal and good technique
- Higher cost for equipment
Real-world example:
Building a custom car frame with 1/4-inch steel often uses TIG welding for visible joints. It takes longer, but the welds are neat and strong.
4. Flux-cored Arc Welders
Flux-cored arc welding (FCAW) is similar to MIG but uses a special wire with a flux core. It does not always need shielding gas, making it good for outdoor jobs.
What size Flux-cored welder for 1/4-inch steel?
- Choose a machine with at least 200 amps.
- Use 0.045-inch flux-cored wire for best penetration.
- 220V supply works best for this thickness.
Duty Cycle Example:
A flux-cored welder with a 30% duty cycle at 200 amps lets you weld for 3 minutes, then pause for 7 minutes.
Advantages of Flux-cored welding for 1/4-inch steel:
- Good for outdoor use
- Handles dirty or rusty metal
- Faster than stick welding
Limitations:
- More smoke and spatter
- Not as clean as MIG or TIG
Practical insight:
Flux-cored welders are often used in construction and repair work, where weather or dirty metal would cause problems for MIG or TIG.
Required Amperage And Voltage For 1/4 Steel
Selecting the right amperage and voltage is key for 1/4-inch steel. If you go too low, your welds will not penetrate. If you go too high, you may burn through the metal or lose control.
| Welder Type | Recommended Amps | Recommended Voltage | Wire/Electrode Size |
|---|---|---|---|
| MIG | 180-200 | 22-26V | 0.035″ – 0.045″ |
| Stick | 180-200 | NA | 1/8″ – 5/32″ |
| TIG | 200+ | 18-22V | NA |
| Flux-cored | 200+ | 22-26V | 0.045″ |
Key insight:
Many beginners think a 140-amp welder can handle 1/4-inch steel. This is risky. You might get a bead, but it will not be strong enough for most uses. Always aim for at least 180 amps, preferably 200 amps, for full penetration and safety.
Power Supply: 110v Vs. 220v
One common question is if you can weld 1/4-inch steel with a 110V welder. The answer is simple: No, 110V is not enough for this thickness. You need a 220V supply for the amperage and duty cycle required.
Why 220V is needed:
- Delivers higher amperage for thicker metal
- Reduces risk of tripped breakers or low performance
- Lets you run the welder longer at high power
Real-world example:
A 140-amp MIG welder on 110V may weld thin steel, but it will struggle or fail on 1/4-inch. The arc will be weak, and the weld will have poor penetration.
Duty Cycle And Its Importance
Duty cycle is often ignored but is critical for 1/4-inch steel. It tells you how long you can weld before the machine needs to cool down.
How duty cycle works:
- A 30% duty cycle at 200 amps means you can weld for 3 minutes, then rest for 7 minutes in a 10-minute period.
- Higher duty cycles are better for long welds or production work.
Example of duty cycle comparison:
| Welder | Output Amps | Duty Cycle (%) | Weld Time (10 min) |
|---|---|---|---|
| Welder A | 200 | 30 | 3 min |
| Welder B | 200 | 60 | 6 min |
| Welder C | 200 | 20 | 2 min |
Key insight:
If you only weld in short bursts, a lower duty cycle may be fine. For long, continuous welds, a higher duty cycle is worth the extra cost.
The Role Of Wire And Electrode Size
Wire or electrode size matters as much as amperage for 1/4-inch steel.
- For MIG welding, use 0.035-inch or 0.045-inch wire.
- For Stick welding, use 1/8-inch or 5/32-inch electrodes.
- For Flux-cored welding, use 0.045-inch wire.
Using smaller wire or electrodes can lead to weak welds that don’t penetrate fully. Always match your wire or rod to the thickness of the steel and the power of your welder.
Comparing Welders For 1/4-inch Steel
Choosing between MIG, Stick, TIG, and Flux-cored welders depends on your project, skill, and budget. Here’s a quick comparison to help decide:
| Welder Type | Best For | Ease of Use | Outdoor Suitability | Finish Quality | Cost |
|---|---|---|---|---|---|
| MIG | General Fabrication | Easy | Fair | Good | Medium |
| Stick | Repairs, Outdoor | Medium | Excellent | Fair | Low |
| TIG | Precision, Visible Joints | Hard | Poor | Excellent | High |
| Flux-cored | Outdoor, Dirty Metal | Medium | Excellent | Fair | Medium |
Key insight:
Many beginners think MIG is always best, but stick and flux-cored are often better for outdoor or dirty work. TIG is best only if you need very clean, beautiful welds.
Common Mistakes When Choosing A Welder For 1/4 Steel
Many people make the same errors when picking a welder for 1/4-inch steel. Avoid these to save time and money:
1. Underestimating Amperage Needs:
A 140-amp welder cannot give strong welds on 1/4-inch steel, even if the specs say it can. Always go higher—180 to 200 amps is safer.
2. Ignoring Duty Cycle:
Long welds need a high duty cycle. If your welder keeps shutting down, you’ll get poor results and waste time.
3. Using The Wrong Wire Or Electrode:
Small wire or rods can’t carry enough current for deep penetration. Always use the correct size for 1/4-inch steel.
4. Overlooking Power Supply:
Trying to run a large welder on 110V leads to weak welds or tripped breakers. Make sure you have a 220V line.
5. Thinking All Welders Are The Same:
Each type (MIG, Stick, TIG, Flux-cored) has a purpose. Pick one that fits your project and skill.
6. Not Checking Real Reviews:
Manufacturer specs can be misleading. Look for real-world tests and user reviews. For example, Lincoln Electric has trustworthy data and guides.
Tip:
If you plan to upgrade your shop later, buy a slightly larger welder. It’s easier to turn down a powerful machine than to push a small one too hard.
Practical Examples: Matching Welders To Jobs
Below are some real scenarios. Each example shows the right welder size and setup for 1/4-inch steel:
Welding A Trailer Frame
- Material: 1/4-inch mild steel
- Welder: 200-amp MIG or Stick
- Wire/rod: 0.045-inch MIG wire or 1/8-inch stick rod
- Power: 220V
- Why: Needs strong, fast welds that hold up to road stress
Repairing A Farm Gate
- Material: 1/4-inch steel, possibly rusty
- Welder: 180-amp Stick
- Electrode: 5/32-inch rod
- Power: 220V
- Why: Stick works well on dirty steel and outdoors
Building A Custom Car Chassis
- Material: 1/4-inch steel tubing
- Welder: 200-amp TIG
- Filler: ER70S-2 rod
- Power: 220V
- Why: Needs clean, strong, and neat welds for looks and safety
Outdoor Structural Welding
- Material: 1/4-inch steel beams
- Welder: 200-amp Flux-cored
- Wire: 0.045-inch flux-cored
- Power: 220V
- Why: Handles wind and dirty surfaces

Credit: stvcnc.com
What Features To Look For In A Welder For 1/4 Steel
When buying a welder for 1/4-inch steel, look for these features:
- High amperage (180-200A or more)
- 220V input
- High duty cycle (30% or better at full power)
- Compatible wire/electrode sizes
- Reliable brand with good support
- Clear controls and easy settings
- Good warranty and service
- Positive user reviews
Many welders also include extras like spool guns, foot pedals, or multi-process capability, but these are less important than the basics.
Non-obvious insight:
Some newer inverter welders can give higher duty cycles and more stable arcs, even at the same amperage. They are often lighter and more energy-efficient than older transformer models.
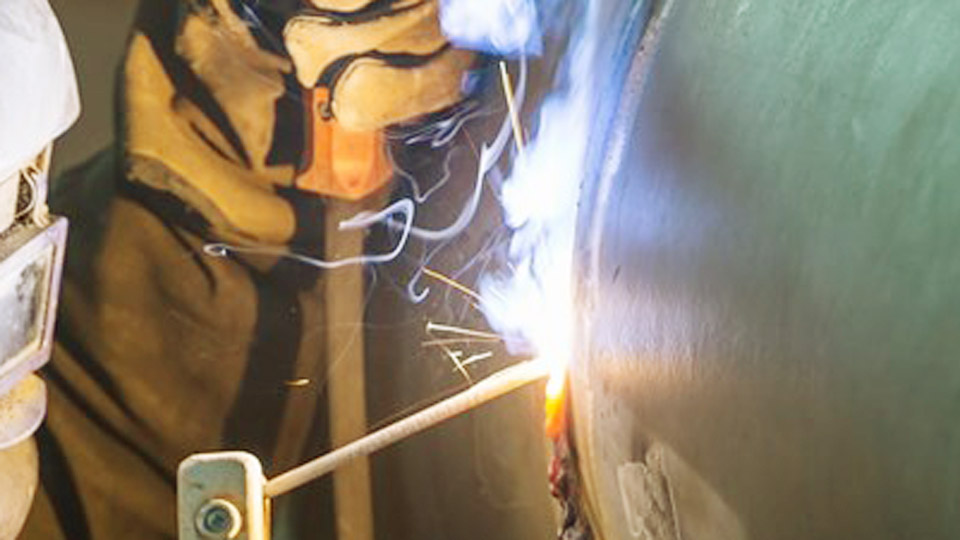
Safety Tips For Welding 1/4 Steel
Welding thick steel creates a lot of heat, sparks, and fumes. Always follow safety rules:
- Wear a proper welding helmet (auto-darkening is best)
- Use gloves and fire-resistant clothing
- Work in a well-ventilated area
- Keep a fire extinguisher nearby
- Clamp your workpiece securely
- Let the metal cool before touching
Non-obvious insight:
For 1/4-inch steel, the arc is much brighter than for thin metal. Make sure your helmet shade is dark enough (shade 10-13).
Credit: garageweld.com
How To Get The Best Welds On 1/4 Steel
Strong, clean welds need the right setup and technique.
- Clean the metal: Remove rust, oil, and paint.
- Set the correct amps/volts: Use the welder’s chart or manual.
- Use the right wire/rod: As listed above.
- Keep a steady hand: Move at a steady speed.
- Watch the weld pool: Make sure it penetrates both pieces.
- Check for defects: Look for cracks, holes, or weak spots.
- Practice: Try on scrap steel before working on your project.
Non-obvious insight:
For very thick joints, you may need to bevel the edges of the steel. This means grinding a small angle so the weld can fill the joint fully and reach the root.
Frequently Asked Questions
What Is The Minimum Welder Size For 1/4-inch Steel?
The minimum is 180 amps for MIG, Stick, or Flux-cored welding. For TIG, you want at least 200 amps. Lower-powered welders cannot give full penetration or strong joints.
Can I Weld 1/4 Steel With A 110v Welder?
No. 110V welders do not provide enough power or duty cycle for 1/4-inch steel. You need a 220V supply to get the needed heat and penetration.
Which Welding Process Is Best For 1/4-inch Steel?
MIG welding is the most popular for ease and speed. Stick welding is best for outdoor or dirty metal. TIG welding is best for clean, visible joints. Flux-cored is strong for outdoor and windy jobs.
How Thick Can A 200-amp Welder Weld?
A 200-amp welder can handle steel up to 3/8 inch in a single pass, but is ideal for 1/4-inch. For thicker steel, you may need to weld in multiple passes or use a more powerful machine.
Do I Need To Preheat 1/4-inch Steel Before Welding?
Usually, you do not need to preheat 1/4-inch mild steel. But for very large pieces, cold weather, or special alloys, a light preheat (around 150°F) can help prevent cracking.
Choosing the right welder size for 1/4-inch steel is simple when you know what to look for. Focus on amperage, duty cycle, wire/electrode size, and power supply. Match your welder to the job and your skill level. With the right setup, you’ll get strong, safe, and reliable welds every time.

