
Disclosure: This post contains affiliate links and I will be compensated if you make a purchase after clicking through my links. Learn More
Lighting an acetylene torch may look simple, but safety and method matter much more than most people think. If you want to use an acetylene torch for metalwork, plumbing, or repairs, you need to know the correct steps. This process is not just about turning knobs and striking a spark.
It involves understanding gas behavior, pressure settings, and fire risk. Many people skip the careful checks, which can cause dangerous situations.
This guide explains how to start an acetylene torch, step by step. You will learn about the equipment, safe practices, and what to avoid. If you want to light a torch without stress, this article will help you build real confidence.
You will find practical details, not just the basic steps.
What Is An Acetylene Torch?
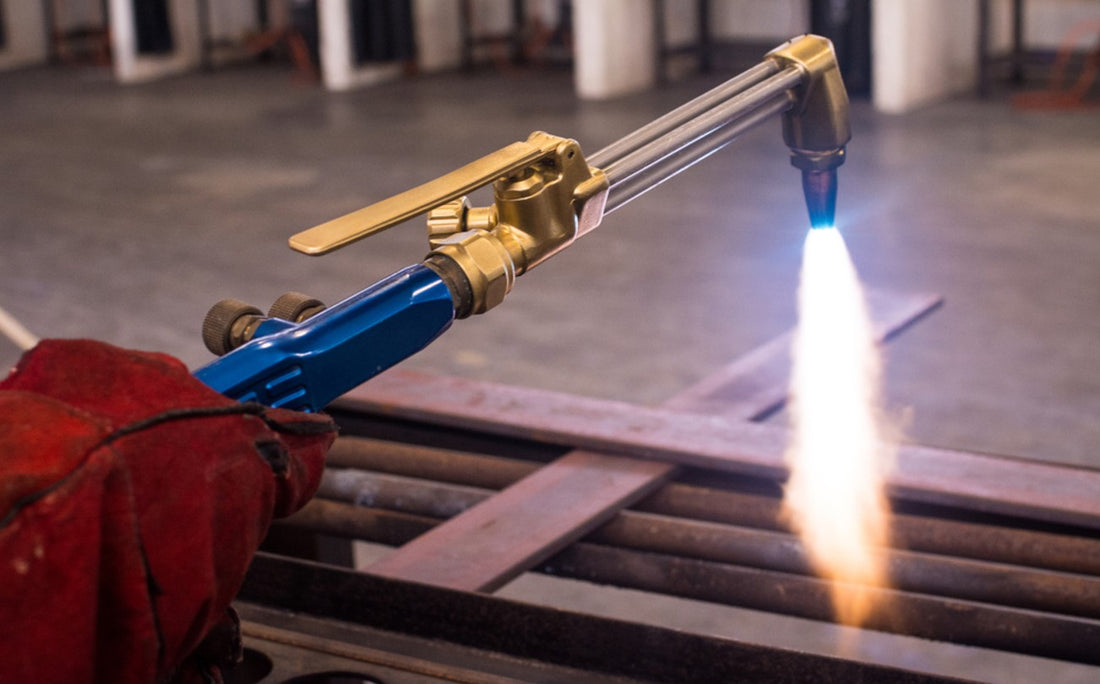
An acetylene torch is a tool that mixes acetylene gas and oxygen to make a hot flame. This flame can melt or cut metal. Welders, plumbers, and artists use these torches for tasks such as welding, brazing, and heating.
The torch works by mixing two gases at the tip. Acetylene burns at a high temperature, especially with oxygen. This makes the torch strong enough to cut steel and other metals.
Why Safety Matters
Acetylene is a flammable gas. If you make a mistake, you can cause a fire, explosion, or injury. Every year, accidents happen because people skip checks or ignore warnings. For example, setting the wrong pressure can burst hoses, or a leak can start a fire.
Always treat the torch with respect. Never rush or skip steps. Safety is the first step to good results.
Parts Of An Acetylene Torch Setup
Before you start, you should know the main parts:
- Acetylene cylinder – Holds the acetylene gas.
- Oxygen cylinder – Holds the oxygen gas.
- Regulators – Control gas pressure from each cylinder.
- Hoses – Carry gases to the torch.
- Torch handle and valves – Where you hold and control the torch.
- Mixing chamber – Where gases mix before burning.
- Torch tip – Where the flame comes out.
- Spark lighter – A tool to safely create a spark.
Each part has a purpose. You cannot use the torch safely if you do not know what each part does.
Personal Protective Equipment (ppe)
Always wear the right gear:
- Welding goggles or face shield – Protects your eyes from sparks and glare.
- Fire-resistant gloves – Keeps your hands safe from heat.
- Long-sleeved, cotton clothing – Synthetic fabrics can melt and burn.
- Closed-toe shoes – Protects your feet from hot metal.
- Ear protection (if working in a noisy area).
Never skip these. Injuries can happen in seconds.
Preparing Your Workspace
Set up your area before lighting the torch:
- Work in a space with good airflow. Acetylene can build up and cause fire risk in closed rooms.
- Clear away flammable items: Paper, rags, paint, solvents.
- Keep a fire extinguisher rated for gas fires nearby.
- Make sure cylinders stand upright and are secure. A falling cylinder can break a valve and cause a gas leak.
- Check that the floor is dry and not slippery.
A good setup stops accidents before they start.
Pre-use Checks And Inspection
Check everything before you start:
- Examine hoses for cracks or leaks.
- Look at regulators and fittings for damage or rust.
- Tighten all connections with a proper wrench, not by hand.
- Inspect the torch tip for blockages.
- Test the spark lighter. Do not use matches or lighters.
Never use damaged gear. If you find a problem, fix it before going further.
Step-by-step: How To Start An Acetylene Torch
Lighting an acetylene torch follows a specific order. Each step matters for safety and control.
1. Open Cylinder Valves Correctly
First, open the acetylene and oxygen cylinder valves. Here’s how:
- Stand to the side of the cylinders, not in front.
- Use the right key or wrench, not pliers.
- Open the acetylene valve about a half turn. It is designed to close quickly if needed.
- Open the oxygen valve fully. This type of valve seals better when fully open.
Always open acetylene first, but you will light it before adding oxygen later.
2. Set The Pressure With Regulators
Each torch and tip has a recommended pressure. Check the manual for your model.
- Turn the regulator adjustment screw until the gauges show the correct working pressure.
- Acetylene is usually set between 5-7 psi for general use.
- Oxygen pressure depends on the job but often is 10-20 psi.
Never set acetylene pressure above 15 psi. Acetylene becomes unstable at higher pressures, which can cause an explosion.
3. Bleed Air From The Lines
Before lighting, clear air from the hoses:
- Open the acetylene valve on the torch handle for a few seconds, then close.
- Do the same with the oxygen valve.
- This step removes air and prevents a “pop” or uneven flame.
Skipping this step can cause a loud noise or damage the torch tip.
4. Check For Leaks
Leaks are a major hazard. Test for leaks before lighting:
- Mix soapy water and brush it on all connections.
- Watch for bubbles. Bubbles mean a leak.
- If you find a leak, tighten or replace the part before going further.
Never use a flame to check for leaks.
5. Purge The Hoses
After checking for leaks, you should purge again to make sure only gas is in the lines.
- Open and close each torch valve briefly—acetylene first, then oxygen.
This stops backfires and gives a clean flame.
6. Open Acetylene Valve On Torch Handle
Now, open the acetylene valve on the torch handle slightly. You should hear a gentle hiss.
- Do not open too much. If you hear a loud rush, close and try again.
- Hold the torch away from your body and other objects.
This step is key for a safe, small flame.
7. Ignite Acetylene Gas
Use a spark lighter to ignite the gas:
- Hold the lighter at the torch tip.
- Squeeze the trigger to make a spark.
- The acetylene gas should light with a soft “pop.”
- If it does not, close the valve and try again.
Never use matches or lighters. They can cause burns.
8. Adjust Acetylene Flame
After lighting, the flame will be yellow and smoky.
- Adjust the acetylene valve until the flame is about 6-8 inches long.
- Do not add oxygen yet.
- The flame should be steady, not flickering or blowing out.
A yellow flame means only acetylene is burning.
9. Slowly Add Oxygen
Now, open the oxygen valve on the torch handle slowly.
- The yellow flame will become blue and smaller.
- Continue until the inner blue cone appears sharp and defined.
- This is called a neutral flame.
A neutral flame is best for welding and general work. If the flame is too “feathery” or has a long tail, you added too much acetylene. If it is noisy or pointed, you added too much oxygen.
10. Fine-tune The Flame
Adjust both valves until the flame is stable:
- The inner blue cone should be clear and about 1/4 inch long.
- The flame should not “jump” or make a whistling sound.
- If the flame pops or blows out, close both valves, wait a moment, and restart.
Fine-tuning helps you get the right temperature for your job.
Common Mistakes When Starting An Acetylene Torch
Many beginners make simple errors. Avoid these for safety and better results:
- Opening valves too quickly – This can cause a pressure surge.
- Setting acetylene pressure above 15 psi – Very risky and can cause explosion.
- Skipping leak checks – Even small leaks can start fires.
- Using wrong PPE – Burns and eye injuries are common.
- Lighting with a match – Always use a spark lighter.
- Holding the torch too close to your body – Hot gas or flame can cause burns.
- Not purging air from hoses – This can cause a loud “pop” and mess up the flame.
- Using damaged hoses or tips – Always inspect before use.
- Leaving cylinders unsecured – Cylinders can fall and break a valve.
- Not reading the manual – Each model is different.
These mistakes are easy to avoid if you follow each step.

Credit: www.wikihow.com
Practical Tips For Better Results
You can improve your process with a few extra habits:
- Mark your regulator settings for your most common jobs.
- Keep extra torch tips clean and ready.
- Store spark lighters in a dry place.
- Replace hoses every few years, even if they look okay.
- Wipe down the torch after use to remove soot.
These small steps save time and prevent problems.
What To Do If The Flame Goes Out
Sometimes the flame will go out by itself, or “blow out.” If this happens:
- Close both torch valves at once.
- Wait a few seconds for unburned gas to clear.
- Check for blockages or leaks.
- Relight using the same steps.
Never try to relight if you hear a hissing sound. Always check for leaks first.
How To Shut Down An Acetylene Torch Safely
Turning off the torch is as important as lighting it. Follow these steps:
- Close the acetylene valve on the torch handle first. The flame will go out.
- Close the oxygen valve next.
- Turn off the cylinders: Acetylene first, then oxygen.
- Open both torch valves to bleed off leftover gas, then close.
- Turn regulator screws counterclockwise to release pressure on the gauges.
- Store the torch and cylinders in a safe, upright position.
This method prevents gas leaks and pressure buildup.
Storing Equipment After Use
Proper storage prevents accidents:
- Always stand cylinders upright and secure with chains or straps.
- Store away from heat sources, sunlight, and flammable materials.
- Cap cylinders when not in use.
- Coil hoses loosely to prevent kinks.
- Keep regulators and torch handles in a dry, dust-free spot.
Check local rules for safe gas storage in your area.

Credit: www.youtube.com
Comparing Acetylene Torch Types
Different torches have different uses. The main types are welding torches, cutting torches, and heating/brazing torches. Here is a comparison:
| Torch Type | Main Use | Flame Temp (°C) | Tip Shape |
|---|---|---|---|
| Welding | Joining metal | ~3200 | Small, round |
| Cutting | Separating metal | ~3400 | Flat, wide |
| Brazing/Heating | Heating/brazing | ~3000 | Wide, soft |
Each type needs different pressure settings and tips.
Pressure Settings For Common Torch Tasks
Correct pressure is important for safety and performance. Here is a guide for typical jobs:
| Task | Acetylene Pressure (psi) | Oxygen Pressure (psi) | Tip Size |
|---|---|---|---|
| Welding thin steel | 5 | 10 | #0 |
| Cutting 1/2″ steel | 7 | 20 | #1 |
| Brazing | 4 | 8 | #0 |
Always check your torch manual for exact numbers.
Signs Of A Good Vs. Bad Flame
Understanding the flame is important for good results. Here is a simple comparison:
| Flame Type | Color | Sound | Result |
|---|---|---|---|
| Neutral | Blue, clear inner cone | Steady, soft | Best for welding |
| Carburizing | Blue with feather | Soft, hissing | Adds carbon, not good for steel |
| Oxidizing | Short, sharp blue | Loud, whistling | Can damage metal |
Adjust valves until you get a neutral flame for most jobs.
Maintenance And Care
Keep your torch in good shape for safety and long life:
- Clean torch tips after each use. Use a tip cleaner, not a needle or wire.
- Check hoses and connections every week.
- Replace damaged parts right away.
- Have regulators checked by a pro every few years.
- Store gas cylinders in a cool, dry spot.
Preventive care stops most problems before they start.
Credit: simpleweld.com
What To Do In Case Of An Emergency
If something goes wrong, act fast and stay calm:
- If you smell gas, shut off all valves and leave the area.
- If a fire starts, use a class B fire extinguisher.
- Call emergency services if you cannot control the fire.
- Do not try to fix leaks while gas is flowing.
- Move cylinders away from heat if safe to do so.
Know where your fire extinguisher and exits are before you start work.
Key Insights Most Beginners Miss
Many first-time users focus only on lighting the torch. But two important points are often missed:
- Always keep the spark lighter close but not in the work area while cutting or welding. This saves time and prevents searching for it with gloves on.
- Mark regulator settings for each tip and job. Write them on tape near your setup. This avoids wrong pressures and wasted gas.
These habits improve both safety and work speed.
Resources For Further Learning
If you want to learn more, read official guides or take a class. The American Welding Society has clear safety rules and tips. You can also find useful instructions on Wikipedia: Oxy-fuel welding and cutting.
Frequently Asked Questions
How Do I Know If My Acetylene Torch Is Leaking?
Test for leaks by brushing soapy water on all connections and valves. If you see bubbles, you have a leak. Never use a flame to check. Fix all leaks before lighting the torch.
What Should I Do If The Flame Pops Or Blows Out?
Close both torch valves right away. Wait a few seconds for gas to clear. Check for blockages, leaks, or wrong pressure. Relight using the same safe steps.
Can I Use An Acetylene Torch Indoors?
Only use an acetylene torch indoors if the room has good ventilation. Poor airflow increases fire risk and can lead to gas buildup. Always keep a fire extinguisher nearby.
Why Should I Never Set Acetylene Pressure Above 15 Psi?
Acetylene becomes unstable and can explode if set above 15 psi. Always stay below this limit. Check your regulator and torch manual for safe settings.
What Is The Best Way To Store Acetylene Cylinders?
Keep cylinders upright and secure them with chains or straps. Store them away from heat, sunlight, and flammable materials. Cap the cylinders when not in use and keep them in a dry area.
Using an acetylene torch safely requires careful steps and attention. With the right habits, you can avoid accidents and get better results. Always respect the equipment and follow the steps every time. This not only protects you but also keeps your workspace safe for everyone.

