Disclosure: This post contains affiliate links and I will be compensated if you make a purchase after clicking through my links. Learn More
Many people think that joining copper pipes always needs a torch and solder. The truth is, there are several ways to connect copper pipes without using any heat. These no-solder solutions are safer, faster, and great for beginners or those who want to avoid the risks of open flames.
Whether you want to fix a leak, install a new line, or make changes to your plumbing, you have strong options. This guide explains the most reliable methods, shows you the tools you need, and gives you step-by-step instructions. By the end, you will know how to join copper pipes without solder and feel confident about your project.
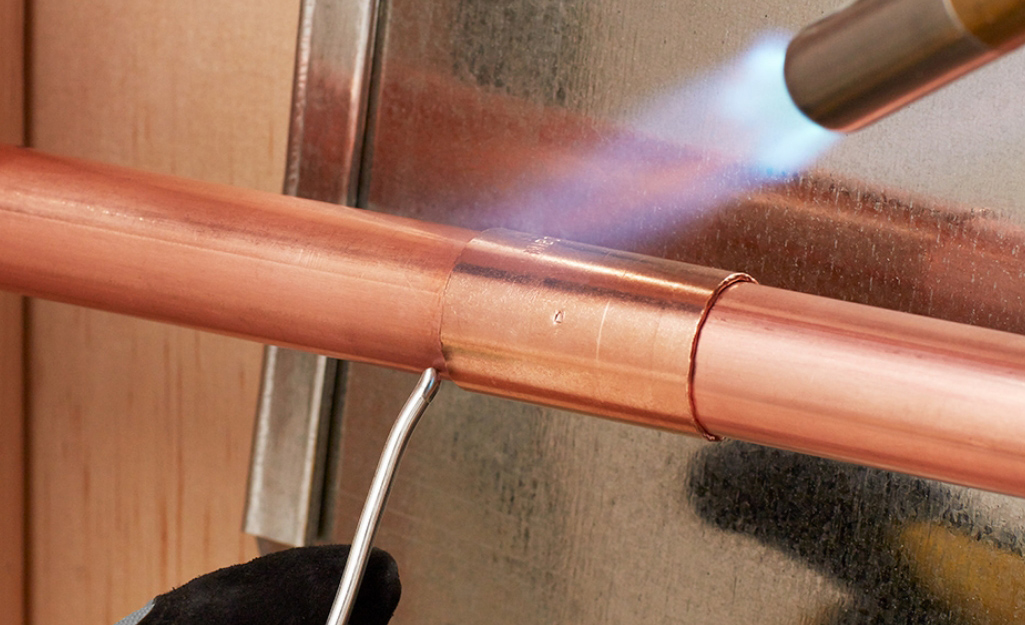
Why Avoid Soldering?
Many homeowners and even some professionals look for alternatives to soldering. Open flames can cause fires, especially in tight spaces or near wood. Soldering also requires skill, patience, and the right materials. Not everyone wants to buy a torch or deal with the safety risks.
With no-solder methods, you can connect pipes with less stress and often finish faster. These methods also make repairs easier if you need to disconnect pipes later.
Basic Tools And Materials
Before you start, gather these basic tools and materials for most no-solder joining methods:
- Pipe cutter for clean, straight cuts.
- Deburring tool or sandpaper to smooth pipe edges.
- Measuring tape for accuracy.
- Marker for marking cut lines.
- Fittings (push-fit, compression, or press fittings).
- Pipe wrenches or adjustable wrench (for compression fittings).
- Cleaning brush for removing dirt from pipe ends.
- PTFE tape (sometimes called Teflon tape) for threaded connections.
Having these tools nearby saves time. Each joining method may need extra items, but this list covers most basics.
Method 1: Push-fit Fittings
Push-fit fittings, often called “push-to-connect,” are a popular no-solder option. Brands like SharkBite have made these fittings famous. They use an internal O-ring and metal teeth to grip and seal the pipe.
How Push-fit Fittings Work
Push-fit fittings have a simple design. When you push the copper pipe into the fitting, metal teeth grab the pipe, and a rubber O-ring makes a watertight seal. This method is very fast and does not need glue, solder, or special tools.
Step-by-step Guide
- Cut the Pipe: Use a pipe cutter for a straight cut.
- Deburr the Edge: Remove any sharp edges with a deburring tool or sandpaper.
- Clean the Pipe: Wipe dirt and grease from the ends.
- Mark Insertion Depth: Most fittings show how far the pipe should go in. Mark this with a marker.
- Push Pipe Into Fitting: Push until the pipe stops at your mark.
- Check Connection: Tug gently to make sure it holds.
Advantages
- Very fast installation
- No special tools or skills needed
- Removable and reusable
- Great for tight spaces
Limitations
- More expensive than other fitting types
- Not all brands work with all pipe sizes or types
- May not be allowed behind walls in some building codes
Example
If you need to fix a leaking elbow, you can cut out the bad part and add a push-fit elbow in under 5 minutes. This is much faster than soldering.
Non-obvious Insight
Push-fit fittings are sensitive to pipe surface. If the pipe has scratches or is dirty, the O-ring might not seal. Always clean and smooth the pipe end for best results.
Method 2: Compression Fittings
Compression fittings use a metal ring (ferrule) and a nut to make a tight seal on the pipe. These are common for water supply lines, sinks, and toilets.
How Compression Fittings Work
A compression fitting has three main parts: the body, the ferrule (ring), and the nut. When you tighten the nut, it squeezes the ferrule onto the pipe, making a strong seal without heat.
Step-by-step Guide
- Cut and Deburr Pipe: Always start with a clean, straight cut.
- Slide Nut and Ferrule On: Put the nut on first, then the ferrule.
- Insert Pipe into Fitting Body: Push it all the way in.
- Tighten Nut: Use a wrench to hold the fitting body. Tighten the nut with a second wrench. Do not overtighten.
- Check for Leaks: Turn on the water and check.
Advantages
- Strong, reliable connection
- Easy to disconnect later
- Widely available
Limitations
- Needs wrenches
- Can leak if not tightened correctly
- Ferrule can deform pipe if overtightened
Example
If you are installing a new faucet, you often use compression fittings for the supply lines. You can connect everything without using a torch or glue.
Non-obvious Insight
Use two wrenches—one to hold the fitting, one to turn the nut. This keeps the fitting from twisting and helps prevent leaks.

Credit: www.youtube.com
Method 3: Press Fittings
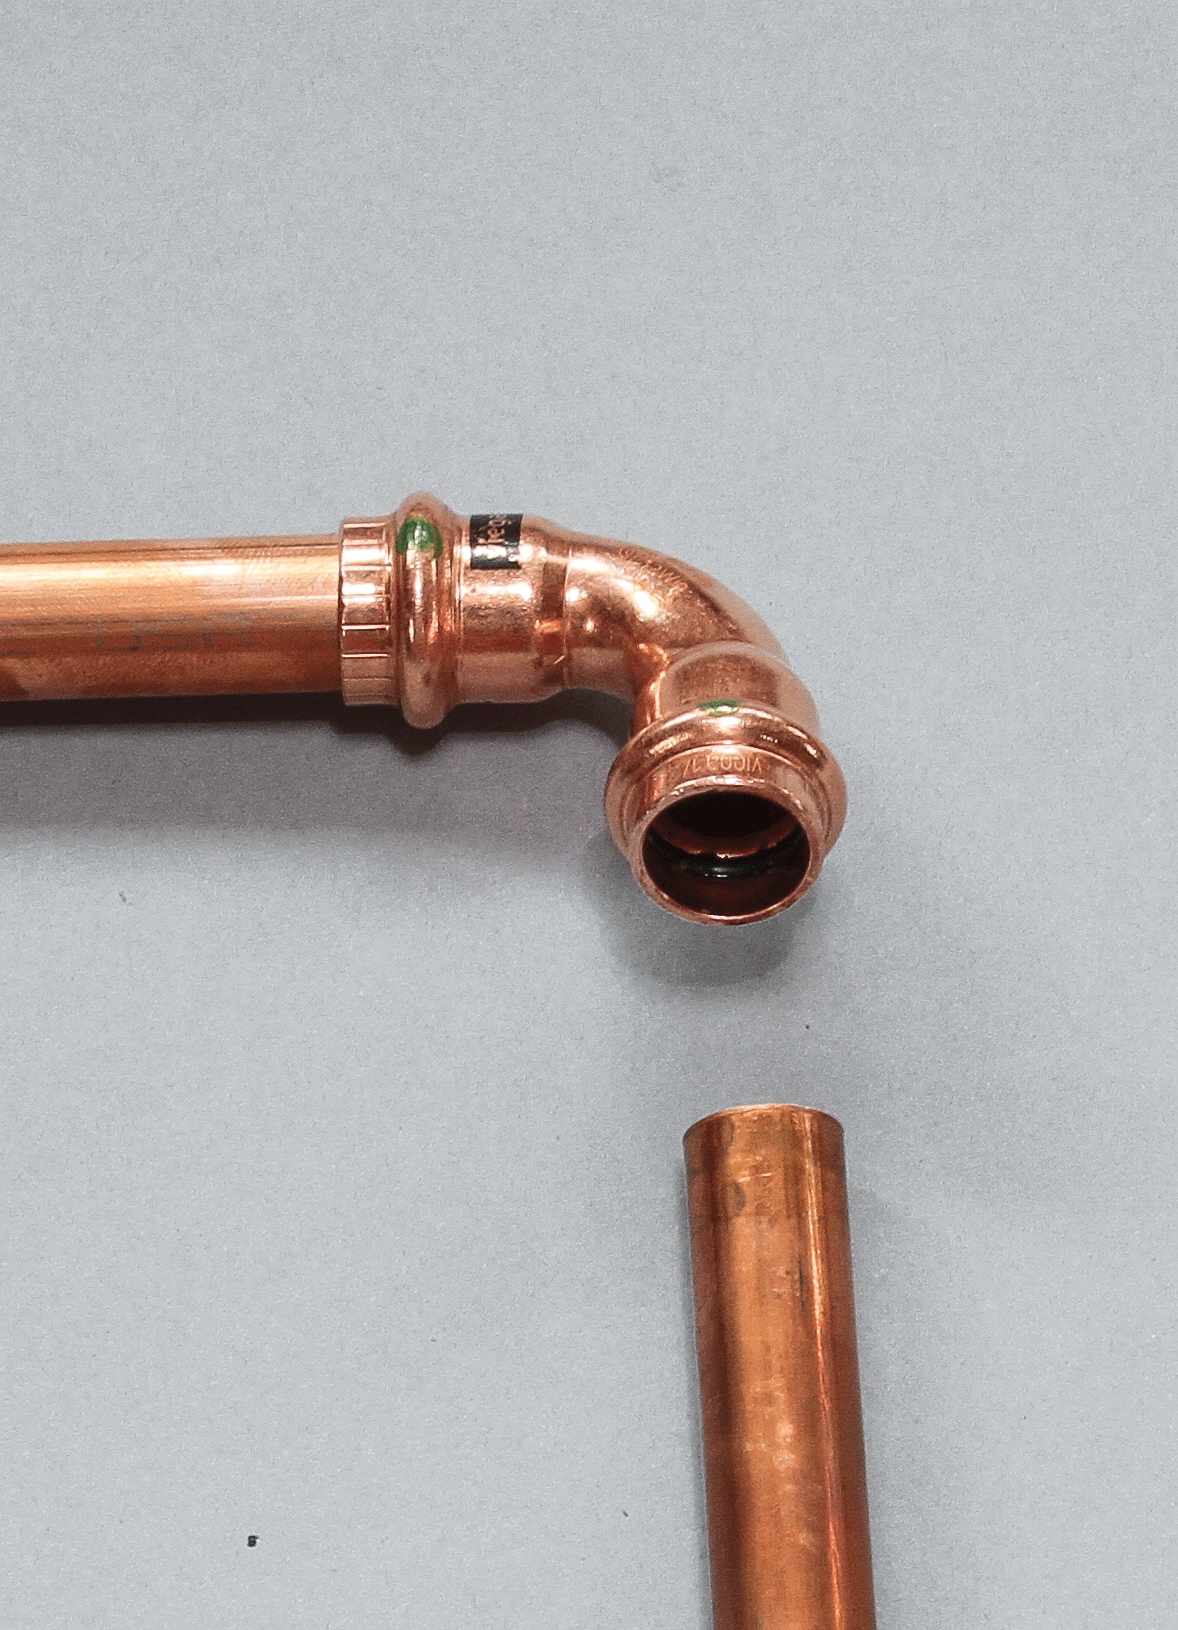
Press fittings use a special tool to press the fitting onto the pipe. The inside has a metal sleeve and an O-ring. When you squeeze the tool, the sleeve grabs the pipe and the O-ring seals it.
How Press Fittings Work
These fittings slide over the pipe. A press tool squeezes the fitting, making a permanent, watertight seal. Common brands include Viega and NIBCO.
Step-by-step Guide
- Cut and Deburr Pipe: Clean the end.
- Mark Insertion Depth: Use a marker.
- Push Fitting Onto Pipe: Insert to the mark.
- Use Press Tool: Place the tool jaws around the fitting and press.
- Inspect the Connection: Check for a complete press.
Advantages
- Extremely strong seal
- No flame or solder
- Approved by building codes
- Good for large projects
Limitations
- Press tools are expensive
- Not cost-effective for small jobs
- Fittings are single-use
Example
Large plumbing jobs in commercial buildings often use press fittings. The speed and strength save time and reduce risk.
Non-obvious Insight
Many tool rental shops offer press tools. You do not have to buy one for a small project.
Method 4: Threaded Adapters
Some copper fittings have threads. You can connect these to threaded pipes or valves using PTFE tape for a watertight joint.
How Threaded Adapters Work
A threaded copper adapter connects to the copper pipe on one side and has male or female threads on the other. You screw it onto another threaded fitting.
Step-by-step Guide
- Cut and Deburr Pipe: Prepare the copper end.
- Attach Adapter: Use a push-fit, compression, or press fitting on the copper side.
- Wrap Threads with PTFE Tape: Wrap the threaded end 2–3 times.
- Screw On Matching Fitting: Tighten by hand, then with a wrench.
- Check for Leaks: Test with water.
Advantages
- Connects copper to other materials (like iron or plastic)
- Easy disassembly
Limitations
- Threaded joints may leak if not taped well
- Not for tight bends
Example
If you need to connect a copper pipe to a water heater with threaded ports, a threaded adapter is often the best choice.
Non-obvious Insight
Use only enough PTFE tape to cover the threads. Too much tape can split the fitting.
Method 5: Flare Fittings
Flare fittings are common in gas lines and refrigeration but work for water pipes too. You flare the copper pipe end with a special tool, then use a nut to make a seal.
How Flare Fittings Work
You use a flaring tool to widen the pipe end into a cone shape. The nut presses the flared end against the fitting body to make a leak-proof seal.
Step-by-step Guide
- Cut and Deburr Pipe: Clean the end.
- Slide Flare Nut On: Before flaring.
- Use Flaring Tool: Clamp the pipe and turn the cone to flare the end.
- Connect to Fitting: Place the flared end against the fitting body.
- Tighten Flare Nut: Use a wrench.
Advantages
- Very strong seal
- Good for high pressure
- Approved for gas lines
Limitations
- Needs a flaring tool
- More steps than push-fit or compression
Example
Air conditioning systems often use flare fittings for copper pipes.
Non-obvious Insight
Do not reuse flared ends. If you disconnect, cut back and flare again for a reliable seal.
Comparing No-solder Methods
Below is a comparison of the main no-solder joining methods for copper pipe:
| Method | Tools Needed | Speed | Skill Level | Reusable | Cost |
|---|---|---|---|---|---|
| Push-Fit | Pipe Cutter | Very Fast | Beginner | Yes | High |
| Compression | Pipe Cutter, Wrenches | Fast | Beginner-Intermediate | Yes | Medium |
| Press Fitting | Pipe Cutter, Press Tool | Very Fast | Intermediate | No | Very High |
| Threaded Adapter | Pipe Cutter, Wrench | Medium | Beginner | Yes | Low |
| Flare Fitting | Pipe Cutter, Flaring Tool, Wrench | Medium | Intermediate | No | Medium |
Credit: www.finehomebuilding.com
Common Problems And Solutions
Every joining method has potential problems. Here are some issues and how to fix them.
Push-fit Leaks
- Pipe not fully inserted: Mark insertion depth and push firmly.
- Dirty or scratched pipe: Clean and smooth the pipe end.
- Damaged O-ring: Replace the fitting.
Compression Leaks
- Nut not tight enough: Tighten with two wrenches, but do not overtighten.
- Ferrule cracked: Replace with a new ferrule.
- Pipe cut unevenly: Re-cut for a flat end.
Press Fitting Problems
- Incomplete press: Check tool alignment. Repress if possible, or cut out and replace.
- Dirty pipe: Always clean before pressing.
Threaded Adapter Leaks
- Too much PTFE tape: Use just enough to cover threads.
- Loose joint: Tighten with a wrench.
Flare Fitting Leaks
- Flare not even: Re-flare with the correct tool.
- Nut not tight: Tighten gently, do not overtighten.
Safety Tips For No-solder Pipe Joining
Even without heat, you need to work safely.
- Turn off water supply before starting.
- Wear gloves to protect hands from sharp copper edges.
- Use safety glasses to keep metal shavings out of your eyes.
- Secure pipes before cutting.
- Work in a clean area to avoid losing small parts.
Credit: www.homedepot.com
How To Choose The Best Method
Your best method depends on your project, tools, budget, and skill.
For Small, Quick Repairs
Push-fit fittings are the fastest and easiest. You do not need special tools or much experience.
For Permanent, High-pressure Joints
Press fittings make the strongest seal but need a press tool. Good for new installations or major work.
For Connecting To Appliances
Compression fittings are common for water supplies, sinks, and toilets. They are easy to remove if you need to replace something.
For Connections To Other Materials
Threaded adapters work well when you need to connect copper to steel or PVC.
For Gas Or Refrigeration
Flare fittings are the standard. They handle high pressure and vibrations better.
Table: Best Use Cases
| Method | Best Use | Not Recommended For |
|---|---|---|
| Push-Fit | Repairs, Temporary fixes, DIY | Behind walls (some codes) |
| Compression | Appliance hook-ups | High-vibration areas |
| Press Fitting | New installations, Large projects | Small DIY repairs |
| Threaded Adapter | Connecting to other pipe types | Hidden joints |
| Flare Fitting | Gas, Refrigeration, High pressure | General water plumbing |
Mistakes To Avoid
Many first-timers make the same errors. Here are some to watch for:
- Skipping Pipe Cleaning: Dirt, grease, or rough edges can cause leaks. Always clean and deburr.
- Not Tightening Enough: Especially for compression and flare fittings.
- Using Wrong Fitting Size: Measure pipes carefully. Copper comes in different sizes (Type L, M, K).
- Mixing Brands: Not all fittings work together. Stick to one brand when possible.
- Ignoring Local Codes: Some methods are not approved in every area. Check codes before installing.
Cost Comparison
Let’s compare the average cost for a simple connection (as of 2024):
| Method | Fitting Price | Tool Cost | DIY Friendly |
|---|---|---|---|
| Push-Fit | $5–$8 | $10 (cutter) | Yes |
| Compression | $2–$4 | $20 (wrenches) | Yes |
| Press Fitting | $4–$7 | $300–$1,000 (tool, rent $30/day) | Somewhat |
| Threaded Adapter | $3–$5 | $10 (wrench) | Yes |
| Flare Fitting | $3–$6 | $30 (flaring tool) | Yes |
Insight: Renting a press tool makes sense for big jobs, but not for small repairs.
Practical Tips For First-time Users
- Buy extra fittings in case you make a mistake.
- Practice on scrap copper before working on your main line.
- Check for leaks after every connection. Use a dry paper towel to spot moisture.
- Label your shutoff valves so you can turn off the right water supply quickly.
- Save receipts and packaging in case you need to exchange parts.
Removing No-solder Fittings
Sometimes you need to remove or replace a fitting. Here’s how:
- Push-fit fittings: Use the removal tool (often a small plastic clip) to release the teeth.
- Compression fittings: Loosen the nut. You may need to cut off the ferrule and nut.
- Press fittings: Cut out the fitting; they are permanent.
- Threaded adapters: Unscrew using a wrench.
- Flare fittings: Unscrew the nut; cut and re-flare the pipe for a new connection.
Checking For Leaks
After installing any fitting, always check for leaks:
- Turn water on slowly.
- Watch the joint for drips.
- Wipe with a dry towel and check for moisture.
- If you see a leak, shut off water and fix the problem before using the pipe.
For gas lines (with flare fittings), use a soapy water solution. Bubbles mean a leak.
When To Call A Professional
Most homeowners can use these methods for small jobs. Call a plumber if:
- The pipe is in a wall or hard to reach.
- You have high water pressure or gas lines.
- You are not sure about your local code.
- You have repeated leaks after repairs.
Professional help can save time and prevent damage.
More Resources
For more technical details or code information, check your local building department or a high-quality online resource such as Wikipedia.
Frequently Asked Questions
How Long Do Push-fit Fittings Last?
Push-fit fittings can last 25 years or more if installed correctly. They are tested for long-term use but should not be buried in walls unless local code allows.
Can I Reuse Compression Fittings?
You can often reuse the nut, but not the ferrule. For a leak-free seal, use a new ferrule when reconnecting.
Are Press Fittings Worth The Cost For Small Jobs?
For small DIY jobs, press fittings are often too expensive because of the tool cost. They are best for big projects or if you can rent the tool cheaply.
Is It Safe To Use No-solder Fittings For Drinking Water?
Yes. Most modern fittings are lead-free and safe for drinking water. Always check the package for certification.
What Is The Most Reliable No-solder Method?
Press fittings offer the strongest, most reliable seal. For simple repairs, push-fit and compression fittings work well and are easier for beginners.
Joining copper pipes without solder is easier than ever. With the right tools and method, you can make strong, leak-free connections in less time and with less risk. Plan your project, choose the best method, and work carefully—your plumbing will be safe and reliable.