Disclosure: This post contains affiliate links and I will be compensated if you make a purchase after clicking through my links. Learn More
Fixing damaged threads on a bolt can save both money and time. Many people think a bad bolt means they have to buy a new one or scrap a project. But, in most cases, you can restore damaged threads with the right tools and methods.
Whether you work in a garage, run a workshop, or fix things at home, learning how to repair bolt threads is a valuable skill. This guide explains every step, offers practical tips, and helps you avoid common mistakes.
Understanding Bolt Thread Damage
Bolt threads can get damaged for many reasons. Knowing the cause helps you choose the best repair method.
Common causes of damaged bolt threads:
- Over-tightening: Applying too much force can strip the threads.
- Cross-threading: Misaligning the bolt when screwing it in damages the threads.
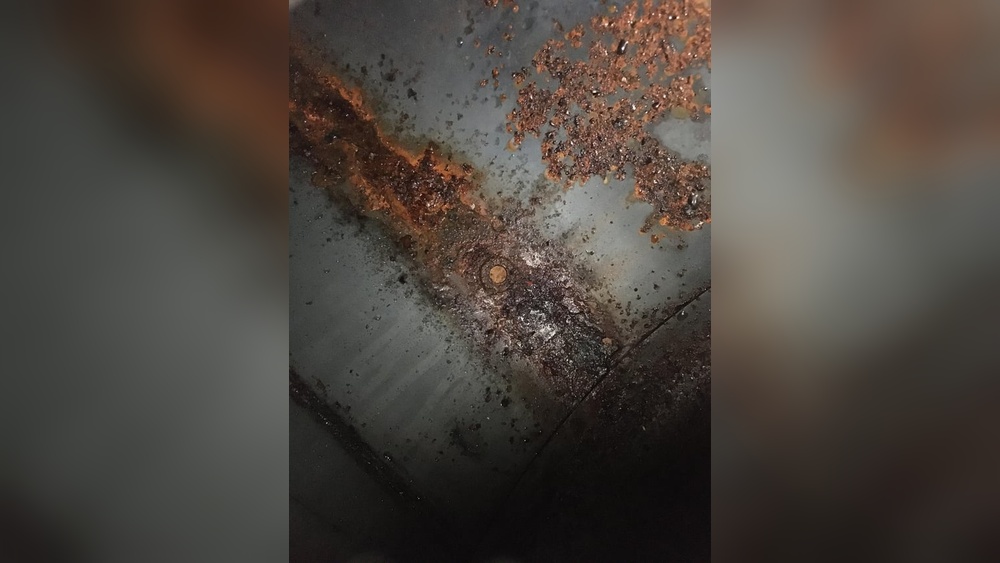
- Corrosion: Rust and dirt can wear threads over time.
- Wear and tear: Repeated use or vibration loosens threads or wears them out.
- Use of wrong tools: Using pliers or the wrong size wrench can deform threads.
A bolt with damaged threads often feels rough when you turn it. Sometimes, it won’t screw in at all or won’t hold tight. You may also notice flattened, chipped, or missing thread sections. Sometimes, you might even see shiny spots where the threads have been crushed or metal filings where material has come off.
If you see blue or brown stains, it could be a sign of overheating or rust. On older bolts, look for pitting or small holes—these are clear signs of corrosion.
When you try to use a damaged bolt, it usually resists turning or feels like it’s “catching. ” If you force it, you might make the damage worse or even break the bolt inside a part, making repair much harder.
These warning signs are important—catching them early can save you from a much bigger repair later.
Types Of Bolt Thread Damage
There are different types of thread damage. Understanding these helps you decide if a repair is possible or if you need a replacement.
Minor Thread Damage
This includes small burrs, dents, or slight flattening. You often see this on the first few threads. Sometimes, the bolt may still function, but it may not turn smoothly. Even if the problem looks small, fixing it early prevents the damage from spreading.
Severe Thread Damage
You see large sections of missing threads, deep gouges, or twisted threads. This often happens from using too much force or the wrong tool. In these cases, the bolt often won’t grab at all. If you notice the thread shape is no longer a clear spiral or there are gaps, it’s a sign of severe damage.
Trying to reuse such a bolt can lead to failure, especially under load.
Corrosion Damage
Rust can eat away the metal, making the threads weak or flaky. With corrosion, the bolt might look swollen or have layers peeling off. Sometimes, the thread profile disappears, and the bolt becomes difficult to size. Even if you remove the rust, the metal underneath may be too thin to hold properly.
Cross-threading
This happens when the bolt goes in at an angle. The threads get crushed or bent. Cross-threading is tricky because, at first, the bolt may feel like it’s working, but it quickly becomes tight or jams. If you see the threads look mashed or not aligned, this is a strong sign of cross-threading.
Tools And Materials Needed
Fixing bolt threads requires some basic and, in some cases, specialized tools.
Essential tools:
- Thread file: Shapes and restores threads by hand.
- Die: Re-cuts threads to original shape.
- Tap and die set: Contains both taps for nuts/holes and dies for bolts.
- Lubricating oil: Reduces friction and prevents new damage.
- Wire brush: Cleans rust and debris.
- Bench vise: Holds the bolt steady.
- Safety glasses and gloves: Protects your hands and eyes.
Optional tools:
- Dremel tool: For heavy burrs or rust removal.
- Thread chaser: Cleans and repairs threads without cutting new ones.
- Replacement bolts: Sometimes, replacement is better.
It’s also helpful to have a small magnet or tray to keep small parts from getting lost. For metric bolts, a thread pitch gauge is useful to identify the exact thread size. In some cases, having a small pick or awl can help remove dirt from the thread valleys.
If you work on larger bolts or do this often, a set of different sized dies and files can save a lot of time.
Safety Precautions
Working with metal and tools involves some risks. Always put safety first.
- Wear safety glasses to protect from metal shavings.
- Use gloves for hand protection, but avoid loose gloves near rotating tools.
- Work in a well-lit space so you can clearly see thread damage.
- Secure the bolt in a vise to prevent slips.
If you use a Dremel or any power tool, tie back long hair and make sure nothing loose can catch. Always check your tools before starting—dull files or damaged dies can slip and hurt you. Clean up metal shavings right away, especially if you work on the floor or bench.
These tiny pieces can cut skin or damage tires if left behind.
Step-by-step Guide: How To Fix Damaged Threads On A Bolt
Let’s go through each method, from the simplest to more advanced repairs.
1. Cleaning The Threads
Start by cleaning the bolt. Sometimes, dirt or rust is the problem, not actual thread damage.
- Brush the threads with a wire brush to remove debris.
- Soak the bolt in a rust remover if you see corrosion.
- Dry the bolt and inspect the threads closely.
Pro tip: Many beginners skip cleaning. This can make minor repairs harder and damage tools.
If you can, use compressed air to blow away dust after brushing. When soaking in rust remover, follow the instructions and don’t leave the bolt too long. Wipe the bolt dry, and use a magnifying glass if you have one—this helps spot damage you might miss with the naked eye.
2. Using A Thread File
A thread file works for minor damage. It has different sizes on each side for different thread pitches.
- Match the file to the bolt’s thread pitch.
- Hold the bolt steady in a vise.
- Stroke the file along the thread, following the angle of the thread.
- File away burrs and reshape the thread peaks and valleys.
- Test the bolt by screwing it into a nut.
Insight: Don’t rush this step. Too much filing can remove too much metal and weaken the bolt.
Start with gentle strokes and check your progress often. If you’re not sure which way to file, look closely at the thread direction. If possible, practice on a scrap bolt before working on the real one. When done, test with a nut—if it goes on smoothly, you likely fixed the problem.
3. Using A Die
A die re-cuts the threads and works well for moderate damage.
- Find the correct die: Match the die size and thread pitch to your bolt. Most bolts have markings.
- Lubricate the threads with oil.
- Place the die on the end of the bolt.
- Turn slowly: Rotate clockwise for a few turns, then back off half a turn to clear chips.
- Repeat until the die moves easily along the threads.
- Clean the bolt and test it in a nut.
Common mistake: Using the wrong die size can ruin the bolt completely.
When starting the die, keep it level with the bolt. If it feels crooked, remove and restart. Some dies have a tapered side—this end should start on the bolt. Don’t force the die; if it binds, back off and clean out metal chips before continuing.
After finishing, check the threads under good light. A proper re-cut thread should look even and shiny.
4. Using A Thread Chaser
A thread chaser is a less aggressive tool than a die. It cleans and reforms threads without removing much metal.
- Choose the right chaser for the bolt size and pitch.
- Apply oil to the threads.
- Thread the chaser onto the bolt by hand first.
- Use a wrench to turn the chaser down the bolt.
- Reverse and repeat as needed.
Tip: Thread chasers are best for bolts that are not too badly damaged.
If you work on cars, investing in a thread chaser set is wise. Some chasers are made for spark plugs, which often get cross-threaded. Unlike a die, a chaser is less likely to make a thread too thin, so it’s a safer option for bolts you want to reuse.
5. Repairing With A Dremel Tool
If you see big burrs or crushed sections, use a Dremel with a small grinding stone.
- Secure the bolt in the vise.
- Grind down the damaged area gently, removing only enough metal to restore the shape.
- Use a thread file or die to finish shaping the threads.
Note: Grinding removes metal. Use this only if other methods fail.
When grinding, keep the tool moving—don’t hold it in one spot or you might make a flat area. Wear a dust mask, as grinding produces fine particles. After grinding, brush the threads and check for heat marks. Excessive heat can weaken the bolt.
6. Using A Tap And Die Set
A tap and die set is the most complete tool for fixing threads. Dies fix bolt threads; taps fix threads inside holes.
- Identify thread size and pitch: Use a thread gauge if unsure.
- Select the correct die for the bolt.
- Lubricate well to prevent sticking.
- Turn the die slowly, backing off to clear chips.
- Finish by cleaning and testing the bolt.
Example: If a 10mm bolt has stripped threads, use a 10mm x 1.5 die.
If working on the hole, use the tap. Keep the tap straight and turn it slowly. Never force it or you risk breaking the tool inside the hole. Always clean the tap and die after use to prevent rust.
7. Replacing Severely Damaged Bolts
Sometimes, repair is not safe. If a bolt has more than 30% of threads missing or is bent, replace it.
Key reasons to replace:
- Bolt holds critical parts (brakes, engines, safety parts)
- Threads are almost flat or missing
- Bolt is cracked or bent
Never reuse a bolt if you are unsure of its strength.
If you must replace a bolt, match both the length and thread pitch to the original. Using a bolt that’s too short or with the wrong threads can cause failure. Save the damaged bolt as a reference when shopping for a replacement.
Comparison Of Thread Repair Methods
Below is a quick comparison of common repair methods for damaged bolt threads.
| Method | Best For | Skill Level | Cost | Metal Removed? |
|---|---|---|---|---|
| Wire Brush | Dirt/rust only | Beginner | Low | No |
| Thread File | Minor damage | Beginner | Low | Yes (minimal) |
| Die | Moderate damage | Intermediate | Medium | Yes |
| Thread Chaser | Light repair | Beginner | Medium | No |
| Dremel Tool | Heavy burrs | Advanced | Medium | Yes (more) |
| Replacement | Severe damage | Beginner | Varies | N/A |
How To Identify Bolt Thread Size And Pitch
Repair works best if you know the exact thread size and pitch. Guessing leads to poor results.
How to measure:
- Use a thread gauge: Match the gauge to the bolt’s threads.
- Check bolt markings: Many bolts have size and pitch marked on the head.
- Compare to a known nut: Try screwing the bolt into different nuts with known sizes.
Metric vs. Imperial: Metric bolts are measured in millimeters (e.g., M8 x 1.25). Imperial bolts use threads per inch (e.g., 5/16-18).
If you don’t have a gauge, you can use a ruler and count the number of threads in a set length (usually 1 inch for imperial, or 10 mm for metric). This isn’t as accurate but helps in a pinch.
Remember, using the wrong thread pitch—even if the diameter matches—will damage both the bolt and the nut.
Example Table: Common Bolt Sizes And Pitches
| Bolt Size | Thread Pitch (Metric) | Threads Per Inch (Imperial) |
|---|---|---|
| M6 | 1.0 mm | — |
| M8 | 1.25 mm | — |
| 1/4″ | — | 20 TPI |
| 5/16″ | — | 18 TPI |
Tip: Always check both the diameter and the thread pitch. Two bolts can look the same but have different threads.
Common Mistakes When Fixing Bolt Threads
Many people make the same errors when trying to fix threads. These mistakes can ruin the bolt or make the repair unsafe.
Using The Wrong Size Tool
A die or thread file that does not match the thread pitch will cut new threads over the old ones. This weakens the bolt.
Not Lubricating
Metal-on-metal contact creates friction and heat. Without oil, you can damage both the tool and the bolt.
Over-filing
Filing or grinding too much removes metal. This makes the bolt weaker and can cause it to snap under pressure.
Ignoring Severe Damage
If a bolt is too damaged, trying to fix it can be dangerous, especially in high-stress areas. Always check if replacement is safer.
Forgetting To Clean
Dirt, chips, or rust left on the bolt can get stuck in tools and create more damage.
Rushing The Process
Trying to fix threads quickly often leads to mistakes. Take your time, check your work often, and do not force any tool. If you feel unusual resistance, stop and check before continuing.
Tips For Preventing Thread Damage In The Future
Repairing threads is useful, but preventing damage is better. Here are the best ways to protect your bolts.
- Start bolts by hand: Always thread a bolt by hand at least a few turns. This prevents cross-threading.
- Use proper torque: Tighten bolts to the manufacturer’s recommendation. Over-tightening strips threads.
- Lubricate if needed: Use anti-seize or oil on bolts that go into metal, especially if exposed to the weather.
- Clean bolts before use: Dirt and rust act like sandpaper and wear out threads.
- Use correct tools: A socket or wrench that fits well gives better control.
- Replace worn bolts: Don’t reuse bolts that are already damaged or stretched.
Store bolts in labeled bins to keep different sizes and types separate. If you work in a humid area, keep bolts in a dry box or use silica gel packs to reduce rust. If you remove a bolt from a critical area, mark it so you remember to inspect it carefully before reuse.
When To Seek Professional Help
Sometimes thread repair is not enough or not safe. Seek help if:
- The bolt is part of a critical system (brakes, suspension, structural parts).
- You cannot restore the shape using a die or file.
- The bolt is stuck or fused in place.
- You lack the right tools.
A professional can use advanced techniques, such as welding or thread inserts, for permanent repairs.
If you try to fix a critical bolt and it still feels loose or does not torque to spec, ask for expert help. In industries like aviation, even small thread problems mean automatic replacement. Safety always comes first.

Credit: knowhow.napaonline.com
Advanced Thread Repair: Thread Inserts
For bolts that screw into a hole (like engine blocks), sometimes both the bolt and the hole threads are damaged. In these cases, a thread insert (like a Helicoil) restores the original size.
How it works:
- Drill out the damaged threads.
- Tap a new hole with a special tap.
- Screw in the insert (a coil-shaped piece of metal).
- Install the bolt into the new threads.
This method restores strength. It is common in automotive and machinery repair. For more details, see the official Wikipedia Threaded Insert page.
For best results, use inserts made of stainless steel or a material stronger than the base metal. Always follow the instructions for the insert kit. Thread inserts are often better than just tapping a larger hole, because they restore the original size and sometimes make the repair stronger than new.
Examples: Fixing Damaged Threads In Real Life
Example 1: Automotive Repair
A car’s brake caliper bolt has stripped threads. The threads look flattened, and the bolt will not tighten.
- Method used: Die and thread chaser.
- Outcome: Threads restored. Bolt torques to the correct spec.
- Lesson: Always start bolts by hand to avoid cross-threading.
A second insight: After fixing, always check the bolt with a torque wrench to confirm it holds properly.
Example 2: Home Workshop
A lawnmower blade bolt gets rusty and the nut does not thread easily.
- Method used: Wire brush to remove rust, then thread file.
- Outcome: Bolt threads cleaned and restored.
- Lesson: Regular cleaning prevents future damage.
It’s also smart to apply anti-seize compound before reassembling, especially for outdoor tools.
Example 3: Industrial Setting
A large steel bolt in a machine is badly cross-threaded and missing threads.
- Method used: Replaced the bolt.
- Outcome: New bolt fits and holds load.
- Lesson: Never reuse bolts with heavy damage in safety-critical places.
In some industrial cases, using a thread insert in the hole is also part of the repair, ensuring the new bolt holds as designed.

Credit: www.youtube.com
Table: When To Repair Vs. Replace
| Condition | Repair | Replace |
|---|---|---|
| Light burrs/dents | ✔ | |
| Moderate thread flattening | ✔ | |
| Heavy rust, missing threads | ✔ | |
| Bolt is bent or cracked | ✔ | |
| Bolt in a critical system | Maybe (if approved by a professional) | ✔ |
Frequently Asked Questions
What Is The Difference Between A Die And A Thread Chaser?
A die cuts or re-cuts threads on a bolt. It removes metal and reshapes the thread. A thread chaser cleans and reforms threads without much cutting. Use a die for moderate damage and a chaser for minor cleaning.
Can I Use A Tap And Die Set On Any Type Of Bolt?
Most tap and die sets work on standard steel bolts, but some bolts use special alloys or coatings. Always match the tool to the bolt’s material and thread pitch. Harder bolts may need specialized tools.
How Do I Know If A Bolt Is Too Damaged To Fix?
If more than one-third of the threads are missing, the bolt is bent, or you see deep cracks, it is safer to replace the bolt. Also, if the bolt holds a critical part (like a brake or suspension), do not risk repair.
Is It Safe To Use Thread-locking Compounds After Repairing Threads?
Yes, you can use thread-lockers (like Loctite) after repair. They help keep bolts tight, especially if threads are a bit loose. Make sure the bolt and nut are clean and dry before applying.
Can I Fix Stainless Steel Bolt Threads The Same Way As Regular Steel?
You can use the same methods, but stainless steel is harder. Use high-quality dies or files and lubricate well. Stainless bolts may also gall (stick) more easily, so turn tools slowly.
Restoring damaged threads on a bolt is practical and often easy with the right tools and technique. By understanding the type of damage, using the proper repair method, and following safety steps, you can fix most bolts and keep your projects moving.
Always check if repair is safe, especially for parts that bear heavy loads. With care and patience, you extend the life of your bolts and avoid unnecessary replacements.
Credit: solutions.travers.com