Disclosure: This post contains affiliate links and I will be compensated if you make a purchase after clicking through my links. Learn More
Welding cast iron with oxy acetylene is a valuable skill in many workshops. Whether you need to repair a cracked engine block, fix old machinery, or restore vintage equipment, knowing the right method saves time and money. Many people find cast iron difficult to weld because it cracks easily and can be unpredictable if you use the wrong technique.
With practice and the right approach, you can achieve strong, lasting repairs. This article explains everything you need to know about oxy acetylene welding for cast iron, including preparation, process steps, common challenges, and expert advice for better results.
Understanding Cast Iron
Cast iron is an iron-carbon alloy with high carbon content, usually around 2–4%. This makes it strong but also brittle. It handles compressive loads well but breaks easily under tension or impact. There are several types of cast iron, but most repairs involve gray cast iron, which is common in engine blocks, pipes, and heavy equipment.
Why is cast iron tricky to weld?
- High carbon: This causes hardness and brittleness.
- Porosity: Cast iron can contain tiny air pockets, which weaken welds.
- Expansion and contraction: Cast iron expands and shrinks a lot when heated and cooled. If you heat it too fast or let it cool too quickly, cracks can form.
Knowing these basics helps you avoid common mistakes and choose the best welding process.
Why Use Oxy Acetylene Welding For Cast Iron?
Oxy acetylene welding uses a flame from mixed oxygen and acetylene gas to melt metal. It is one of the oldest and most trusted methods for welding cast iron. Many professionals prefer this method because:
- Good heat control: You can adjust the flame to heat the metal slowly and evenly.
- Less cracking: The slow heating and cooling reduce stress and cracking.
- Works with old parts: You can repair dirty or oily cast iron, which is common in used machinery.
- Strong bonds: If you follow the right steps, the welds can be as strong as the original metal.
This method needs patience and careful technique, but the results are often better than with electric welding for cast iron.
Safety Precautions
Working with oxy acetylene can be dangerous if you ignore safety. The gases are flammable, and the process generates extreme heat. Always follow these rules:
- Wear protective gear: Use flame-resistant gloves, goggles or a welding face shield, and a long-sleeve shirt.
- Work in a ventilated area: Oxy acetylene welding creates fumes. Avoid breathing them.
- Check gas hoses and fittings: Look for leaks before lighting the torch.
- Keep fire extinguishers nearby: Have one rated for electrical and flammable liquid fires.
- Never use oil on oxygen fittings: Oil can ignite in contact with pure oxygen.
Serious accidents often happen because people skip these steps. Take safety as seriously as the welding itself.
Required Tools And Materials
Welding cast iron with oxy acetylene needs specific tools and materials. Gather everything before you start:
- Oxy acetylene torch set: Includes regulators, hoses, and torch handle.
- Welding goggles or face shield: For eye protection.
- Welding gloves and clothing: Flame-resistant.
- Filler rod for cast iron: Use nickel-based rods for best results.
- Flux for cast iron: Helps the weld bond and reduces impurities.
- Wire brush: For cleaning the work area.
- Grinder: To prepare and finish the weld.
- Fire bricks or sand: To support and insulate the part.
- Preheating oven or propane torch: For heating larger parts.
- Thermal chalk or temperature indicator: To monitor preheat temperatures.
Pro tip: Nickel rods cost more but make a much better weld on cast iron. Mild steel rods are cheaper but often lead to cracks.
Preparing The Cast Iron
Preparation is the most important step. Good prep means fewer cracks and better welds.
Cleaning The Surface
Cleanliness makes a huge difference. Cast iron often has oil, grease, paint, or rust. These can cause weak welds or porosity.
- Scrape off thick grease and oil.
- Use a degreaser or acetone to remove any remaining oil.
- Grind away paint, rust, and old metal from the weld area using a grinder.
- Use a wire brush to finish cleaning.
Non-obvious tip: Even small traces of oil trapped in cracks can ruin a weld. Heat the area gently with a torch before welding to help burn off hidden oil.
Preparing The Crack Or Joint
A proper joint helps the filler metal flow and bond. For cracks or broken pieces:
- Grind a V-groove along the crack, about 60–90 degrees.
- Make the groove deep enough to reach clean metal.
- Drill a small hole at each end of the crack. This stops the crack from growing during heating.
For broken parts, align the pieces and clamp them securely. Leave a small gap (about 1–2 mm) for the filler rod.
Practical advice: Don’t skip drilling the crack ends. Many repairs fail because the crack spreads during welding.
Preheating The Metal
Cast iron hates quick temperature changes. Preheating helps the whole part expand evenly and reduces the risk of new cracks.
- For small parts: Heat gently with a propane torch.
- For large parts: Use an oven or build a firebrick enclosure and heat slowly.
- Target preheat temperature: 600–700°F (315–370°C).
Use temperature sticks, thermal chalk, or an infrared thermometer to check the temperature.
Non-obvious insight: Uneven heating causes more cracks than not preheating at all. Move the torch in circles, not just over the weld area, to warm the whole part.
Selecting The Right Filler Rod And Flux
Choosing the best filler rod is critical for cast iron repairs.
- Nickel rods: Give the strongest, most crack-resistant welds. They are easy to machine after welding.
- Copper-nickel rods: Also work well and are cheaper, but not as common.
- Cast iron rods: Some brands make rods from pure cast iron, but these are hard to machine after welding.
- Mild steel rods: Only use these for non-critical repairs. They shrink more and may cause cracks.
Flux: Always use a flux made for cast iron. It cleans the metal and helps the filler stick.
Common mistake: Skipping flux or using the wrong rod leads to weak, porous welds that break easily.
Setting Up The Oxy Acetylene Torch
Proper torch setup is essential for safe and effective welding.
- Check all connections for leaks using soapy water.
- Open the oxygen and acetylene tank valves slowly.
- Set the gas pressures: Around 5 psi for acetylene, 10 psi for oxygen (check your torch manual).
- Purge the hoses to clear any air.
- Light the acetylene first, then add oxygen to get a neutral flame (the inner cone should be sharp and blue).
- Adjust the flame size to match the thickness of the metal.
Pro tip: A neutral flame avoids adding extra carbon to the metal, which can make the weld more brittle.
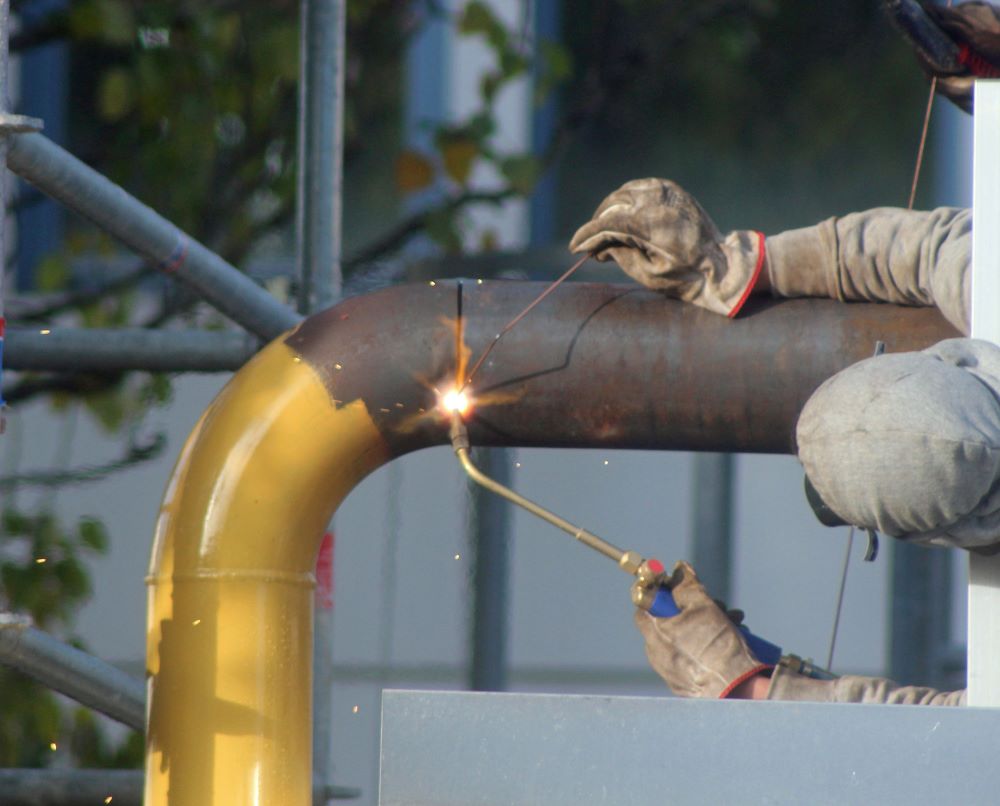
The Welding Process: Step-by-step
Welding cast iron is slow and careful work. Follow these steps:
1. Preheat The Whole Part
- Heat the part to 600–700°F (315–370°C) evenly.
- Use a large flame and move in circles to warm the entire area.
- Use fire bricks or sand to insulate and keep heat in.
2. Apply Flux
- Sprinkle or brush flux into the groove or joint.
- The flux will bubble and melt as you heat the area.
3. Melt The Base Metal
- Hold the flame 1–2 inches from the workpiece.
- Heat the edges of the groove until they start to melt.
- Avoid overheating; cast iron melts around 2100°F (1150°C) but can burn if you’re not careful.
4. Add Filler Rod
- Touch the nickel rod to the molten edge.
- Let the rod melt and flow into the joint.
- Move the flame and rod together, building up the weld slowly.
5. Control The Cooling
- After welding, keep the part hot.
- Cover it in sand, ashes, or wrap in insulation to cool very slowly. This step is critical—fast cooling will crack the weld.
- Cooling time: At least 8–12 hours for thick parts. Overnight is better.
Expert tip: Some pros weld in short sections, then peen the weld with a hammer while it’s hot. This relieves stress and reduces cracks.
Key Techniques For Stronger Welds
Successful cast iron welding depends on technique. Here are some methods that improve results:
Peening The Weld
After each small weld section, tap the weld with a round-faced hammer. This stretches the metal as it cools, reducing stress.
- Use light taps, not hard blows.
- Peen while the weld is still red-hot.
Weld In Short Sections
Cast iron hates too much heat in one spot. Weld small sections (about 1 inch), then move to another area. This helps spread the heat and reduces warping.
Backstep Welding
Start at the end of the crack and weld backward in short steps. This prevents the crack from growing as you go.
Use Fire Bricks Or Sand
Surround the part with fire bricks or bury in sand. This keeps heat in and cools the part more slowly.
Non-obvious insight: If you weld a large, flat surface, clamp steel bars across the area to prevent warping during heating.
Common Problems And How To Fix Them
Even with good technique, things can go wrong. Here are problems you may face and solutions:
- Cracking during cooling
- Cause: Cooled too quickly, or not enough preheat.
- Fix: Reheat and allow to cool slower next time. Use more insulation.
- Porous or weak welds
- Cause: Dirty joint, wrong rod, or not enough flux.
- Fix: Clean better, switch to nickel rod, use more flux.
- Weld does not bond
- Cause: Base metal not hot enough, or moving too fast.
- Fix: Slow down, preheat more, and let the flame dwell longer.
- Weld is too hard to grind or machine
- Cause: Used cast iron rod or allowed too much carbon pickup.
- Fix: Use nickel rods, keep a neutral flame.
- Part warps or bends
- Cause: Heated unevenly or welded too much at once.
- Fix: Preheat the whole part, weld in short steps, and clamp if possible.
Practical example: If you weld an old engine block and see a new crack appear after cooling, you likely cooled it too quickly. Next time, bury the whole piece in a bucket of dry sand after welding.

Credit: www.youtube.com
Comparing Oxy Acetylene With Other Methods
Some people wonder if other welding methods are better for cast iron. Here’s a simple comparison:
| Method | Cost | Strength | Ease for Beginners | Machinability |
|---|---|---|---|---|
| Oxy Acetylene | Medium | High (with nickel rod) | Medium | Good |
| MMA (Stick Welding) | Low | Medium | Easy | Fair (with nickel electrodes) |
| MIG Welding | High | Low | Medium | Poor |
| Brazing | Medium | Medium | Easy | Excellent |
Oxy acetylene is the best for repairs that require strong, machinable welds, but it takes more skill and patience.
Real-life Example: Repairing A Cracked Vise
Suppose you have a cast iron vise with a long crack. Here’s how you could repair it:
- Clean the area with a grinder and degreaser.
- Drill small holes at each end of the crack.
- Grind a V-groove along the crack.
- Preheat the entire vise to about 650°F, using fire bricks and a propane torch.
- Set up your oxy acetylene torch with a neutral flame.
- Apply cast iron flux to the groove.
- Weld short sections using a nickel rod, peening each section while hot.
- Insulate the vise in sand to cool slowly overnight.
With patience, the weld will blend into the original metal and the vise will be strong again.
Tips For Better Results
Many beginners make the same mistakes when learning to weld cast iron. Here are extra tips to help you succeed:
- Never rush the process. Fast heating or cooling causes most failures.
- Practice on scrap before fixing important parts. Get used to how the metal behaves.
- Keep the flame moving to avoid overheating one spot.
- Don’t skip preheat or post-heat steps. These are as important as the weld itself.
- Use the right filler rod and flux. Cheap rods or no flux almost always lead to weak welds.
Cost And Time Estimate
Welding cast iron with oxy acetylene is not the cheapest method, but often the strongest. Here’s a basic breakdown:
| Item | Typical Cost | How Often Needed |
|---|---|---|
| Oxy Acetylene Torch Kit | $200–$400 | One-time |
| Nickel Filler Rods | $20–$40 (per pack) | Each job |
| Cast Iron Flux | $10–$20 | Each job |
| Protective Gear | $40–$100 | One-time |
| Fire Bricks/Sand | $20–$30 | Reusable |
A typical repair can take 2–6 hours including preparation, welding, and cooling.

Credit: www.reddit.com
Maintenance And Aftercare
After welding, you can increase the life of the repair with a few steps:
- Inspect the weld for any cracks or porosity.
- Grind or machine the surface if needed.
- Paint or coat the area to prevent rust.
- Test the part under light load before full use.
If you see any signs of cracking or weakness, repeat the repair steps. Good care after welding ensures a long-lasting fix.
Environmental And Health Considerations
Oxy acetylene welding can create fumes with carbon monoxide, iron oxide, and other substances. Always:
- Work in a space with good airflow.
- Use a fume extractor if indoors.
- Avoid inhaling any smoke or gases.
Cast iron dust (from grinding) is also harmful. Wear a dust mask when finishing welds.
For more detailed safety guidelines, see the Wikipedia page on Oxy-fuel welding and cutting.
Credit: www.har-tech.com
Frequently Asked Questions
What Is The Best Filler Rod For Welding Cast Iron With Oxy Acetylene?
The best filler rod is a nickel-based rod. These rods make strong, crack-resistant welds that are easy to machine. Mild steel rods are cheaper but often cause cracks and are harder to finish.
Do I Always Need To Preheat Cast Iron Before Welding?
Yes, preheating is almost always necessary. It helps the whole part expand evenly, which prevents cracks during and after welding. Only very small, non-critical repairs can skip preheating, but results are less reliable.
Can I Use Oxy Acetylene To Weld Any Type Of Cast Iron?
You can weld gray cast iron easily with oxy acetylene. Other types, like white or ductile iron, are harder to weld and may need different methods or special rods. Always check the type before starting.
How Do I Avoid Cracks When Welding Cast Iron?
To avoid cracks:
- Clean the joint well.
- Preheat the part to 600–700°F.
- Weld in small sections, using a nickel rod.
- Peen the weld while hot.
- Cool the part slowly in sand or insulation.
Is Oxy Acetylene Welding Better Than Stick Welding For Cast Iron?
Oxy acetylene usually gives better results for cast iron, especially for machinable, strong welds. Stick welding is easier and faster for beginners but more likely to cause cracks unless you use expensive nickel electrodes.
Welding cast iron with oxy acetylene is a skill that pays off for many repairs. With the right tools, careful preparation, and patience, you can make repairs that last for years. Start with small projects, and you’ll build confidence and experience quickly.

