Disclosure: This post contains affiliate links and I will be compensated if you make a purchase after clicking through my links. Learn More
To weld cast iron with a MIG welder, preheat the casting and use a low-heat setting on the welder. Cast iron has a low melting point, so it is crucial to handle it with care.
When welding, use the MIG welder to create a strong bond between the cast iron pieces. Avoid overheating or rapid cooling to prevent cracking or damage to the casting. By following these steps, you can successfully weld cast iron using a MIG welder.
Welding cast iron can be a challenging task, as it requires a delicate balance of heat and technique. Cast iron has unique properties that make it prone to cracking and damage if not welded correctly. However, with the right approach and proper equipment, welding cast iron can still be accomplished successfully.
We will explore the process of welding cast iron with a MIG welder, focusing on the essential steps to ensure a strong and durable weld. By understanding the specific requirements and techniques involved, you can confidently tackle cast iron welding projects with a MIG welder. So, let’s dive into the process so you can master welding cast iron like a pro.
The Basics Of Welding Cast Iron
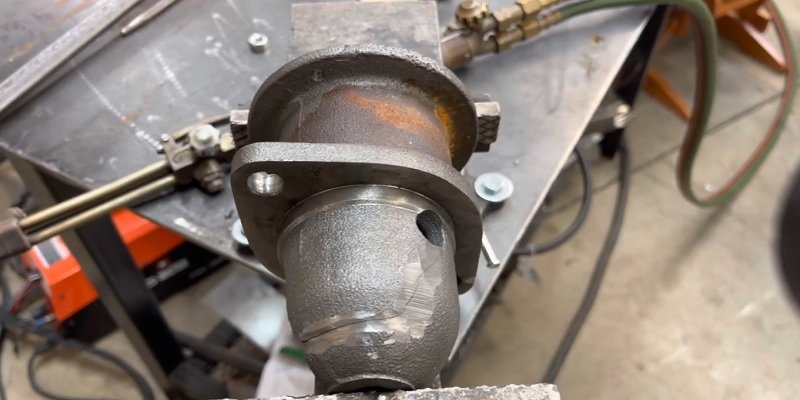
Welding cast iron can be a bit tricky, but with the right techniques and equipment, it is definitely possible. One popular method of welding cast iron is using a MIG (Metal Inert Gas) welder. MIG welding offers some advantages, such as its ease of use and clean welding process. In this article, we will explore the basics of welding cast iron with a MIG welder, including the challenges involved and the steps you need to take to prepare the cast iron for welding.
Overview of Welding Cast Iron with a MIG Welder
Welding cast iron with a MIG welder involves using a specialized electrode and a shielding gas to create a strong bond between the cast iron pieces. The electrode is typically made of nickel-based alloys or high-nickel-content stainless steel. This is because cast iron has a high carbon content, which makes it prone to cracking and distortion during the welding process.
The MIG welding process utilizes direct current (DC) and a wire feed system to continuously feed the electrode into the weld joint. The shielding gas, typically a mix of argon and carbon dioxide, protects the molten metal from atmospheric contamination, ensuring a clean and strong weld.
Understanding the Challenges of Welding Cast Iron
Welding cast iron poses a unique set of challenges due to its high carbon content and brittle nature. Cast iron is prone to cracking and warping when exposed to high heat. Additionally, its low thermal conductivity makes it difficult to distribute heat evenly throughout the material.
Another challenge is the presence of impurities such as sulfur, phosphorus, and silicon in cast iron, which can affect the weldability and the integrity of the weld joint. Therefore, proper preparation and preheating of the cast iron are crucial to minimize these challenges and ensure a successful weld.
Preparing the Cast Iron for Welding
Before you start welding cast iron with a MIG welder, it is essential to properly prepare the material. Here are the steps you should follow:
Step 1: Thoroughly clean the cast iron surface to remove any dirt, rust, or impurities. You can use a wire brush or sandpaper to accomplish this.
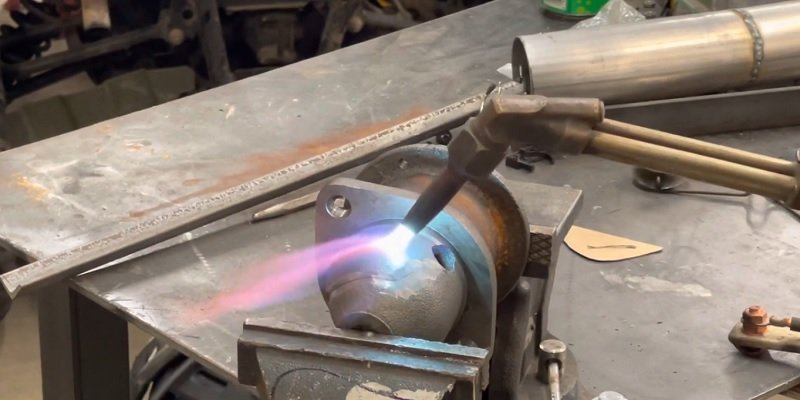
Step 2: Preheat the cast iron to reduce the temperature gradient and minimize the risk of cracking. The preheating temperature will depend on the thickness of the cast iron, but generally, it is recommended to preheat to around 500-1000°F (260-538°C).
Step 3: Consider using a pre-weld coating or flux to improve the weldability and protect the weld from atmospheric contamination.
Step 4: Choose the appropriate MIG welding settings for cast iron. This includes selecting the correct wire feed speed, voltage, and shielding gas composition. It is best to consult the MIG welder manufacturer’s recommendations or seek guidance from welding professionals.
Step 5: Weld the cast iron using a series of short, overlapping welds to minimize heat input and prevent excessive stress on the material.
Step 6: Allow the welded cast iron to cool slowly to relieve residual stresses. Rapid cooling can lead to cracking or distortion.
Step 7: Finally, post-weld heat treatment may be necessary to further relieve stresses and ensure the longevity of the weld.
By following these steps and taking the necessary precautions, you can successfully weld cast iron with a MIG welder. It is essential to practice and gain experience, as welding cast iron can be challenging. Remember to maintain proper safety measures, such as wearing appropriate protective gear and working in a well-ventilated area.
Choosing The Right Mig Welder For Welding Cast Iron
When it comes to welding cast iron, choosing the right Mig welder is crucial for achieving high-quality results. With the right machine, you can ensure a strong and durable weld that will hold up to the demands of the job. In this section, we will discuss the factors to consider when selecting a Mig welder for cast iron, the recommended specifications for welding cast iron with a Mig welder, and provide tips for adjusting the settings and heat for optimal results.
Factors to consider when selecting a Mig welder for cast iron
Before diving into the specifications, it’s important to understand the key factors that you need to consider when choosing a Mig welder for welding cast iron:
Amperage Range: Look for a Mig welder that offers a wide amperage range, preferably starting from around 30 amps and going up to at least 180 amps. This will ensure that you have enough power to effectively weld cast iron.
Duty Cycle: Check the duty cycle of the Mig welder, which indicates the amount of time it can operate continuously before needing to cool down. A higher duty cycle is desirable, as it allows for longer welding sessions without interruptions.
Thermal Overload Protection: Ensure that the Mig welder has a thermal overload protection feature. This feature will prevent the welder from overheating and potentially damaging the internal components, especially when welding cast iron, which requires higher heat.
Adjustable Controls: Look for a Mig welder that provides adjustable controls for voltage and wire speed. Being able to fine-tune these settings will allow you to optimize the weld bead and achieve the desired results when welding cast iron.
Recommended specifications for welding cast iron with a Mig welder
When welding cast iron with a Mig welder, it’s important to have specific specifications in mind to ensure proper fusion and minimize the risk of cracking or distortion:
| Wire | Shielding Gas | Preheat | Interpass Temperature | Post-heat |
|---|---|---|---|---|
| High-Nickel Nickel-Alloy or Cast Iron Wire | Typically 100% Argon or 75% Argon / 25% CO2 | Between 500°F and 1200°F | Maintain within preheat temperature range | Between 1000°F and 1300°F |
Tips for adjusting the settings and heat for optimal results
When welding cast iron with a Mig welder, follow these tips to adjust the settings and heat for optimal results:
Clean the Surface: Before starting, make sure the cast iron surface is clean and free of any impurities, such as oil, rust, or paint. This will ensure better fusion and a stronger weld.
Preheat: Preheating the cast iron using a flame or other heat source is crucial to reduce the risk of cracking. Maintain the preheat temperature within the recommended range specified for the type of cast iron being welded.
Heat Control: Adjust the voltage and wire speed according to the thickness of the cast iron and the desired weld bead. It is important to find the right balance between heat input and travel speed to achieve proper fusion without overheating the cast iron.
Maintain Ideal Interpass Temperature: During the welding process, pay attention to the interpass temperature and ensure it stays within the recommended range. This will help to prevent excessive cooling, which can lead to cracking or distortion.
Post-heat Treatment: After completing the welding process, apply post-heat treatment to relieve residual stresses and minimize the risk of cracking. Maintain the post-heat temperature within the recommended range for the specific type of cast iron.
By carefully considering the factors for selecting a Mig welder for cast iron, following the recommended specifications, and adjusting the settings and heat, you will be well on your way to achieving successful welds on cast iron with a Mig welder. With the right equipment and techniques, you can confidently tackle various welding projects involving cast iron.
Proper Techniques For Welding Cast Iron With A Mig Welder
Preheating methods for preventing cracks and distortion
When welding cast iron with a MIG welder, it’s crucial to employ proper preheating techniques to prevent cracks and distortion. Preheating helps to gradually increase the temperature of the cast iron, minimizing thermal stress during welding.
To preheat the cast iron effectively, follow these steps:
Thoroughly clean the surface of the cast iron before welding to remove any impurities or contaminants. This ensures proper fusion and reduces the risk of defects.
Preheat the cast iron using a torch or an induction heating device. Gradually bring the temperature up to around 500-1,200°F, depending on the thickness of the cast iron and the specific welding requirements. This temperature range helps to avoid rapid heating, which could result in cracking.
Ensure the preheated cast iron is evenly heated by using a temperature-indicating crayon or a suitable heat-sensing tool to monitor the temperature. This prevents localized overheating or cooling, reducing the chances of distortion and cracks.
Once the cast iron has reached the desired preheating temperature, it is ready for welding with a MIG welder.
Step-by-step process for welding cast iron with a mig welder
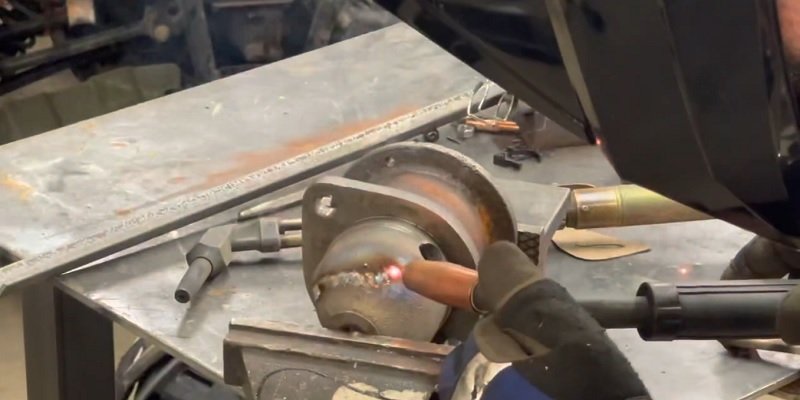
When welding cast iron using a MIG welder, follow the step-by-step process outlined below:
- Set up your MIG welder with the appropriate settings. Consult the manufacturer’s instructions for the recommended voltage, wire feed speed, and shielding gas for welding cast iron.
- Ensure you have the correct filler material for cast iron. Nickel-based or high-nickel-content electrodes are commonly used for cast iron welding as they have superior toughness and match the coefficient of expansion of the base material.
- Clean the surfaces to be welded by removing any rust, paint, or grease. This enhances the quality of the weld and promotes proper fusion.
- Securely clamp the cast iron pieces to be welded to prevent movement during welding.
- Begin by tack welding the cast iron parts together. Tack welds act as temporary fixations to maintain alignment during the welding process. Space the tack welds evenly along the joint.
- Once the tack welds are in place, start creating the main welds by moving the MIG welder’s nozzle in a controlled and consistent motion along the joint. Aim for smooth and continuous welds.
- Ensure adequate shielding gas coverage during welding to protect the weld pool from atmospheric contamination. This helps to produce strong and defect-free welds.
- Allow the welded cast iron to cool slowly after welding. Rapid cooling can lead to internal stresses and potential cracking.
Using proper welding techniques to achieve strong welds
Applying the right welding techniques is essential for achieving strong and durable welds on cast iron. Follow these tips to ensure successful welding:
Keep the welding speed steady and avoid excessive heat input, as this can result in brittle welds and increased chances of cracking.
Use proper welding techniques such as weaving or overlapping strokes to distribute heat evenly and prevent overheating in a single area.
Employ intermittent welding to allow the cast iron to cool periodically, minimizing stress and avoiding potential cracks.
Consider performing post-weld heat treatment to relieve any residual stresses and further strengthen the weld.
Inspect the welds for any defects or cracks and carry out necessary repairs or modifications as required.
Common Mistakes To Avoid When Welding Cast Iron With A Mig Welder
Welding cast iron with a MIG welder can be a delicate process that requires careful attention to detail. While MIG welding is a popular choice for its versatility and ease of use, it can pose unique challenges when working with cast iron. To ensure a successful weld, it is crucial to identify and avoid common pitfalls that could compromise the integrity of the weld joint and the overall structural strength of the cast iron piece.
Identifying and Avoiding Potential Pitfalls During the Welding Process
When welding cast iron with a MIG welder, there are several potential pitfalls that you should be aware of and take steps to avoid. By understanding and addressing these issues, you can achieve a high-quality weld that is both strong and durable.
Some of the common mistakes to avoid during the welding process include:
Not properly preheating the cast iron piece: Cast iron has a high carbon content, which makes it susceptible to cracking when rapidly heated or cooled. To prevent this, it is essential to preheat the cast iron piece gradually before welding. This reduces thermal stress and minimizes the risk of cracks forming.
Using the wrong filler material: Choosing the correct filler material is crucial when welding cast iron. Nickel-based filler rods or electrodes specifically designed for cast iron should be used to ensure a compatible weld. Avoid using mild steel or other unsuitable fillers, as they may not bond properly with the cast iron and result in a weak weld.
Ignoring proper cleaning and preparation: Good surface preparation is essential for achieving a successful weld. Failing to remove impurities, such as rust, grease, or paint, from the cast iron surface can negatively impact the weld quality. Thoroughly clean the area to be welded and remove any contaminants that could compromise the integrity of the weld.
Overheating the cast iron: Overheating the cast iron during the welding process can lead to excessive expansion and contraction, resulting in cracking or distortion. Take care not to apply excessive heat or dwell in one area for too long. Use short, controlled welds and allow sufficient cooling time between passes.
Tips for Preventing Cracking and Distortion
Cracking and distortion are common concerns when welding cast iron, but there are several measures you can take to minimize these issues. By following these tips, you can improve the structural integrity of the weld and reduce the risk of failure.
Consider implementing the following measures to prevent cracking and distortion:
Preheat the cast iron piece to a suitable temperature (generally around 500 to 600°F) before beginning the welding process. This gradual preheating helps to reduce thermal stresses that could lead to cracking.
Use a ductile filler material with a high nickel content to ensure a strong bond and minimize the risk of cracking. These fillers have better thermal expansion properties, making them more compatible with cast iron.
Implement a stitch welding technique instead of continuous welding to reduce heat input. Stitch welding involves making short welds with sufficient cooling time in between. This approach allows the cast iron to dissipate heat, minimizing the potential for distortion.
Consider using a backstep welding technique, where you weld from the end of the crack towards the healthier section. This method helps prevent crack propagation and minimizes distortion.
Troubleshooting Techniques for Handling Welding Issues
Even with proper precautions, welding cast iron can still present challenges. Understanding how to troubleshoot common welding issues can help you overcome obstacles and produce a successful weld.
Here are some troubleshooting techniques to address welding issues:
If cracks occur during the welding process, stop immediately and assess the situation. Preheat the cast iron piece further to relieve any residual stress and weld carefully to bridge the cracks without allowing them to propagate.
If distortion occurs, gradually heat the affected area and use clamps or fixtures to straighten the piece while it is still hot. This can help to restore the shape and minimize distortion.
Perform post-weld stress relief by slowly cooling the welded cast iron piece in a controlled manner. This can help relieve residual stresses and reduce the risk of cracking or distortion.
If encountering porosity or gas pockets in the weld, adjust the welding parameters such as voltage, wire feed speed, or shielding gas flow rate. Ensure the material is thoroughly cleaned and free from any contaminants that may contribute to porosity.
By understanding and avoiding common mistakes, preventing cracking and distortion, and employing troubleshooting techniques, you can navigate the challenges of welding cast iron with a MIG welder and achieve strong, quality welds. Remember to always prioritize safety, take your time, and seek professional guidance if needed, especially when working on critical cast iron components.
Post-Welding Considerations For Welding Cast Iron With A Mig Welder
Welding cast iron with a MIG welder can be a challenging task, but with proper post-welding considerations, you can ensure a durable and strong weld. In this section, we will discuss some important post-welding considerations that will help prevent cracking, improve weld strength, and enhance the overall quality of your project.
Cooling methods to prevent cracking after welding
One of the critical steps in welding cast iron is managing the cooling process to prevent the formation of cracks. Due to the high carbon content and low melting point of cast iron, it is highly susceptible to cracking if it cools too quickly. To avoid this issue, consider the following cooling methods:
Slow cooling: Allow the welded cast iron to cool down slowly to room temperature. This can be achieved by simply turning off the welder and letting it cool naturally. It is important to avoid any sudden temperature changes which can cause thermal stress and lead to cracks.
Peening: Another effective method is peening. This involves gently tapping the welded area with a ball-peen hammer while it is still hot. The purpose of peening is to relieve stress and distribute it evenly throughout the material, reducing the likelihood of cracks.
Heat sinking: In some cases, using a heat sink can help control the cooling process. This involves attaching a copper block or clamp near the weld area. The heat sink absorbs excess heat, preventing rapid cooling and minimizing the risk of cracking.
Post-weld treatment for improving weld strength and durability
To enhance the strength and durability of the weld, it is crucial to perform post-weld treatments. These treatments help to relieve stress, improve the grain structure, and minimize the risk of future failures. Consider the following post-weld treatment techniques:
Preheating: Preheating the cast iron before the welding process is highly recommended. This helps to reduce the thermal shock experienced during welding and minimizes the formation of brittle microstructures that can lead to cracks.
Post-weld heat treatment: Applying controlled heat after welding can significantly improve the weld’s quality. This treatment can be achieved through techniques such as stress relieving or annealing. Stress relieving helps to remove residual stresses, while annealing involves heating the welded piece to a high temperature and then slowly cooling it to improve its strength and ductility.
Stress relief: If preheating and post-weld heat treatment are not feasible, stress relief can be done separately. This involves gently heating the welded area to a specific temperature and then allowing it to cool gradually. Stress relief helps to reduce internal stress and minimize the chances of cracking.
Proper cleaning and finishing techniques
After welding, it is vital to clean and finish the welded cast iron for optimal results. Proper cleaning ensures the removal of any contaminants, such as dirt, oil, or welding flux, which can weaken the weld. Additionally, a polished finish can enhance the appearance and provide a protective layer. Consider the following techniques for cleaning and finishing:
Cleaning: Use a wire brush or sandpaper to remove any surface impurities. Make sure to clean both the weld and surrounding areas thoroughly.
Grinding: If necessary, use a grinder to smooth out any uneven surfaces or weld beads. This will help create a clean and professional finish.
Finishing: Apply a suitable coating or paint to protect the weld and improve its appearance. Select a coating that is compatible with cast iron and resistant to corrosion.
By implementing these post-welding considerations, you can ensure a successful weld when working with cast iron using a MIG welder. Remember to prioritize slow cooling, employ appropriate post-weld treatments, and follow proper cleaning and finishing techniques to achieve a strong and durable weld.
Frequently Asked Questions On How To Weld Cast Iron With A Mig Welder?
Can Cast Iron Be Welded With Mig?
Yes, cast iron can be welded using MIG welding. MIG welding is suitable for repairing or joining cast iron components, but it requires careful heat control and the use of preheating and post-heating techniques to minimize the risk of cracking.
What Mig Wire Is Used To Weld Cast Iron?
MIG wire with high nickel content is used to weld cast iron.
What Is The Welder Setting For Cast Iron?
The optimal welder setting for cast iron requires using low heat and a slower welding speed. Gradually preheating the cast iron and utilizing specific filler rods suitable for cast iron welding will help achieve a strong weld.
What Is The Best Method To Weld Cast Iron?
The best method to weld cast iron is by using the preheating technique. This involves gradually heating the cast iron to a specific temperature, then welding it with the appropriate filler material. Preheating helps prevent cracking and ensures a strong weld joint.
Final Thoughts
To sum up, welding cast iron with a MIG welder can be a challenging task, but with the right technique and equipment, you can achieve successful results. Remember to preheat the metal, use the appropriate filler wire and techniques like backstepping to prevent cracking.
Practice and patience are key to mastering this skill. With proper care and attention, you’ll be able to weld cast iron like a pro.

