Disclosure: This post contains affiliate links and I will be compensated if you make a purchase after clicking through my links. Learn More
Welding stainless steel pipe with a stick welder is a skill that many welders want to learn, but often find challenging. Stainless steel has a reputation for being difficult to weld because it reacts quickly to heat, and the results can look poor if you use the wrong method.
Yet, with the right tools, preparation, and knowledge, you can achieve strong, clean welds that meet professional standards. This guide will help you understand the process step-by-step, avoid common mistakes, and give you practical advice you can trust.
Understanding Stick Welding For Stainless Steel Pipe
Stick welding, or Shielded Metal Arc Welding (SMAW), uses an electric current to melt a coated metal rod and join metals. The rod’s coating forms a gas shield around the weld, protecting it from air. Many prefer stick welding for pipe because it is portable, works outdoors, and handles dirty or rusty materials.
Stainless steel comes in different types, but 304 and 316 are most common for pipes. They resist rust and chemical damage, so they’re popular in food plants, chemical factories, and water systems.
Stick welding stainless steel is different from welding mild steel. Stainless steel conducts heat slowly and holds it longer. This means you can easily overheat or warp the pipe if you do not control your heat input. Also, the filler rod must match the pipe grade for the best results.
Tools And Equipment You Need
Before you start, gather all the tools you’ll use. Missing a key item can lead to poor welds or wasted time.
- Stick welder (SMAW machine)
- Welding rods (electrodes): E308L, E309L, or E316L rods for stainless steel
- Angle grinder or flap disc
- Wire brush (stainless steel only)
- Chipping hammer
- Clamps and pipe stands
- Measuring tape and marker
- Welding helmet and gloves
- Fire-resistant jacket or sleeves
- Ventilation (fan or extractor if indoors)
Choose a stick welder that gives you enough amperage for your pipe thickness. For most pipe work, 80-120 amps is common.
Choosing The Right Electrode For Stainless Steel Pipe
Selecting the correct welding rod is key for strong, corrosion-resistant welds.
- E308L: Best for 304 stainless steel pipe. It gives smooth welds and resists cracking.
- E316L: Use for 316 stainless pipe or where the pipe will see chemicals or salt water.
- E309L: Good for joining stainless to mild steel, or as a buffer layer.
The “L” means low carbon, which reduces the risk of weld decay (sensitization) at the joint.
Rod diameter matters, too. Use 2. 5mm or 3. 2mm rods for most pipe joints. Thicker rods (4. 0mm) are harder to control on thin pipe and can overheat the work.
Here’s a quick reference:
| Pipe Thickness | Rod Diameter | Amps Range |
|---|---|---|
| 2-4 mm | 2.5 mm | 60-90 A |
| 4-6 mm | 3.2 mm | 80-120 A |
| 6-8 mm | 4.0 mm | 110-150 A |
Preparing The Stainless Steel Pipe
Good preparation means fewer weld defects and a better finish.
- Clean the Pipe: Use a stainless wire brush or flap disc to remove oil, dirt, and any oxide. Do not use a steel brush, as it leaves particles that cause rust.
- Cut and Fit: Cut the pipe ends square with an angle grinder. Use a pipe cutter if you want a perfect edge. Make sure the joint fits tightly; gaps cause burn-through and weak welds.
- Bevel the Edges: For pipe over 3 mm thick, grind a 30-37.5° bevel on both pipe ends. This helps the weld penetrate fully.
- Align and Clamp: Use pipe stands and clamps to hold the pipe in place. Check alignment with a straight edge or level.
- Remove Burrs: Clean off all metal filings, oil, paint, or stickers near the joint.
Non-obvious tip: Never touch stainless with bare hands after cleaning. Sweat or oil from your skin can cause rust spots or poor welds.

Credit: www.youtube.com
Setting The Welding Machine
Set your welding machine to match your rod size and pipe thickness. Stick welders have a current (amperage) knob.
- Start at the lower end of the rod’s recommended range.
- Increase slowly if the rod sticks or the arc is unstable.
- If the weld pool becomes too wide or the pipe warps, lower the amps.
Some machines have AC/DC options. For stainless steel, DCEN (direct current electrode negative) is best. It gives a smoother, more controlled arc.
Non-obvious tip: Test your settings on scrap pipe before you start the real joint. Every machine is a little different.
Tack Welding The Pipe
Tack welds hold the pipe in position and stop it from moving as you work.
- Place small welds (10-15 mm long) every 30-50 mm around the pipe.
- Space them equally to balance heat.
- Check alignment after every tack; adjust if needed.
Too few tacks can let the joint shift or open up. Too many, or large tacks, can put in extra heat and cause distortion.
Credit: weldguru.com
Welding Positions For Pipe
Pipe welding uses specific positions, each with its own challenges. The most common for stick welding:
- 1G (Roll): Pipe is rolled under the torch. Easiest for beginners, but not always possible on big or fixed pipes.
- 5G (Horizontal Fixed): Pipe does not move. You weld from the bottom up, sides, and top.
- 6G (Inclined Fixed): Pipe sits at a 45° angle. This is the hardest and is the test position for most certifications.
If you can, start with 1G to learn the basics, then try 5G and 6G as your skill grows.
| Position | Pipe Movement | Difficulty |
|---|---|---|
| 1G (Roll) | Pipe rotates | Easy |
| 5G (Horizontal Fixed) | Pipe fixed | Medium |
| 6G (45° Fixed) | Pipe fixed | Hard |
Running The Root Pass
The root pass is the first weld inside the joint. It joins the pipes and sets the shape for other welds.
- Start at the bottom of the pipe.
- Hold the rod at a 75°-80° angle to the pipe, with a 10°-15° lead angle (pointing the rod in the direction you move).
- Keep the arc short but steady. Too long, and you get spatter; too short, and the rod sticks.
- Move in a slight side-to-side or “whip” motion to fill the joint evenly.
- Watch the keyhole (melted spot) and control your speed. Go slower if the gap is wide, faster if it’s tight.
Practical example: On a 3 mm pipe, you might weld 15 mm, then pause, to avoid overheating.
Common mistake: Burning through the root. If this happens, lower the amps or move faster.
Cleaning Between Passes
Stainless stick electrodes make a thick, dark slag. This must be removed before the next weld.
- Use a chipping hammer to knock off the slag.
- Brush with a stainless wire brush until clean and shiny.
- Check for defects: Look for cracks, holes, or undercut.
Never use a steel brush or grind with a wheel used on mild steel. Even a small amount of contamination can cause rust spots.
Pro tip: Clean the area at least 15 mm past the weld, as slag can flow further than you expect.
Filling And Capping Passes
After the root pass, you add more welds to fill the joint (fill passes), then finish with a “cap” pass.
Fill Passes
- Use the same rod angle as before.
- Slightly weave the rod to cover the joint, but do not weave too wide; 2-3 times the rod diameter is enough.
- Keep a steady speed. Pause at the sides to fill the edges.
Cap Pass
- Make the final pass smooth and slightly convex (not flat or sunken).
- Watch for even width and height.
- Clean the area well for a good finish.
Non-obvious insight: On stainless, a flat or slightly convex cap resists rust better. Concave welds can trap moisture.
Controlling Heat Input
Stainless steel dislikes heat. Too much heat causes “sugaring” (a rough, gray, sugary weld surface) inside the pipe, or “warp” (pipe bends out of shape).
Ways to control heat:
- Use the lowest amps that let you keep a stable arc.
- Weld in short sections, then let the pipe cool.
- Do not stop in the middle of the joint for too long.
- Use backing gas (purge) inside the pipe if code or application demands.
Data point: Keep interpass temperature below 150°C (300°F) for most stainless grades.
Common mistake: Trying to weld the whole joint in one go. Patience gives better results.
Purging The Pipe
For high-quality welds, especially in food, pharma, or pressure pipe, you must protect the inside of the pipe from air while welding. This prevents “sugaring” and keeps the inside smooth.
- Seal both ends of the pipe with tape or rubber plugs.
- Pump in argon gas at low pressure (2-5 L/min).
- Start welding when you feel argon coming out of the weld gap.
Purging is not always needed for low-pressure or non-critical pipe, but it is best practice.
Avoiding Common Problems
Stick welding stainless steel pipes can cause issues if you skip steps or ignore details. These are the most frequent problems and how to avoid them:
- Cracking: Use low-carbon rods, avoid overheating, and do not weld over dirty metal.
- Porosity (tiny holes): Clean the pipe, use the right rod, and keep moisture away.
- Warping: Weld in short runs, use clamps, and allow cooling breaks.
- Rust spots: Use only stainless tools, and never touch with bare hands.
Non-obvious insight: Always store your rods in a dry place. Moisture in the coating causes porosity and weak welds.
Inspecting Your Welds
Strong, clean welds are the goal. You can check your work in several ways:
- Visual check: The weld should be smooth, even, and shiny. No cracks or holes.
- Tapping: Tap with a hammer; a clean, high-pitched ring means solid metal.
- Bend test (for practice): Bend a test weld. Good stainless welds bend, not break.
- Professional testing: For code work, X-rays or dye penetrant tests check for hidden cracks.
Practical tip: If the weld rusts after a few days, you likely had contamination or used the wrong rod.
Safety Tips For Stick Welding Stainless Pipe
Stick welding gives off bright light, hot metal, and fumes. Stainless steel rods also have chromium, which is hazardous if inhaled.
- Wear a full welding helmet with shade 10 or darker.
- Use leather gloves and long sleeves.
- Work in a well-ventilated area. Use a fume extractor if indoors.
- Do not touch hot pipe or welds.
- Keep fire extinguishers nearby.
Stat: Welding fumes can cause cancer over long exposure. Always protect your lungs.
Post-weld Cleaning And Passivation
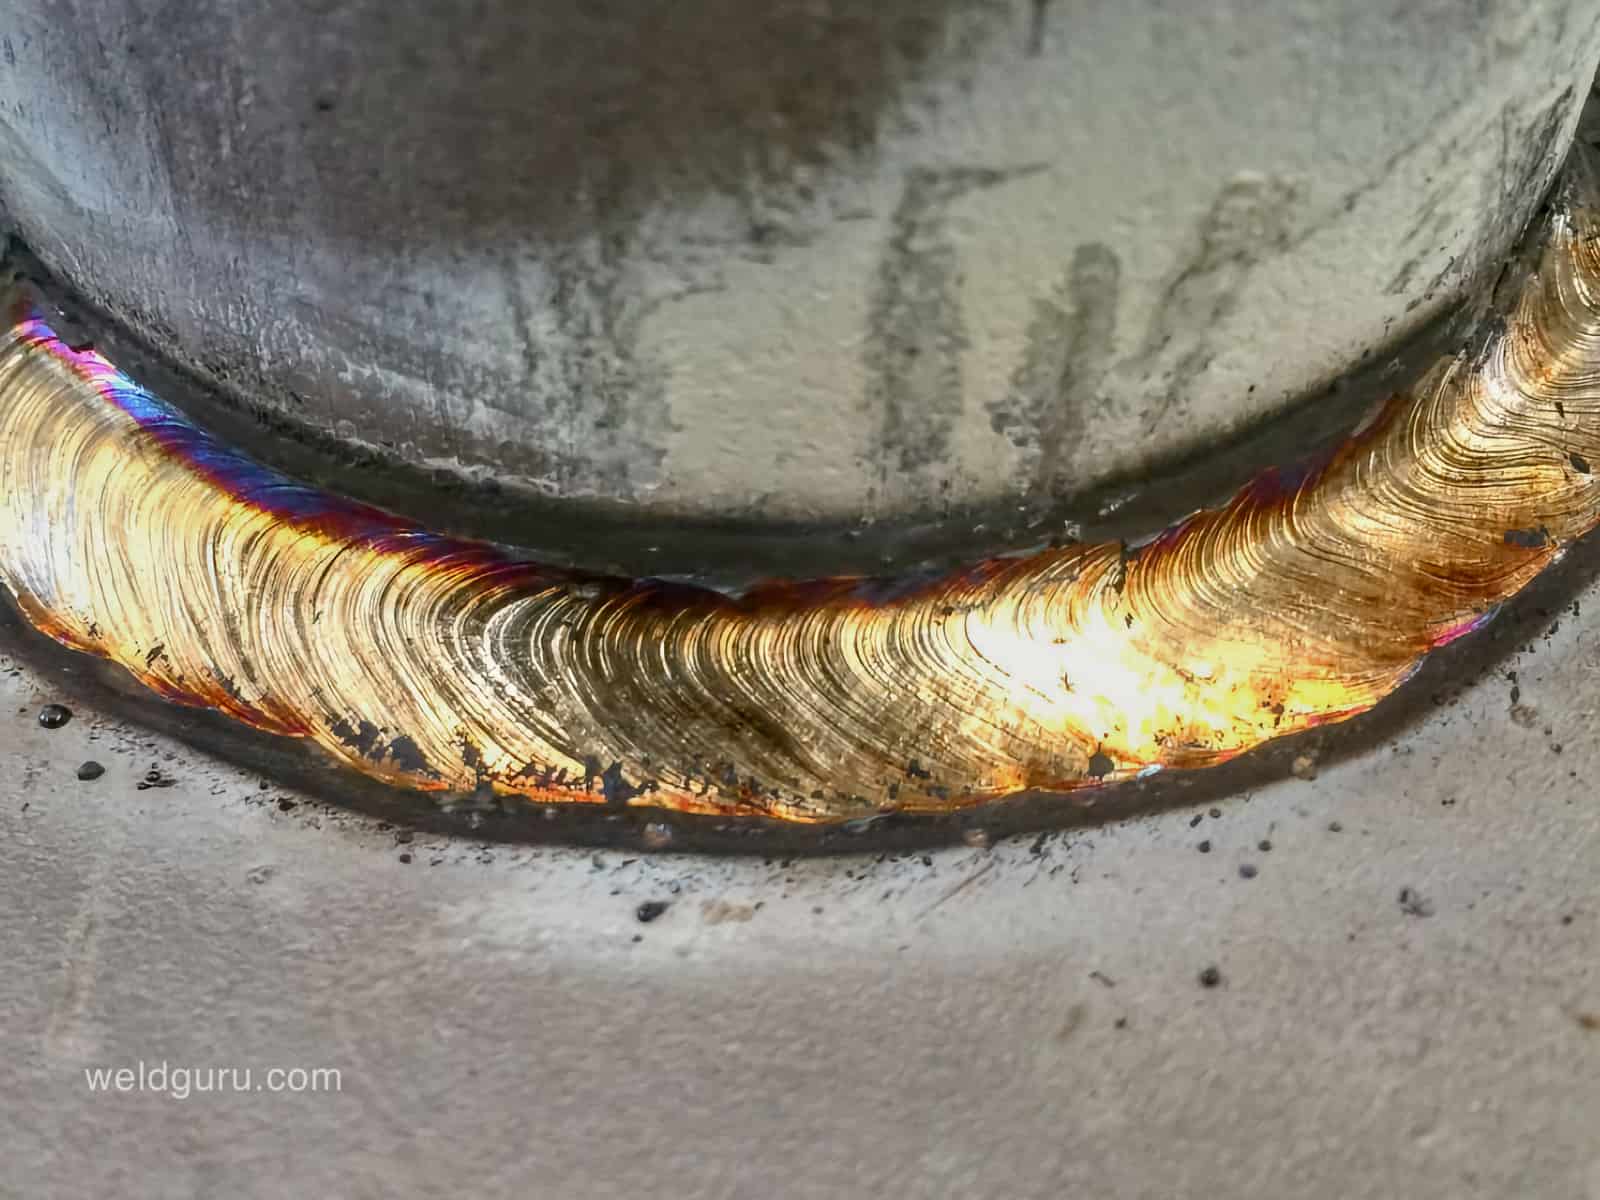
After welding, stainless steel often needs extra cleaning to remove heat tint, slag, and oxide. This makes the weld resist rust and looks better.
- Mechanical cleaning: Use a stainless wire brush or fine flap disc.
- Chemical cleaning (passivation): Apply a citric or nitric acid gel, then rinse. This restores the chromium oxide layer that gives stainless its rust resistance.
Never skip cleaning, especially for pipes used in food or water systems.
Credit: weldguru.com
Cost And Time Estimates
Stick welding is cost-effective, but time depends on skill, pipe size, and quality requirements.
| Task | Typical Time | Material Cost |
|---|---|---|
| Preparation (per 1m pipe) | 20-30 min | Low |
| Welding (root, fill, cap per joint) | 40-60 min | Medium |
| Cleaning/Passivation | 15-25 min | Low-Medium |
Non-obvious tip: Labor often costs more than rods or power. A careful setup saves you time and money.
When To Choose Stick Welding For Stainless Pipe
Stick welding is not always the best method, but it has strong advantages for some jobs:
- Outdoor repairs, where wind stops other welding methods.
- Remote locations with limited power.
- Dirty, rusty, or painted pipes.
- Small jobs where TIG or MIG is too slow or expensive.
Stick welding is less ideal for thin-wall pipe, sanitary welds, or where perfect appearance is critical.
Comparing Stick Welding To Other Stainless Pipe Welding Methods
Many shops use TIG (GTAW) or MIG (GMAW) welding for stainless pipe. Here’s how stick welding compares:
- Stick (SMAW): Simple, portable, forgiving, but more spatter and slower.
- TIG: Clean, precise, best for thin or food-grade pipe, but slower and needs argon gas.
- MIG: Fast, good for long runs, but needs gas and clean metal.
Stick welding is often chosen for field work or when TIG/MIG is not practical.
For more about welding methods, see this Welding Overview.
Practical Tips From Experienced Welders
- Always start with test welds on scrap before the main joint.
- Keep your rods dry; use a rod oven if possible.
- Clean tools often, especially if you work on both stainless and mild steel.
- Mark your pipe before cutting and fit-up, not after cleaning.
- Watch your puddle, not your rod tip, for better control.
- Rest your arm to avoid shaking, which causes uneven welds.
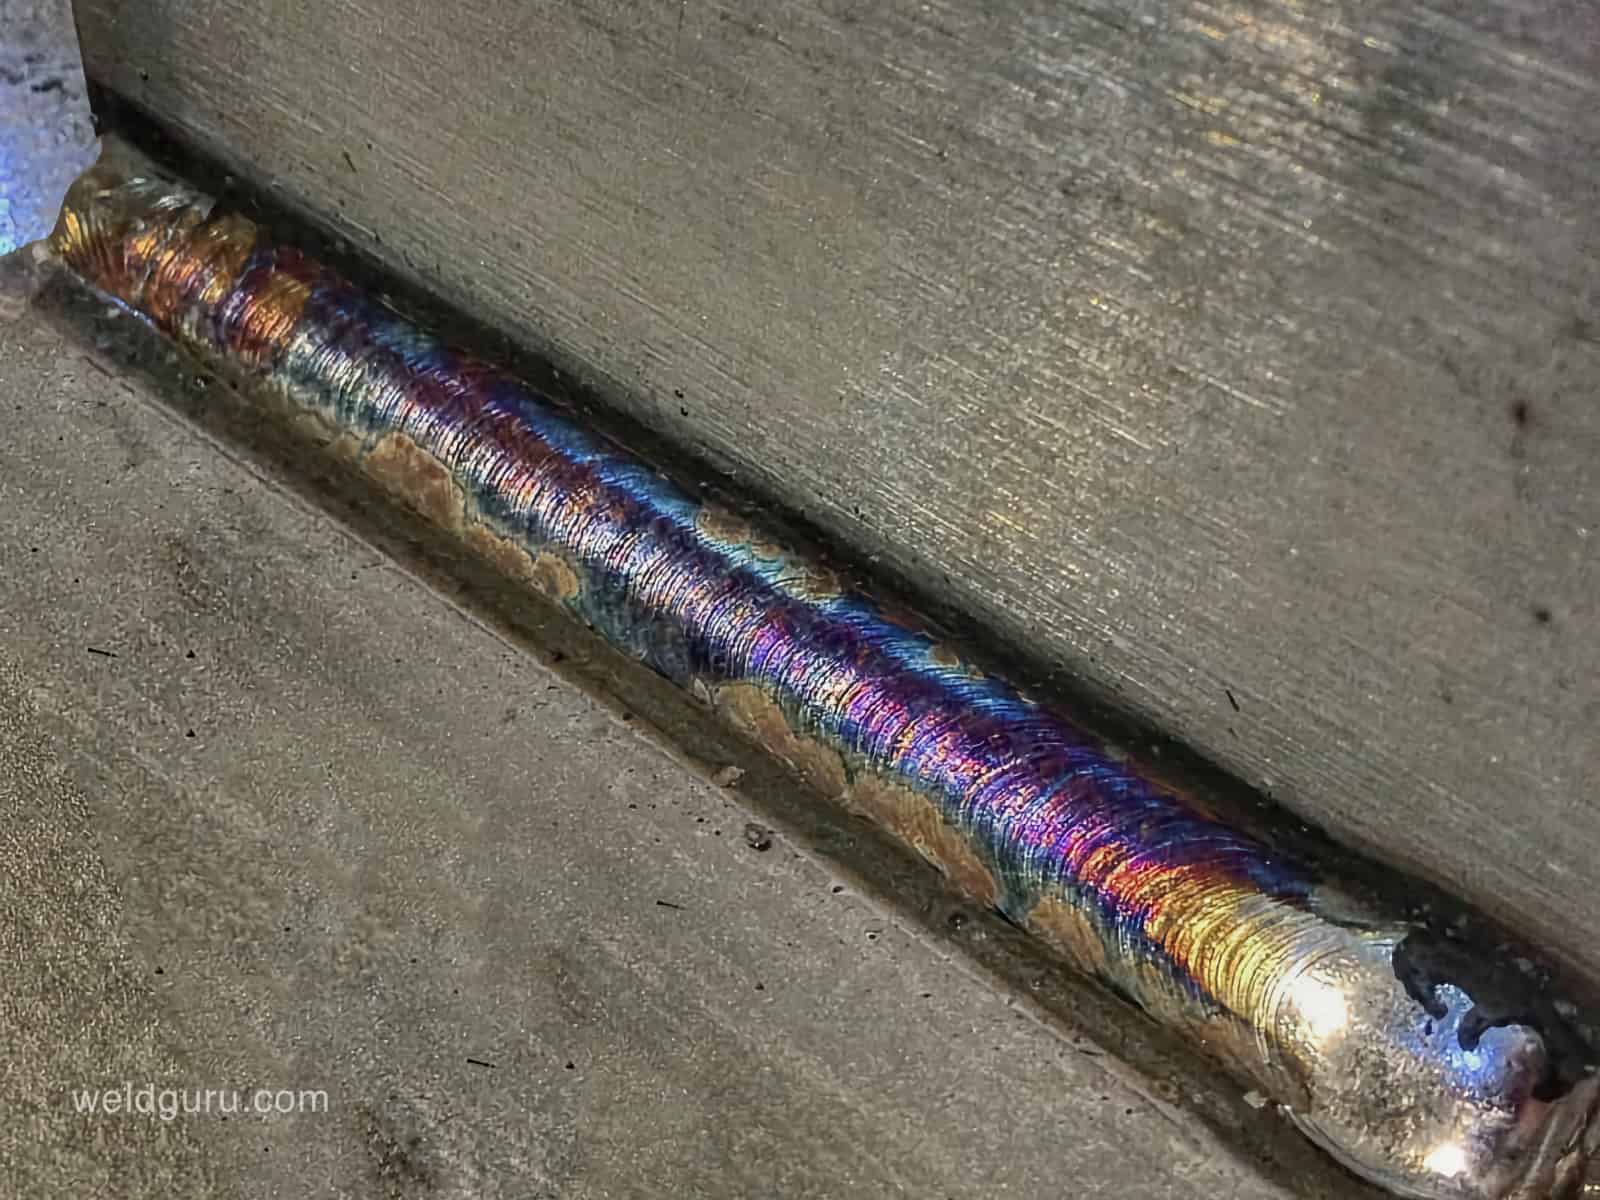
Non-obvious insight: If you see blue, purple, or yellow on your weld, you overheated the pipe. Lower your amps or allow more cooling time.
Frequently Asked Questions
What Is The Best Electrode For Stick Welding Stainless Steel Pipe?
The best electrode depends on the pipe grade. Use E308L for 304 pipe, E316L for 316 pipe, and E309L if joining stainless to mild steel. Always choose a low-carbon (“L”) rod to reduce weld decay.
Do I Need To Purge The Inside Of The Pipe When Stick Welding Stainless?
Purging is not always required, but it is best for high-quality or sanitary welds. Purging with argon gas stops “sugaring” on the inside and keeps welds strong and smooth.
Why Does My Stainless Weld Look Gray Or Rough Inside The Pipe?
This is called “sugaring” and happens when air reaches the weld during high heat. It means no purge gas was used, or the pipe was too hot. Sugaring weakens the weld and can trap bacteria in sanitary pipes.
Can I Stick Weld Stainless Steel Pipe Outdoors?
Yes, stick welding is one of the best choices for outdoor work. The flux coating on the rod protects the weld from wind and dirt better than TIG or MIG.
How Do I Stop My Stainless Weld From Rusting?
Keep all tools and brushes for stainless only. Do not touch cleaned pipe with bare hands. Remove all slag and heat tint after welding. If possible, use a passivation solution to restore the rust-resistant layer.
—
Stick welding stainless steel pipe is a valuable skill for many types of construction and repair. With the right tools, good preparation, and careful heat control, you can create welds that last and look professional. Always focus on cleaning, use the right rod, and do not rush.
With practice, even tough pipe joints become manageable. Always work safely and take pride in each weld you finish.