Disclosure: This post contains affiliate links and I will be compensated if you make a purchase after clicking through my links. Learn More
Setting the output on a Lincoln stick welding machine is a skill that makes a real difference in the quality of your welds. Many people feel unsure the first time they adjust welding settings, but with clear steps and the right information, you can master this process and get better results in your welding projects.
This guide explains each part of setting the output, from understanding your machine to fine-tuning for different metals and rods. Whether you are new to stick welding or looking to improve your current skills, you will find practical advice here.
Understanding Stick Welding And Lincoln Machines
Stick welding, also called Shielded Metal Arc Welding (SMAW), uses an electric current to melt both the rod and the base metal, creating a strong joint. Lincoln Electric is one of the most trusted brands for welding machines. Lincoln machines are popular for their durability, simple controls, and consistent output. Knowing how these machines work helps you set them up properly.
Lincoln stick welders come in many models, but most use a similar process for adjusting output. Each machine may have different controls, so it helps to read your specific model’s manual. Still, the basic concepts apply to almost all Lincoln stick welding machines.
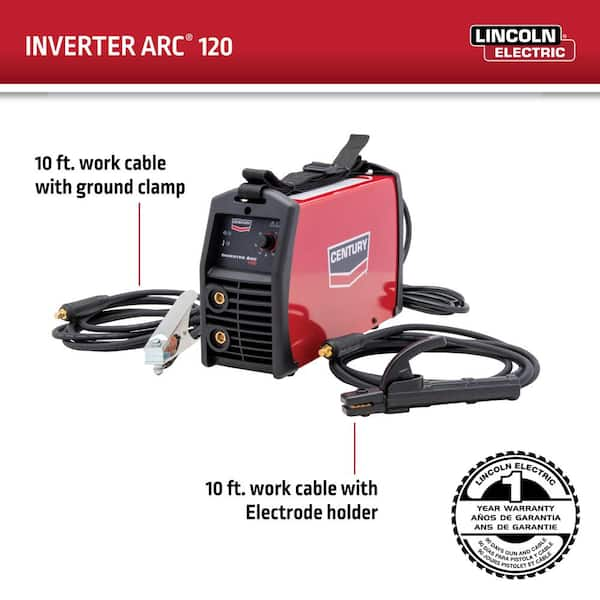
Key Parts Of A Lincoln Stick Welder
Before you set the output, you need to know the main parts:
- Power switch: Turns the machine on and off.
- Output control (amperage knob): Sets the welding current.
- Electrode holder: Holds the welding rod.
- Ground clamp: Connects to your workpiece to complete the circuit.
- Input power cord: Connects to your power source (110V, 220V, or 240V).
Some advanced Lincoln models also have digital displays or additional knobs for fine-tuning. Always check what features your machine has.
Why Output Settings Matter In Stick Welding
The output setting or amperage is the main control that affects your weld. If the output is too low, the arc will sputter, and the weld won’t penetrate the metal. If the output is too high, the metal may burn through or create too much spatter. The right setting lets you produce a stable arc, smooth welds, and good penetration.
Getting the right amperage is not just about following a chart. It depends on many factors:
- Type and thickness of metal
- Rod type and size
- Welding position (flat, vertical, overhead)
- Your technique
Understanding how each factor influences the output will help you set your Lincoln machine correctly.
How To Set Stick Welding Output On A Lincoln Machine
Setting the output involves several steps. Follow these steps to get the best results.
1. Choose The Right Electrode
The electrode, or welding rod, is the first decision you make. Common rods for stick welding are E6010, E6011, E6013, E7014, and E7018. Each type works best with certain metals and applications.
Example:
- E6010/E6011: Good for dirty or rusty steel. Deep penetration.
- E6013: General purpose, easy to use, mild steel.
- E7018: Strong welds, used for structural work, low hydrogen.
Each rod has a recommended amperage range. Check the rod’s packaging or a welding chart for this information.
2. Check The Metal Thickness
Metal thickness affects how much power you need. Thicker metals need higher amperage. For thin metal, use lower amperage to avoid burning through.
As a basic guide:
- 1/16″ to 1/8″ steel: 40–90 amps
- 1/8″ to 1/4″ steel: 90–160 amps
- Over 1/4″ steel: 160–250 amps
Use these numbers as a starting point, not a strict rule.
3. Find The Recommended Amperage
Match your electrode size to the right amperage. Here’s a quick reference:
| Electrode Size | Amperage Range | Typical Use |
|---|---|---|
| 1/16″ (1.6 mm) | 20–40A | Light sheet metal |
| 3/32″ (2.4 mm) | 40–90A | General repairs, thinner steel |
| 1/8″ (3.2 mm) | 90–160A | Most common jobs |
| 5/32″ (4.0 mm) | 110–210A | Thicker steel, heavy work |
| 3/16″ (4.8 mm) | 140–250A | Heavy plate, industrial use |
Check your rod box or manual for the exact range. It’s better to start in the middle of the recommended range, then adjust as needed.
4. Prepare Your Lincoln Machine
- Place the welder on a stable surface.
- Plug in the power cord to the correct outlet. For most home jobs, 220V provides more power and smoother welds, but some smaller Lincoln models run on 110V.
- Connect the ground clamp firmly to clean metal on your workpiece.
- Insert the electrode into the holder, leaving about 1–2 inches exposed.
5. Set The Amperage Output
Turn the output control knob (often labeled “Current” or “Amperage”) to your starting value. For example, if you are using a 1/8″ E6013 rod, set the knob to about 110–130 amps.
Some Lincoln models have a digital display. Others have a simple dial with numbers. The numbers may not be exact amps, but they give a reference point.
Tip: If you are unsure, start low. It’s easier to increase the current than to fix damage from too much heat.
6. Test The Arc And Adjust
Before welding your main project, strike an arc on a scrap piece of similar metal. Watch and listen to the arc:
- A good arc makes a steady, crisp sound like frying bacon.
- If the rod sticks or the arc is weak, increase the amperage.
- If the arc is violent, with too much spatter or the rod burns too fast, lower the amperage.
Make small changes (5–10 amps at a time) until the arc feels right.
7. Check The Weld Bead
After a short weld, look at the bead:
- Good bead: Smooth, even, no holes or undercut.
- Low amperage: Tall, narrow bead, poor penetration, rod may stick.
- High amperage: Flat, wide bead, burns through, excessive spatter.
Adjust the amperage based on what you see.
8. Repeat As Needed
Fine-tune your settings for each job. Different rods, metals, and positions may need new settings.
Practical Insight: Many beginners forget to clean the ground connection. A poor ground can make the arc unstable, even if your amperage is correct. Always clamp to bare metal for the best results.
Credit: www.homedepot.com
Common Mistakes When Setting Output
Mistakes are easy to make when learning stick welding. Here are the most frequent problems:
- Ignoring the rod size: Using the same setting for all rods leads to poor welds.
- Not matching amperage to metal thickness: Thin metal needs less power.
- Skipping test welds: Always test on scrap before your real project.
- Leaving the ground clamp on paint or rust: This weakens the electrical connection.
- Turning the knob while welding: Most Lincoln machines need to be stopped before changing settings.
- Not checking input voltage: Plugging a 220V welder into a 110V outlet reduces performance.
Non-obvious tip: If your Lincoln welder has a “Hot Start” feature, it gives a brief boost at the start to prevent sticking. Some people think the output is wrong when the real issue is the start-up. Learn your machine’s features to avoid confusion.
Table: Comparing Lincoln Stick Welder Models For Output Settings
Some Lincoln stick welding machines offer more precise control than others. Here’s a quick comparison:
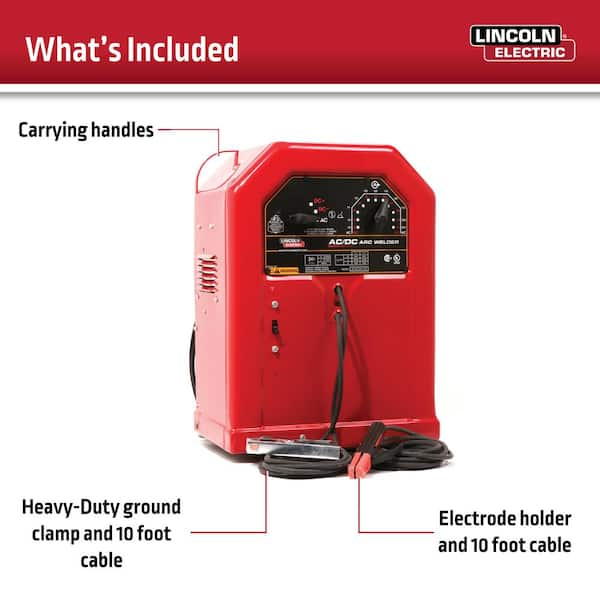
| Model | Output Range | Control Type | Best For |
|---|---|---|---|
| Lincoln AC225 | 40–225A | Tap selector | Home, farm, small shops |
| Lincoln Idealarc 250 | 35–300A | Dial (infinite control) | Heavy, industrial jobs |
| Lincoln Invertec V155-S | 5–155A | Dial (digital display) | Portable, light work |
| Lincoln Ranger 225 | 50–225A | Dial (engine-driven) | Field, construction |
Insight: Infinite control dials offer finer adjustments than tap selectors. For jobs that need precise settings, choose a model with a dial.
Credit: www.homedepot.com
How Welding Position Changes Output Needs
Welding in different positions changes the output needed. Overhead and vertical welds often require slightly lower amperage than flat welds. This helps prevent the molten metal from dripping or sagging.
- Flat position: Use normal settings from the chart.
- Vertical/uphill: Lower amperage by 5–10% for better control.
- Overhead: Also lower amperage. Use fast-freeze rods like E6010 or E7018.
Always test first, as personal technique can affect the best setting.
Using Lincoln Machine Features For Better Output Control
Some Lincoln machines offer extra features to help you set output more easily:
- Digital displays: Show exact amperage, making adjustments easier.
- Hot Start: Reduces rod sticking at arc start.
- Arc Force: Maintains arc stability when the rod gets close to the work.
- Dual voltage: Lets you use 110V or 220V for flexibility.
If your machine has these features, use them to improve your results. For example, Arc Force helps beginners maintain a steady arc, even if their hand moves too close.
Non-obvious tip: Some Lincoln welders have an “electrode positive” and “electrode negative” setting. Most stick welding uses DCEP (Direct Current Electrode Positive). Using the wrong polarity can make the arc weak or unstable, even if amperage is correct.
How To Read And Use Lincoln Output Charts
Lincoln includes output charts in most manuals. These charts show recommended settings for each electrode and metal thickness. They are a great starting point, but you should always adjust based on your real-world results.
Example chart entry:
- Electrode: E6013, 1/8″
- Metal thickness: 1/8″–3/16″
- Amperage: 90–130A
- Polarity: AC or DC+
Start at the middle value and check your weld quality. If you see too much spatter or burning, adjust the amperage.
Table: Typical Output Settings For Popular Rods
Here’s a quick look at common settings for popular rods on steel:
| Rod Type | Size | Amperage | Polarity |
|---|---|---|---|
| E6010 | 1/8″ | 75–125A | DC+ |
| E6011 | 1/8″ | 75–125A | AC, DC+ |
| E6013 | 1/8″ | 90–130A | AC, DC+ |
| E7018 | 1/8″ | 110–165A | AC, DC+ |
Always verify with your rod’s packaging, as brands may vary.
Example: Setting Output For A Real Project
Suppose you want to weld 1/8″ mild steel using a Lincoln AC225 and E7018 rods.
- Check rod size: 1/8″ E7018.
- Check chart: Recommended 110–165A.
- Set machine: Turn the selector to 125A.
- Test weld: Make a short bead on scrap steel.
- Check result: If the bead is smooth, you have the right setting. If the rod sticks, raise to 135A. If the bead is too flat or burns through, lower to 115A.
- Weld your project with the confirmed setting.
This step-by-step approach gives you confidence and helps avoid mistakes.
Tips For Consistent Output Settings
- Clean all connections before starting.
- Use the same brand and type of rods for each project.
- Mark good settings on your machine or in a notebook for future reference.
- Let the machine warm up for a few minutes before critical welds.
- Watch for changes in sound: A steady, frying sound means a stable arc.

Credit: weldmongerstore.com
Safety Advice When Adjusting Output
- Always wear safety gear: Gloves, helmet, and a long-sleeve shirt.
- Turn off the machine before changing rods or making adjustments.
- Keep your work area dry and clear of flammable items.
- Use the correct power supply for your Lincoln machine.
Important: High amperage can cause burns and fire hazards. Never set output higher than needed.
Advanced Output Adjustments For Experts
Experienced welders sometimes fine-tune output beyond the charts:
- Arc length: Holding the rod closer or farther from the work changes heat. A shorter arc is hotter.
- Travel speed: Moving faster or slower affects bead width and penetration.
- Rod angle: Changing the angle can help control the weld pool.
Mastering these small changes can improve your welds, but always start with the basic output setting.
Insight for advanced users: If you weld outdoors, wind can blow away the shielding gas from the rod’s flux. Increase amperage slightly to compensate for a less stable arc, but avoid making the weld too hot.
Troubleshooting Output Problems
If you still have trouble after adjusting the output, consider these issues:
- Rod quality: Old or damp rods perform poorly.
- Power supply: Voltage drops in long extension cords reduce output.
- Internal machine problems: If output does not change when you turn the knob, have the machine checked by a professional.
Example: Many beginners blame bad welds on settings, but often the real issue is a rusty ground connection or poor rods. Always check these before changing machine output.
Where To Find More Information
Lincoln Electric offers detailed manuals and charts for every model. Their support site is helpful for specific questions. For more advanced learning, the American Welding Society and Lincoln Electric Learning Center have free resources and training videos.
Frequently Asked Questions
What Happens If My Amperage Is Too High Or Too Low?
If your amperage is too high, you may burn through the metal, create too much spatter, or make a flat, wide bead. If it is too low, the rod may stick, the arc will be weak, and the weld will not penetrate the metal properly.
How Do I Know The Right Amperage For My Rod?
Check the rod’s packaging or a welding chart. Start in the middle of the recommended range. Adjust based on your test welds and the appearance of the bead.
Can I Change Output Settings While Welding?
Most Lincoln machines should be stopped before adjusting the output. Changing amperage while welding can damage the machine or produce unstable results. Always pause before making changes.
What If My Lincoln Welder Has No Numbers On The Dial?
If your machine uses a dial without numbers, use a chart as a guide, then mark your preferred positions with tape or a marker after testing. Rely on the sound and look of the weld to fine-tune.
Do I Need To Use The Same Settings For Every Welding Job?
No, each job may need different settings. Metal thickness, rod type, position, and even weather can require adjustments. Always test and adjust as needed.
Setting stick welding output on a Lincoln machine is not difficult once you know the steps. Start with the recommended settings, test on scrap, and make careful adjustments. Pay attention to details like rod type, metal thickness, and machine features.
With practice, you will set the output quickly and get strong, clean welds on every project. Stick with these basics, and your welding results will improve every time.