Disclosure: This post contains affiliate links and I will be compensated if you make a purchase after clicking through my links. Learn More
Setting up a MIG welder can be confusing, especially when you see a control called “inductance. ” Many welders skip this setting, not sure what it does or why it matters. But adjusting inductance can change how your weld looks, how much spatter you get, and even how easy it is to control the bead.
If you want to get better results with your MIG welder, understanding inductance is key. This article will explain everything you need to know about setting inductance on a MIG welder, including what it does, why it matters, and how to adjust it.
You’ll also learn how it affects your welds, see real examples, and get practical tips to avoid common mistakes.
What Is Inductance On A Mig Welder?
Inductance in MIG welding controls how quickly the current rises at the start of each arc cycle. This setting exists mainly on machines that use synergic or advanced MIG processes, but many modern welders include it. Inductance affects the arc’s shape, bead profile, spatter, and penetration. It is especially useful when welding thin materials or when you want more control over the weld puddle.
In simple terms, inductance is the welder’s way of smoothing out the electrical current. If you set inductance high, the current rises slower, creating a softer arc. If you set it low, the current rises faster, resulting in a more aggressive arc.
Why Inductance Matters In Mig Welding
Many beginners ignore the inductance control, but it can make a big difference in your welding results. Here are the main reasons why inductance is important:
- Controls Spatter: High inductance reduces spatter, which means less cleaning after welding.
- Affects Penetration: Low inductance gives deeper penetration but more spatter. High inductance gives less penetration but a smoother weld.
- Improves Bead Appearance: Inductance helps you get a flatter or more raised bead, depending on your needs.
- Protects Thin Metal: Inductance can prevent burn-through on thin materials by softening the arc.
- Increases Control: Adjusting inductance gives you more control over the weld puddle, especially with tricky joints.
Many welding guides skip over this control, but it can be the difference between a messy weld and a professional-looking bead.
How Inductance Works In A Mig Welder
To understand how to set inductance, you need to know what happens inside the machine. When you press the trigger, your MIG welder sends electricity through the wire. The wire melts and forms the weld. Inductance changes how quickly the current goes up at the start of each wire melt cycle.
- Low Inductance: The current rises quickly. This gives a strong, “crackling” arc, similar to frying bacon. The weld penetrates deeper but creates more spatter.
- High Inductance: The current rises slowly. The arc is smoother and softer. The bead is wider and flatter, with less spatter, but penetration is less.
This setting is most noticeable in short-circuit transfer welding, which is common for thin steel and automotive work.
Where To Find The Inductance Control
Not every MIG welder has an inductance setting. You will find it on:
- Synergic MIG welders
- Advanced inverter welders
- Some multi-process machines
On older or entry-level machines, you may not see an inductance knob. If your welder has it, it may be labeled as:
- Inductance
- Arc Control
- Dynamic Control
Check your user manual or look for a knob or digital setting with these names.
How To Set Inductance On A Mig Welder: Step-by-step
Setting inductance is easier than most people think. Follow these steps for the best results:
1. Identify The Inductance Control
Find the inductance setting on your welder. It might be a physical knob, a button, or a setting on a digital screen. If you cannot find it, check your manual or the manufacturer’s website.
2. Set Your Welding Parameters First
Before you adjust inductance, set your:
- Wire feed speed
- Voltage
- Gas flow
- Polarity
Use the recommended settings for your wire type and material thickness.
3. Start With The Default Inductance Value
Most machines have a default, usually around 50% or “0” on a scale from -10 to +10. Start here. This is a balanced setting and works for most jobs.
4. Strike An Arc And Make A Test Weld
Weld a short bead on a scrap piece of your work material. Watch the arc, bead profile, and spatter.
5. Adjust Inductance Up Or Down
- If you want a softer arc and less spatter, increase inductance.
- If you need more penetration and a “crisp” arc, decrease inductance.
Make small changes (for example, +1 or -1) and test again.
6. Inspect Your Welds
Look at the bead. Check for:
- Spatter level
- Bead shape (flat or raised)
- Penetration (did it go through or not?)
Choose the setting that gives you the best result for your job.
7. Repeat As Needed
Fine-tune your setting until you are happy with the weld.
What Happens At Different Inductance Settings
The changes you see can be subtle or clear, depending on your material and technique. Here is a comparison to help you see the effect:
| Inductance Setting | Arc Sound | Bead Shape | Spatter | Penetration |
|---|---|---|---|---|
| Low | Loud, crackling | Narrow, raised | High | Deep |
| Medium (Default) | Balanced | Medium | Medium | Good |
| High | Soft, smooth | Wide, flat | Low | Shallow |
How Inductance Affects Different Welding Applications
Inductance is not a “set once” and forget it control. You should adjust it for different jobs. Here are some examples:
Welding Thin Sheet Metal
When welding car panels or thin steel, you want to avoid burn-through and spatter. Use higher inductance. This softens the arc and keeps the bead flat.
Welding Thick Steel
If you want deep penetration, such as when welding frames or heavy brackets, use lower inductance. This gives a hotter arc and drives the weld deeper.
Out-of-position Welding
When welding overhead or vertical, a higher inductance can help control the puddle and reduce sagging.
Aluminum Mig Welding
Some advanced MIG welders allow inductance adjustment for aluminum. Use higher inductance for a smoother arc, but watch for lack of penetration.
Practical Examples: Inductance Settings For Common Materials
Here is a guide to help you set inductance for popular welding jobs:
| Material | Thickness | Recommended Inductance | Notes |
|---|---|---|---|
| Mild Steel | 0.8-1.5 mm | High (60-80%) | Reduces spatter, prevents burn-through |
| Mild Steel | 2-6 mm | Medium (45-60%) | Balanced for strength and appearance |
| Stainless Steel | All | Medium-High (50-70%) | Smoother arc, less discoloration |
| Aluminum | 1-3 mm | High (70-90%) | Softer arc helps with puddle control |
| Galvanized Steel | 1-2 mm | Medium (50-60%) | Reduces spatter, protects coating |
These are starting points. Always test on scrap material before welding your actual project.
Inductance And Wire Type: What To Know
Different wires respond to inductance in different ways. The most common wires are solid wire (ER70S-6) and flux-cored wire (E71T-11). Inductance mainly affects solid wire in short-circuit transfer. With flux-cored wire, the effect is less noticeable but still present.
- Solid wire: Benefits most from inductance adjustment. You will see clear changes in spatter and bead shape.
- Flux-cored wire: Some machines allow inductance changes, but it’s less important. The wire creates its own shielding and arc shape.
If you use other wires, such as stainless or aluminum, always check the manufacturer’s advice.
Inductance Vs. Other Controls: What’s The Difference?
Many people confuse inductance with voltage or wire feed speed. Each control does something different:
| Control | Main Effect | What It Changes |
|---|---|---|
| Inductance | Current rise speed | Arc softness, spatter, bead shape |
| Voltage | Arc length | Bead width, penetration |
| Wire Feed Speed | Metal delivery rate | Bead size, deposition rate |
If your weld is not right, change only one control at a time. This helps you see the effect and avoid confusion.

Credit: www.jasic.co.uk
Common Mistakes When Setting Inductance
Many welders, especially beginners, make the same mistakes with inductance. Here are the main ones, and how to avoid them:
- Ignoring Inductance: Many skip this control and accept extra spatter or poor beads. Always test and adjust.
- Turning Inductance Too High: Very high inductance can make the arc too soft, leading to cold welds with poor fusion.
- Turning Inductance Too Low: Low inductance causes a harsh arc, lots of spatter, and can burn through thin metal.
- Changing Inductance Before Other Settings: Always set wire feed speed and voltage first, then fine-tune with inductance.
- Not Testing on Scrap: Always run test beads when changing inductance. Every machine is a little different.
Two Non-obvious Insights About Inductance
- Inductance Changes Arc Stability in Windy Areas: If you weld outdoors, higher inductance can help keep the arc stable when wind moves your shielding gas. Many beginners do not realize this can reduce porosity.
- Digital Machines May “Hide” Inductance: Some digital MIG welders auto-set inductance based on your material and wire. You might need to unlock “advanced” settings to adjust it yourself. Always check your manual for hidden controls.
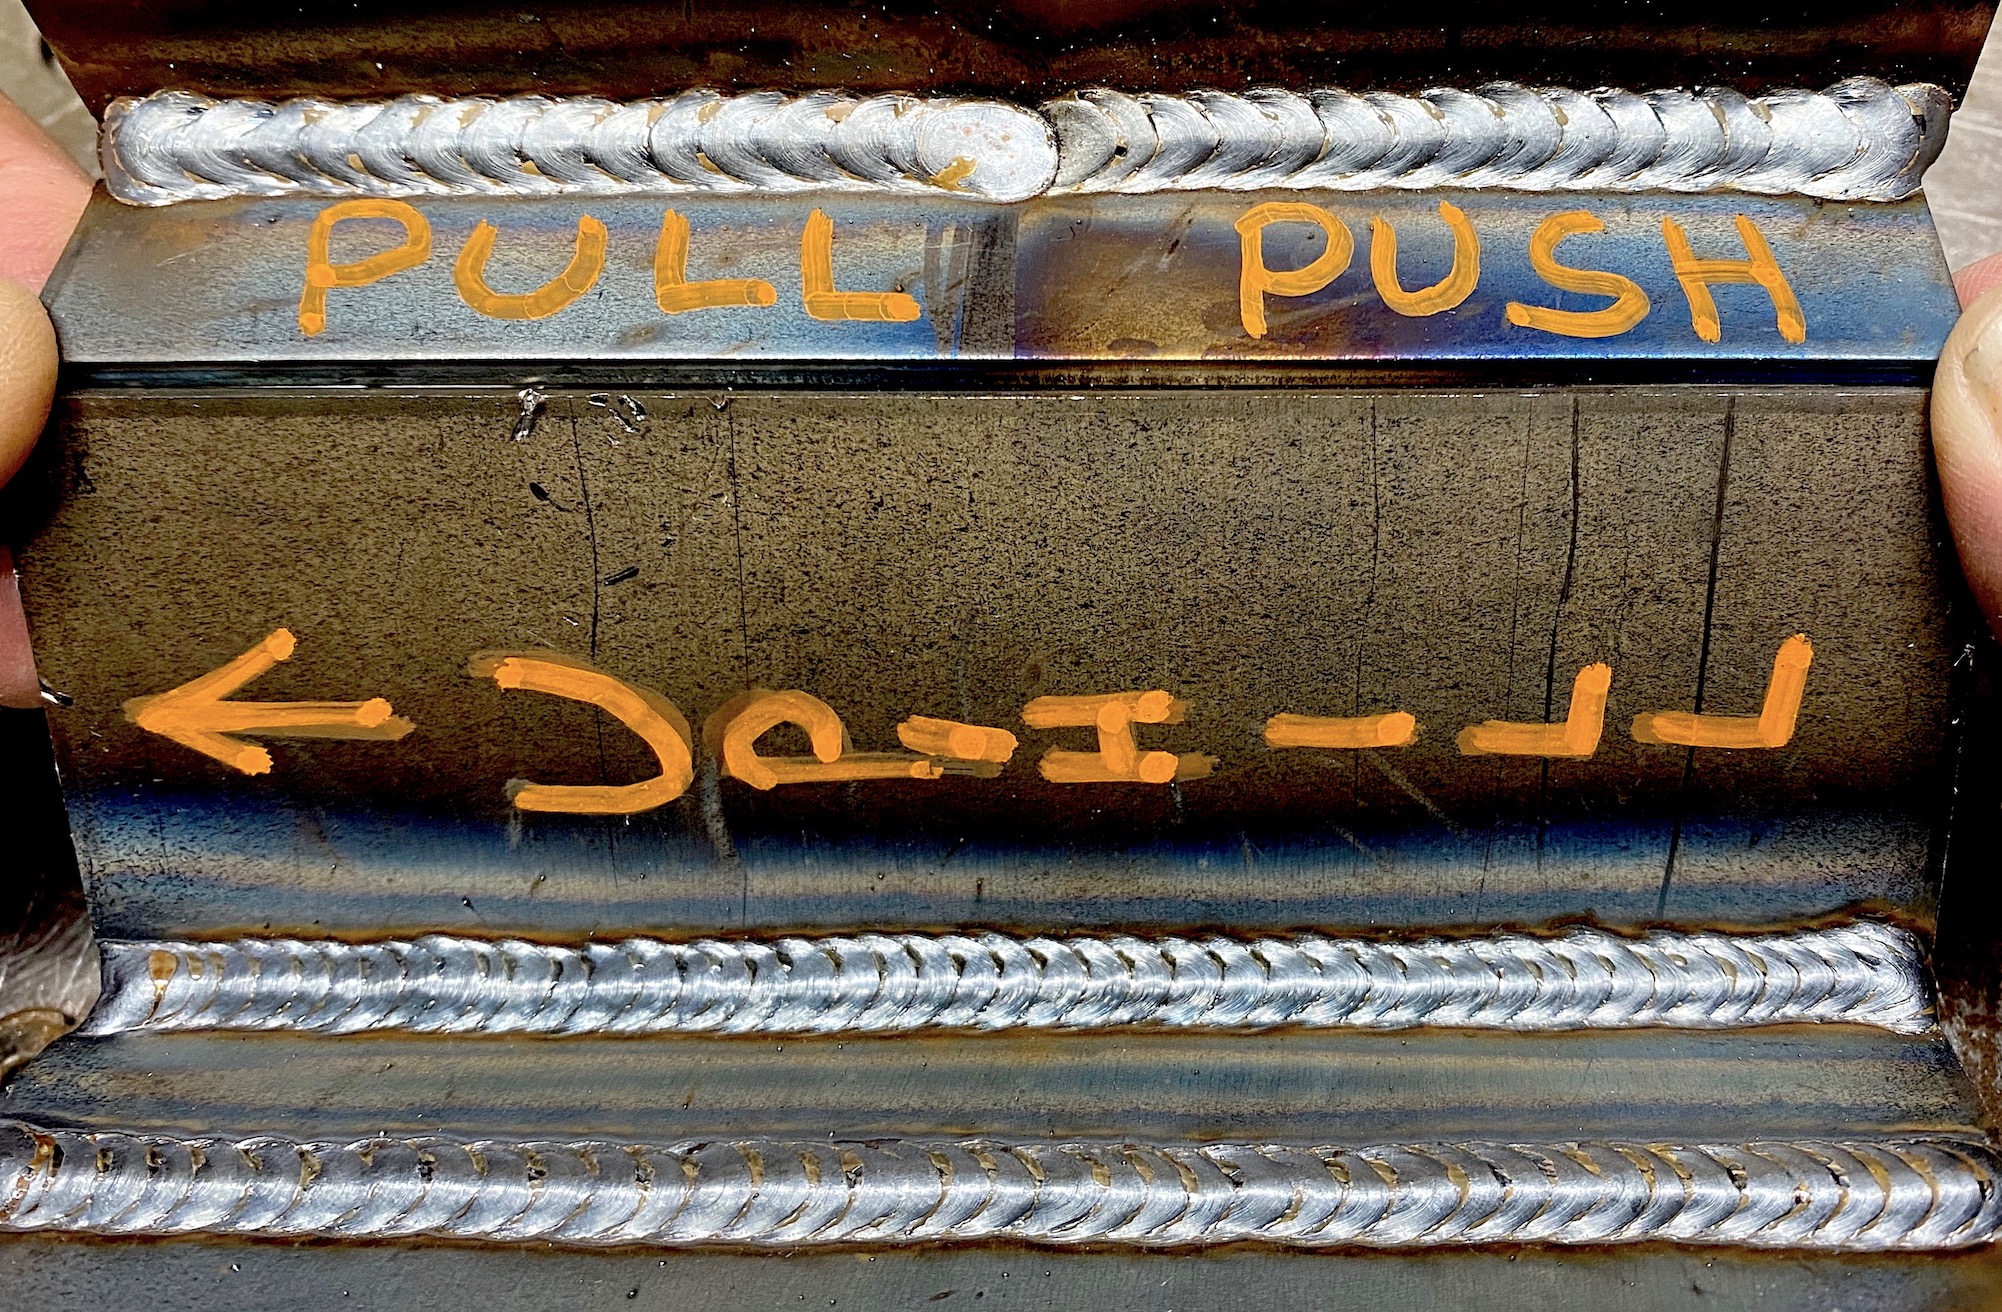
Credit: www.weldingtipsandtricks.com
Signs Your Inductance Is Set Correctly
Welders often wonder how to know if they have the right inductance setting. Here are the signs:
- Arc is stable: Not too harsh or too soft.
- Low spatter: You spend less time cleaning.
- Good bead shape: Neither too narrow nor too wide.
- Consistent penetration: No burn-through, but strong joints.
If you see these signs, your inductance is set well for your job.
How Professionals Use Inductance
Experienced welders use inductance to fine-tune their results. For example, in a repair shop, a welder might use high inductance for thin car body panels, then lower it for structural work. In fabrication, professionals adjust inductance to match the welding position or to reduce post-weld cleanup time.
If you want to improve your skills, try keeping a log of your settings and results. This helps you learn what works best for each job.
Safety Considerations When Adjusting Inductance
Changing inductance does not change the basic safety rules of welding, but it can affect:
- Arc flash risk: A harsh arc (low inductance) can be brighter. Always wear proper PPE.
- Heat input: High inductance can make cold welds. Always check for strong joints.
- Machine overheating: If you push your machine with high settings for long periods, watch for overheating.
Always follow your welder’s safety guidelines.
How To Troubleshoot Inductance Problems
If your welds look wrong, inductance could be the cause. Here is a quick troubleshooting guide:
- Too much spatter: Increase inductance.
- Arc feels weak or “cold”: Lower inductance slightly.
- Bead is too flat and wide: Lower inductance.
- Bead is too narrow and tall: Raise inductance.
- Burn-through: Raise inductance, slow down, or lower voltage.
If the problem does not improve, check other settings or your shielding gas.
Tips For Getting The Best Results
Here are practical tips for using inductance on a MIG welder:
- Make small changes: Adjust by one or two points at a time.
- Keep a notebook: Write down your settings for different materials.
- Watch the arc: Listen to the sound and look for a steady, even arc.
- Clean your material: Dirt and rust can mask the effects of inductance.
- Check your ground: A poor ground connection can make arc control inconsistent.
- Try different wires: Some wires respond better to inductance changes.
Inductance And Modern Welding Technology
Modern MIG welders are adding more controls, including digital inductance. Some machines even let you save your favorite settings for each job. If you are buying a new welder, look for one with easy-to-adjust inductance, especially if you work with many materials.
For more on MIG welding controls, the Gas metal arc welding page on Wikipedia explains the science behind arc controls in detail.

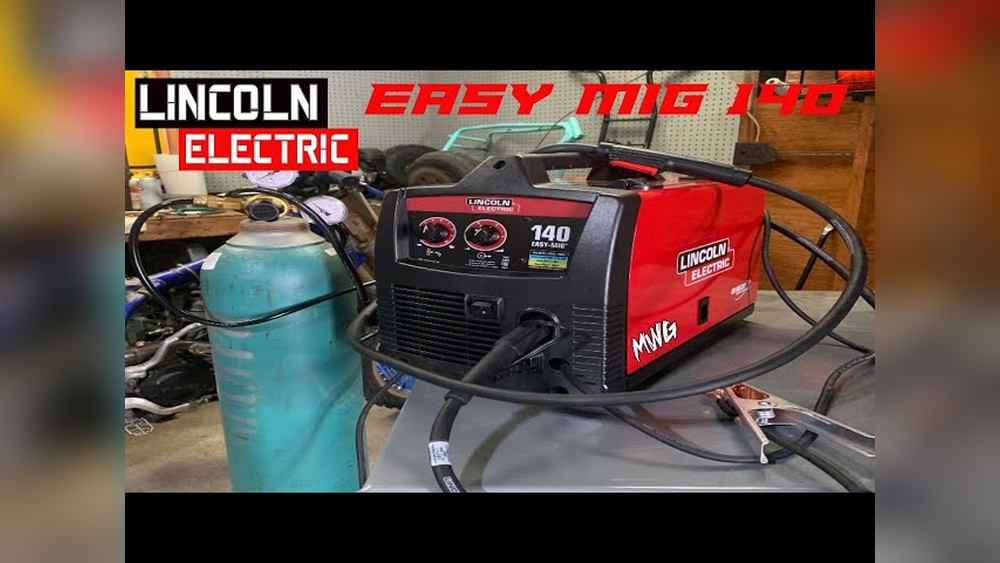
Credit: www.youtube.com
Frequently Asked Questions
What Is The Main Purpose Of The Inductance Control On A Mig Welder?
The main purpose of the inductance control is to adjust how quickly current rises during the welding cycle. This changes the arc’s softness, bead shape, and amount of spatter. It helps you get cleaner, stronger welds, especially on thin metal.
Should I Adjust Inductance For Every Job?
You do not need to adjust inductance for every weld, but you should check it when changing material thickness, wire type, or welding position. Small adjustments can improve results and reduce cleanup time.
What Happens If My Inductance Is Set Too High?
If inductance is too high, the arc becomes too soft and flat. Welds may have poor penetration, and the joint could be weak. You may also see a bead that is too wide and not fused well with the base metal.
How Do I Know If My Welder Has An Inductance Control?
Check your welder’s front panel for a knob or setting labeled “Inductance,” “Arc Control,” or “Dynamic Control. ” If you have a digital welder, check the menu or manual. Some machines set inductance automatically and hide the control.
Can I Damage My Welder By Setting Inductance Incorrectly?
You are unlikely to damage your welder by adjusting inductance, but you can make bad welds. Always test on scrap, start with the default, and make small changes. Watch for signs of weak welds or excess spatter.
Final Thoughts
Inductance is one of the most important but least understood controls on a MIG welder. By learning how to set it correctly, you can get better welds, less spatter, and more control over your work. Start with your machine’s default, test on scrap, and adjust based on the results you see and hear.
With practice and careful observation, you will soon use inductance like a professional, making your welding cleaner and stronger every time.