Disclosure: This post contains affiliate links and I will be compensated if you make a purchase after clicking through my links. Learn More
Welding square tubing with a MIG welder can be a challenge, especially if you worry about burning holes through the metal. Many beginners struggle with the same problem: too much heat melts the tubing, while too little heat leads to weak or messy welds. This guide explains clear steps to MIG weld square tubing without blowing through, using simple language and practical advice. If you want to build strong frames, furniture, or repairs, you can follow these methods to get clean, solid results.
Why Square Tubing Is Different
Square tubing is a common material in metal projects. People use it for building gates, tables, trailers, and even car parts. The shape gives it strength, but the flat, thin walls can be easy to damage with too much welding heat. Unlike thick steel plate, square tubing often ranges from 16 gauge (1.6 mm) to 1/8 inch (3.2 mm) wall thickness. These thin walls heat up very quickly. If you apply too much current or move too slowly, you create holes that are hard to fix.
Many new welders make the mistake of treating square tubing like thicker metal, using the same settings. Instead, you need to adjust your approach. Learn to balance heat control, wire speed, and welding technique to avoid blowing through.
Understand Mig Welding Basics
Before welding, it helps to review how MIG welding (Metal Inert Gas welding, also called GMAW) works. A MIG welder uses an electric arc to melt a wire electrode, which joins metal pieces. A shielding gas (often argon, CO₂, or a mix) protects the molten weld from the air.
Key factors in MIG welding:
- Voltage (heat)
- Wire feed speed
- Travel speed
- Shielding gas flow
- Distance from the workpiece
Each factor influences how much heat you put into the tubing. Too much heat or too slow movement causes blow-through.
Select The Right Tubing
Choosing the right square tubing for your project can help avoid problems. For most small projects, people use tubing from 16 gauge (1.6 mm) up to 11 gauge (3 mm). Thinner tubing is lighter but melts easily under high heat.
If you can, use tubing with a slightly thicker wall for high-stress projects. For decorative or light frames, thinner tubing is fine, but you must take extra care during welding.
Prepare The Tubing
Good preparation prevents many welding problems. Follow these steps before starting:
- Cut clean edges: Use a chop saw or angle grinder for straight cuts. Jagged or uneven cuts make welding harder.
- Remove oil, paint, and rust: Clean both inside and outside edges with a wire brush or grinder. Paint and oil create fumes and make poor welds.
- Fit-up: Clamp or tack the pieces so they line up with a small gap (about 1 mm or less). Large gaps increase the risk of blow-through.
- Bevel the edges (if needed): For thicker tubing, grind a small angle (bevel) on the edges. For thin tubing, keep edges square to avoid burning through.
Many beginners skip cleaning or fitting properly. Even small bits of rust or gaps can ruin your weld and increase blow-through risk.
Choose The Right Mig Welder Settings
Setting your MIG welder correctly is the most important step to avoid blow-through. Here’s how to choose the best settings for square tubing:
Voltage And Amperage
For thinner tubing (16-14 gauge), set the voltage and amperage lower. A typical setting for 16 gauge steel might be 16-17 volts and 60-80 amps. For 1/8” (3 mm) thick tubing, you can use 18-20 volts and 90-120 amps.
Check your welder’s manual for a starting point, then test on scrap pieces.
Wire Feed Speed
Set the wire feed speed so the weld sounds like frying bacon—not popping or hissing. If the wire feeds too fast, you get uneven welds and spatter. Too slow, and the arc cuts in and out. For 0.8 mm (.030”) wire, start around 180-200 inches per minute (ipm) for thin tubing. Adjust as needed.
Wire Size
Use .023” (0.6 mm) or .030” (0.8 mm) solid wire for thin square tubing. Thicker wires (.035” or larger) put in more heat, which can increase blow-through. For most hobby or light projects, .023” wire works best.
Shielding Gas
Use 75% Argon / 25% CO₂ for clean welds on mild steel square tubing. Pure CO₂ works but makes a hotter weld, which can burn thin walls. Set the gas flow to 20-25 cubic feet per hour (CFH).
Polarity
Set your welder to DC Electrode Positive (DCEP) for solid wire and shielding gas. Using the wrong polarity makes weak welds and can damage the tubing.
Example Setting Chart
Here is a quick reference for common square tubing thicknesses:
| Wall Thickness | Wire Size | Voltage | Wire Speed (ipm) | Gas Mix |
|---|---|---|---|---|
| 16 gauge (1.6 mm) | .023” (0.6 mm) | 16-17 V | 180-200 | 75/25 Ar/CO₂ |
| 14 gauge (2 mm) | .030” (0.8 mm) | 17-18 V | 200-230 | 75/25 Ar/CO₂ |
| 1/8” (3.2 mm) | .030” (0.8 mm) | 18-20 V | 230-250 | 75/25 Ar/CO₂ |
Always test on scrap pieces of the same tubing before starting your real project.
Use The Right Welding Technique
How you move the MIG gun matters as much as settings. Use these techniques to avoid blowing through:
Stitch Welding (tack And Skip)
Instead of running a long bead, use short bursts (stitches). Weld for one second, stop, move ahead, and repeat. This lets the metal cool between welds. After you finish the first set of stitches, go back and fill the gaps.
Push Or Pull?
Use a slight push angle (gun points ahead of your travel), about 10-15 degrees. This gives better gas coverage and helps control the puddle. Pulling the gun makes a deeper, hotter weld—risking blow-through.
Keep A Short Stick-out
Keep the wire tip about 1/4 inch (6 mm) from the tubing. A long stick-out (distance from tip to work) reduces gas coverage and makes the arc unstable, which can burn through.
Move Quickly
Travel at a steady, fast speed. Moving slowly adds heat and increases blow-through. Watch the weld pool—if it starts to sink or drip, you are moving too slowly.
Weld Position
Weld the flat (horizontal) joints first, as they are easiest to control. For vertical or overhead welds, use even shorter stitches and lower heat.
How To Weld Thin Square Tubing: Step-by-step
- Fit and clamp the pieces: Make sure the tubing is square and tightly clamped.
- Set the welder: Use the lowest voltage and wire speed that still gives a stable arc.
- Tack weld corners: Place small tacks (short welds) at each corner or joint. This keeps tubing from warping.
- Stitch weld the joint: Make a 1/2 inch (12 mm) weld, then move to another spot. Repeat until the seam is complete.
- Let it cool: Wait a few seconds between welds to avoid heat build-up.
- Fill gaps: After the first pass, fill in any gaps with short stitches.
- Check for blow-through: If you see a hole, stop. Let the area cool, then patch using short bursts at a lower setting.
Here’s a comparison of common mistakes and better practices:
| Mistake | Better Practice |
|---|---|
| Long, slow welds | Short stitch welds |
| High voltage/amperage | Lower settings, test first |
| Dirty or rusty tubing | Clean, bare metal |
| Wire tip too far from work | Short stick-out (1/4″) |
| No cooling time | Wait between welds |
How To Fix Blow-through Holes
If you blow a hole in the tubing, you can still save your project. Here’s how:
- Let the area cool: Never try to weld over a hot hole. The metal will keep melting.
- Lower the heat: Turn down the voltage and wire speed.
- Stitch the edges: Make very short bursts around the edge of the hole, letting each cool.
- Build up the metal: Continue with short welds until the hole closes. If the hole is too big, use a small patch of steel.
- Grind smooth: Once filled, grind the area flat to match the tubing.
Many beginners keep welding over a hot hole, which only makes it larger. Patience and short welds are the key.
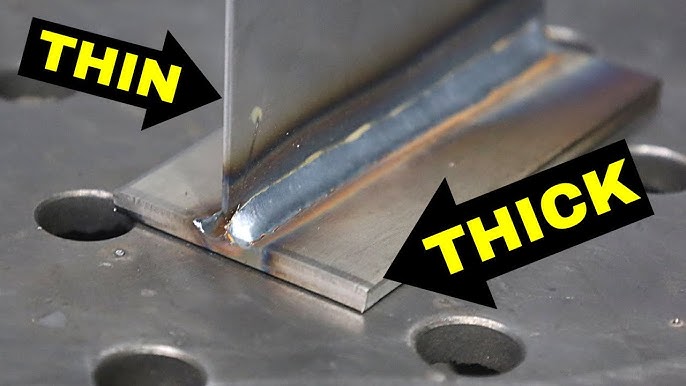
Credit: www.youtube.com
Tips For Strong And Neat Welds
- Practice on scrap tubing first. Try different settings and techniques.
- Use both hands to hold the MIG gun steady.
- Clamp your work securely so nothing moves.
- Check for proper gas flow—listen for a gentle hiss, not a loud blast.
- Wear proper safety gear: Gloves, jacket, and a good welding helmet.
- Work in a well-ventilated area to avoid fumes.
- Inspect your welds for cracks or holes before using the finished piece.
- Cool the tubing with a damp cloth if it gets too hot, but only after welding (never during).
Common Problems And Solutions
Warping
Thin tubing can warp from heat. Use more tacks and weld in short stitches, moving around the joint to spread heat.
Porosity
Welds with bubbles or holes often come from dirty metal or not enough shielding gas. Clean the tubing and check your gas flow.
Spatter
Too much spatter means the settings are off. Lower the wire speed or voltage, and hold the gun at the correct angle.
Incomplete Penetration
If the weld sits on top of the tubing and does not join both pieces, the heat is too low or you’re moving too fast. Increase voltage slightly or slow your movement.
Choosing The Right Filler Wire
The filler wire matters for strength and weld quality. For most square tubing (mild steel), use ER70S-6 solid wire. This wire type gives clean welds with good strength. For stainless tubing, use an appropriate stainless filler, and for aluminum, use a dedicated aluminum wire and different gas (usually pure argon).
Here’s a quick comparison:
| Material | Recommended Wire | Shielding Gas |
|---|---|---|
| Mild Steel | ER70S-6 | 75/25 Ar/CO₂ |
| Stainless Steel | ER308L | 98% Ar/2% CO₂ |
| Aluminum | ER4043 | 100% Argon |
For most home and light industrial projects, ER70S-6 with a 75/25 gas mix is the best choice.
Safety Reminders
Welding is safe if you follow some basic rules:
- Always wear a welding helmet with the right shade.
- Protect your skin with gloves and a jacket—welding burns happen fast.
- Do not weld near flammable materials.
- Keep a fire extinguisher nearby.
- Work in a place with good airflow to avoid breathing fumes.
- Disconnect the welder when changing wire or tips.
Ignoring safety is one of the fastest ways to get hurt, even on small projects.
Advanced Tips For Professionals
If you weld square tubing often, there are a few extra steps you can take for even better results:
- Use a backing bar: Place a copper or aluminum bar behind the seam. The weld won’t stick to it, and it absorbs heat, reducing blow-through.
- Pre-set clamps: Use self-locking clamps or magnetic squares for perfect alignment.
- Pre-tack all joints: Tack every joint before final welds to keep the tubing from moving.
- Double-pulse MIG welders: These advanced machines control heat even better, but are more expensive.
- Use a spool gun for aluminum: Standard MIG guns can jam with soft aluminum wire.
Testing Your Welds
After you finish welding, check your work for strength and quality:
- Visual inspection: Look for even, smooth beads without holes or cracks.
- Tap test: Gently tap the weld with a hammer. A solid weld sounds “ringy,” while a poor weld sounds dull.
- Bend test: If possible, try to bend a small sample. Good welds bend with the tubing, while weak welds crack or break.
- Magnet test: Pass a magnet over the weld. If it sticks to the filler, you used the right wire for mild steel.
Never trust a weld just because it looks good on the surface. Testing is the only way to be sure.

Credit: www.reddit.com
Two Insights Most Beginners Miss
- Heat builds up fast in square tubing because of the large, flat surface and thin walls. Even short welds can add too much heat if you don’t pause.
- Joint fit-up is more important than you think. Even a 2 mm gap can make blow-through almost certain, while tight joints let you use lower heat and faster travel.
Frequently Asked Questions
What Is The Best Wire Size For Mig Welding Square Tubing?
For most square tubing under 1/8” (3 mm), use .023” (0.6 mm) or .030” (0.8 mm) solid wire. Thinner wire allows you to weld at lower heat, reducing the risk of blowing through the metal. Use .035” wire only for thicker tubing.
How Do I Prevent Warping When Welding Square Tubing?
Weld in short stitches, moving around the joint to spread the heat. Use several small tack welds before the main welds. Clamp the tubing securely, and avoid long, continuous beads.
Can I Mig Weld Square Tubing Without Shielding Gas?
You can use flux-cored wire without shielding gas, but it creates more spatter and is harder to control on thin tubing. Gasless welding is not recommended for clean, neat welds on square tubing.
What Causes “blow-through” In Mig Welding?
Blow-through happens when too much heat melts the tubing, creating a hole. Common causes are high voltage/amperage, slow travel speed, large gaps, or using thick wire. Lower the heat and move faster to avoid this.
Where Can I Learn More About Mig Welding And Settings?
You can find more technical details and tables on the official Gas Metal Arc Welding Wikipedia page. This source offers more in-depth explanations about MIG welding principles and practices.
Welding square tubing can seem difficult, but with the right approach, you can get strong, neat results. Start with careful preparation, use the right settings, and practice your technique. Avoid common mistakes and test your welds for safety. With time and patience, you can weld square tubing without blowing through and achieve professional-quality results.

Credit: www.reddit.com