Disclosure: This post contains affiliate links and I will be compensated if you make a purchase after clicking through my links. Learn More
To clean a generator, turn off the unit and disconnect it from any power sources. Use a damp cloth to wipe down the exterior.
Generators need regular cleaning for optimal performance and longevity. Dust, grime, and debris can accumulate, affecting the machine’s efficiency. Cleaning ensures that the generator runs smoothly, preventing potential issues. Regular maintenance also extends the life of your equipment, saving you money in the long run.
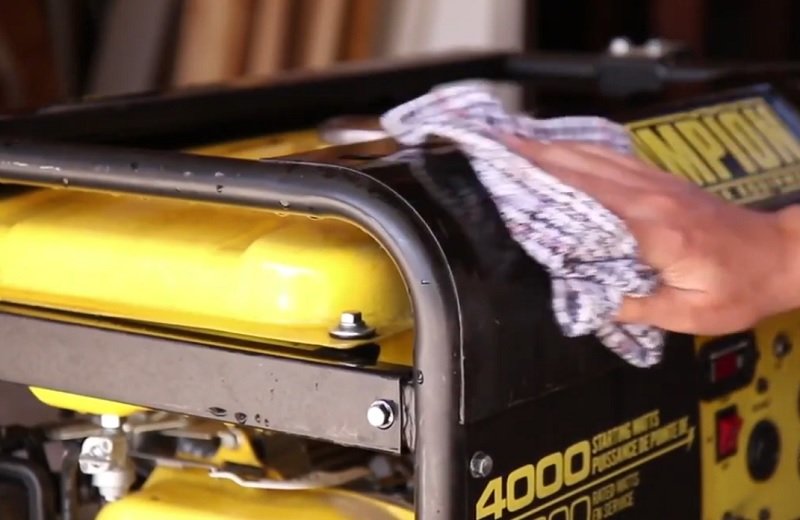
Simple tools like a damp cloth, a soft brush, and mild detergent can make a big difference. Routine checks and cleanings are essential to keep your generator in peak condition. By maintaining your generator, you ensure its reliability during power outages and other emergencies. Clean your generator regularly to keep it running efficiently.
Safety First
Cleaning a generator is important, but safety must come first. Following safety steps avoids accidents and ensures the generator works well. Let’s look at key safety measures.
Personal Protective Equipment
Always wear Personal Protective Equipment (PPE) when cleaning a generator. PPE includes:
- Gloves
- Safety goggles
- Ear protection
- Protective clothing
Gloves protect your hands from sharp parts and chemicals. Safety goggles shield your eyes from debris and dust. Ear protection guards against loud noises. Protective clothing keeps your skin safe from spills and heat.
Generator Shutdown
Before cleaning, always shut down the generator. Follow these steps:
- Turn off all connected appliances.
- Switch off the generator using the main power switch.
- Disconnect the generator from any power sources.
- Let the generator cool down completely.
Turning off connected appliances prevents electrical shocks. The main power switch ensures the generator is off. Disconnecting power sources stops accidental starts. Cooling down avoids burns and heat-related injuries.
Gathering Tools
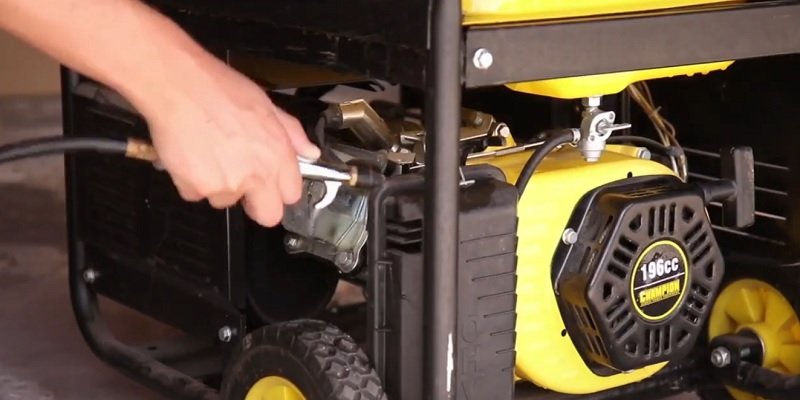
Before you start cleaning your generator, gather all necessary tools. Proper preparation ensures a smooth cleaning process. This section will help you collect everything you need.
Cleaning Supplies
Having the right cleaning supplies is crucial. Here is a list of essentials:
- Soft cloths
- Brushes of various sizes
- Bucket of warm water
- Mild detergent
- Compressed air canister
- WD-40 or similar lubricant
Use soft cloths to wipe down surfaces. Brushes help clean small crevices. Warm water with mild detergent will remove dirt and grime. Compressed air canister blasts out dust from hard-to-reach areas. Lubricant keeps moving parts functioning smoothly.
Tool Checklist
Besides cleaning supplies, you need some tools. Here is a checklist:
- Screwdrivers (flat and Phillips head)
- Wrenches
- Pliers
- Socket set
- Flashlight
- Multimeter
Screwdrivers help remove covers and panels. Wrenches and pliers are for loosening and tightening bolts. A socket set is useful for various nuts. Flashlights help you see clearly, especially in dim areas. A multimeter checks electrical connections.
With these tools and supplies, you are ready to clean your generator. Proper preparation ensures a safe and effective cleaning process.
Initial Inspection
Before cleaning your generator, conduct an initial inspection. This ensures the safety and efficiency of the cleaning process. Look for any visible issues or potential hazards.
Visual Check
Start with a thorough visual check of the generator. Look for dust, dirt, or debris. Check the exterior for any cracks or dents. Ensure all parts are intact and secure. A clean generator works better and lasts longer.
- Examine the control panel for any signs of damage.
- Inspect the exhaust system for blockages.
- Look at the air filter for dirt buildup.
Leak Detection
Perform a leak detection to identify any fuel or oil leaks. Leaks can be dangerous and should be fixed immediately. Check around fuel lines and oil seals. Use a flashlight for better visibility.
- Check for any wet spots or puddles.
- Inspect hoses and connections for cracks.
- Look for oil stains around the engine.
| Inspection Area | What to Look For |
|---|---|
| Control Panel | Damage or wear |
| Exhaust System | Blockages or residue |
| Fuel Lines | Cracks or leaks |
Cleaning The Exterior
Keeping your generator clean is crucial for its performance. Regular cleaning helps avoid damage and ensures longevity. This section will guide you on how to clean the exterior of your generator. Follow these simple steps to keep it spotless and running efficiently.
Wiping Down Surfaces
First, turn off and unplug the generator. Use a soft cloth to wipe down all surfaces. Start with the top and work your way down. Dampen the cloth with water if needed, but avoid soaking it. Pay special attention to the control panel and vents.
For stubborn stains, use a mild detergent. Mix it with water and apply with the cloth. Avoid using harsh chemicals that can damage the paint. Make sure to dry all surfaces thoroughly after cleaning.
Removing Dirt And Debris
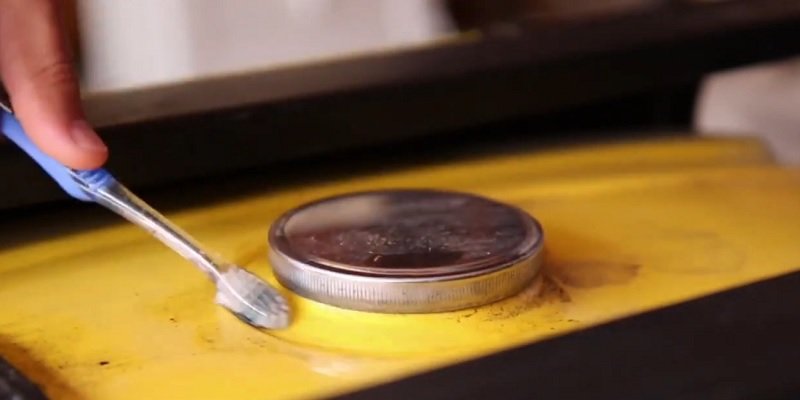
Inspect the generator for dirt and debris. Use a small brush to clean crevices and hard-to-reach areas. A soft-bristle brush is ideal for this task. Be gentle to avoid scratching the surface.
- Check the vents for blockages.
- Remove any leaves or twigs trapped in the grill.
- Use compressed air to blow out stubborn dirt.
Cleaning the wheels and base is also important. Wipe them down to remove any mud or grime. Keeping these parts clean ensures smooth movement and stability.
| Item | Cleaning Method |
|---|---|
| Control Panel | Wipe with damp cloth, dry thoroughly |
| Vents | Brush out dirt, use compressed air |
| Grill | Remove debris, clean with brush |
| Wheels | Wipe down, remove mud |
Regular cleaning keeps your generator looking new. It also helps it work better. Follow these steps to maintain your generator’s exterior easily.
Cleaning The Air Filter
Keeping the air filter clean ensures your generator runs smoothly. A dirty air filter can reduce performance. Follow these steps to clean the air filter effectively.
Filter Removal
- Turn off the generator and let it cool down.
- Locate the air filter cover on the side of the generator.
- Use a screwdriver to remove the cover screws.
- Carefully lift off the cover to expose the air filter.
- Gently pull out the air filter from its housing.
Filter Cleaning
- Inspect the air filter for damage. Replace if necessary.
- Tap the filter gently to remove loose dirt.
- Use compressed air to blow out remaining dirt.
- Wash the filter with mild soap and water. Allow to air dry.
- Ensure the filter is completely dry before reinstallation.
Proper air filter maintenance extends the life of your generator. Clean or replace the filter regularly to keep your generator in top shape.

Cleaning The Fuel System
Regular cleaning of the fuel system is crucial to keep your generator running smoothly. A clean fuel system ensures that fuel flows properly, preventing clogs and maintaining efficiency. Follow these steps to effectively clean your generator’s fuel system.
Draining Fuel
First, ensure the generator is turned off and cool. Locate the fuel valve and set it to the off position. Place a fuel container under the drain valve. Open the valve and allow the fuel to drain completely into the container. This helps remove old fuel and any contaminants.
Fuel Line Inspection
After draining the fuel, inspect the fuel lines for any signs of wear or damage. Check for cracks, leaks, or blockages. If you notice any issues, replace the fuel lines immediately. Clean the fuel filter by removing it and rinsing it with fresh fuel. Reinstall the filter and ensure all connections are secure.
Battery Maintenance
Proper battery maintenance is crucial for the efficient operation of your generator. Regular cleaning and inspection can extend the battery’s life and ensure reliable performance. Follow these steps to keep your generator battery in top condition.
Battery Removal
First, ensure the generator is off. Find the battery compartment. Use a wrench to disconnect the negative cable first. Remove the positive cable next. Carefully lift the battery out of its compartment. Place it on a stable surface.
Battery Cleaning
Inspect the battery for any signs of corrosion. Mix baking soda and water to create a cleaning solution. Use a brush to apply the solution to the battery terminals. Scrub gently to remove any buildup. Rinse with clean water and dry with a cloth.
Check the battery cables for damage. Replace any frayed or corroded cables. Reconnect the cables, starting with the positive terminal. Ensure all connections are tight.
Read Also: How to clear battery problem on Generac generator
Reassembly And Testing
After cleaning the generator, the next step is reassembly and testing. Proper reassembly ensures the generator works safely and efficiently. Follow these steps for a smooth reassembly and testing process.
Reinstalling Components
Begin by reinstalling the generator’s main components. Ensure each part fits securely.
- Attach the Air Filter: Place the clean air filter back in its slot. Secure it with screws or clips.
- Reconnect the Battery: Attach the battery cables to their respective terminals. Ensure a tight fit.
- Install the Fuel Tank: Position the fuel tank correctly. Tighten the bolts to hold it in place.
Check all connections twice. Ensure no parts are loose or missing.
Operational Test
Perform an operational test to confirm the generator works properly.
- Fill the Fuel Tank: Add fuel to the tank. Use the recommended type and amount.
- Check Oil Levels: Ensure the oil level is within the recommended range.
- Start the Generator: Turn on the generator. Listen for any unusual noises.
Let the generator run for at least 10 minutes. Observe its performance closely.
| Component | Check |
|---|---|
| Air Filter | Securely attached |
| Battery | Proper connection |
| Fuel Tank | Correctly installed |
| Oil Level | Within range |
After testing, turn off the generator. Inspect it for any leaks or issues. Repeat the test if necessary.
Proper reassembly and testing ensure your generator runs smoothly and safely.
Frequently Asked Questions
How Often Should I Clean My Generator?
Clean your generator twice a year or after running it for 100 hours. Regular cleaning keeps it running smoothly and helps spot early signs of wear and tear.
What Tools Are Needed To Clean A Generator?
You’ll need basic cleaning items: a soft brush for dust, clean cloths, mild soap, and canned air. These simple tools help you reach all parts of your generator safely.
Can I Use Water To Clean My Generator?
Don’t spray water on your generator – it can damage electrical parts. Instead, use a slightly damp cloth to clean the outside. Think of it like cleaning a TV screen!
How To Clean The Generator’s Air Filter?
First, take out the air filter. Wash it gently with soap and water, rinse well, and let it dry fully. Put it back only when it’s completely dry. A clean filter helps your generator breathe better!
Final Words
Regular cleaning of your generator ensures optimal performance and longevity. Follow the steps outlined to maintain it effectively. Keeping it clean reduces the risk of malfunctions. Make it a routine task to avoid costly repairs. A well-maintained generator provides reliable power when you need it most.
Keep your generator in top shape!


