Disclosure: This post contains affiliate links and I will be compensated if you make a purchase after clicking through my links. Learn More
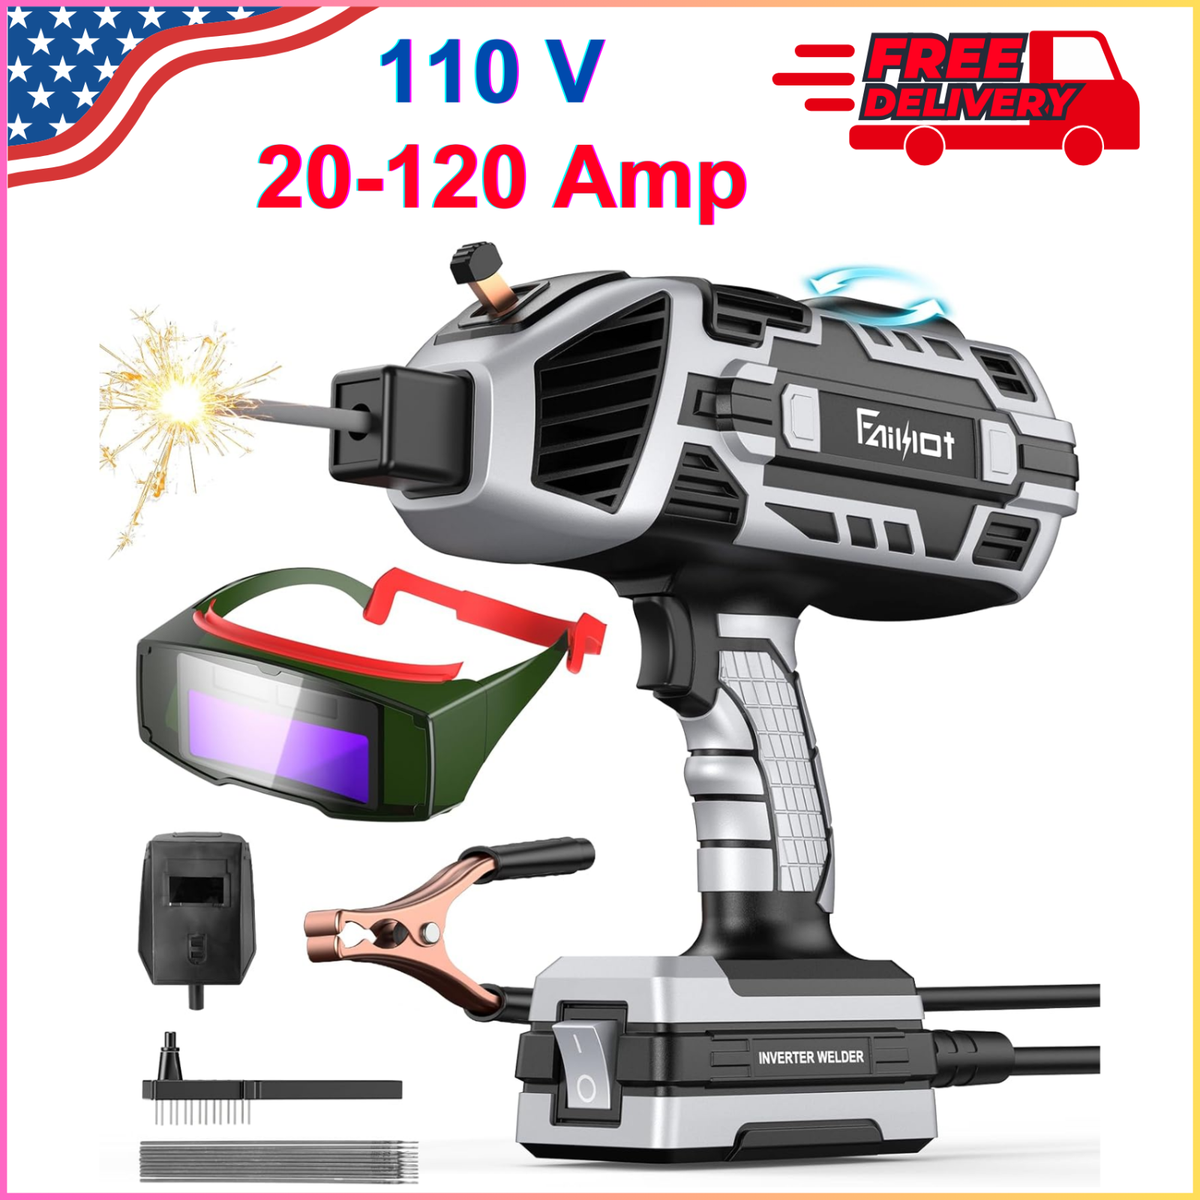
A 110V/120V welder can handle most basic home repairs and light fabrication jobs. While it won’t match the power of industrial machines, it’s strong enough for tasks like fixing gates, making shelves, and repairing tools with the right technique and electrode choice.
Why People Choose 110v/120v Welders For Home Repairs
Many homeowners prefer 110V/120V welders for simple reasons: they plug into a standard household outlet, are affordable, and are easy to move. You don’t need to install special wiring or hire an electrician. This makes them ideal for garages, sheds, or any DIY workspace.
Most American homes have 120V outlets. With these welders, you avoid the hassle of finding a 220V outlet or running heavy extension cords. Portability is another big benefit. Most 110V welders are small, lightweight, and easy to carry. You can set up anywhere and get to work fast.
For beginners, these machines feel less intimidating. The controls are simple. You don’t have to learn complex settings or worry about burning through thin metal. If you’re starting out or only need to weld occasionally, a 110V/120V welder fits the bill.
What Can A 110v/120v Welder Actually Do?
A lot more than you might think. With the right setup and expectations, you can handle a wide range of home repairs and small projects:
- Repairing lawn mower decks and metal tools
- Fixing gates, fences, and railings
- Building shelves or small racks
- Welding exhaust pipes and car panels
- Making garden art or metal crafts
- Mending patio furniture
- Creating brackets, hinges, or supports
Most 110V welders can weld steel up to 1/8 inch thick in a single pass. With some skill, you can join thicker pieces by making multiple passes or prepping the joint with a bevel. For thin metal, these machines are often a better choice than big welders, which can burn holes quickly.
If you need to weld aluminum or stainless steel, some 110V welders support these with the right wire or rods, but results are best with steel. For heavy-duty jobs like structural beams or large trailers, you’ll need a bigger welder.
Understanding The Power Limits Of 110v/120v Welders
The main limit of a 110V/120V welder is power output. Household outlets provide less voltage and current than what industrial welders use. This affects how thick the metal can be, how long you can weld before overheating, and what types of electrodes or wires you can use.
Key Power Specs
- Input Voltage: 110V or 120V AC (typical home outlet)
- Output Amperage: Usually 80–140 amps, depending on the model
- Duty Cycle: Most offer 20–30% at max power (weld for 2–3 minutes, rest for 7–8)
What Does This Mean For Welding?
- You can weld mild steel up to 1/8 inch thick easily.
- For 3/16 inch steel, you may need to make two or more passes.
- Welding thicker sections (over 1/4 inch) is not practical.
- Duty cycle limits mean you can’t weld continuously—plan for breaks.
Some advanced inverter models push these limits further, but physics is physics: a standard outlet only gives so much juice. Trying to weld too thick or too long can trip breakers or overheat the machine.
Comparison: 110v/120v Vs 220v Welders
Here’s a simple comparison of capabilities:
| Feature | 110V/120V Welder | 220V Welder |
|---|---|---|
| Max Steel Thickness (Single Pass) | 1/8 inch | 1/4 inch or more |
| Output Amps | 80–140A | 150–250A+ |
| Duty Cycle | 20–30% | 40–60%+ |
| Portability | High | Medium/Low |
| Power Needed | Standard 15A/20A outlet | Dedicated 220V circuit |
Types Of 110v/120v Welders You’ll Find
Not all home welders are the same. Here are the most common types:
1. Mig Welders (wire Feed)
These are the most user-friendly. They use a spool of wire and shielding gas, or flux-cored wire for outdoor work. Great for beginners and quick repairs.
2. Stick Welders (smaw)
They use electrodes (sticks) and work well on rusty or dirty metal. They’re simple, cheap, and don’t need gas. Good for farm repairs and heavy outdoor use.
3. Tig Welders
Rare at 110V, but some models exist. TIG gives precise, clean welds on thin metal and aluminum, but it’s slower and takes more skill.
4. Multi-process Welders
These can do MIG, TIG, and stick welding. Handy if you want one machine for many jobs, but they may be pricier.
Popular Models And Their Specs
Some top-rated 110V/120V welders for home use include:
| Brand/Model | Type | Amperage | Max Steel Thickness | Weight |
|---|---|---|---|---|
| Hobart Handler 140 | MIG | 25–140A | 1/4 in (multi-pass) | 57 lbs |
| Lincoln Electric K2278-1 | MIG | 35–88A | 1/8 in | 46 lbs |
| Forney Easy Weld 100 ST | Stick | 10–90A | 1/8 in | 9.65 lbs |
| YESWELDER 205DS | MIG/Stick/TIG | 30–205A (dual voltage) | 1/4 in (220V); 1/8 in (110V) | 23 lbs |
These models all run from a household outlet and are trusted for reliability and ease of use.
How To Get The Most From A 110v/120v Welder
To make your welder work its best, follow these tips:
1. Use The Right Extension Cord
If you must use an extension cord, pick a heavy-duty one—at least 12-gauge, and as short as possible. Thin, long cords drop voltage and make your welder perform worse.
2. Prep Your Metal Carefully
Clean metal welds better. Remove rust, paint, oil, and dirt with a wire brush or grinder. This is especially important for low-power welders.
3. Choose The Correct Electrode Or Wire
- MIG: .023″ or .030″ wire works best for thin steel.
- Stick: 1/16″ or 3/32″ 6011, 6013, or 7014 electrodes are ideal. Avoid thick rods, as they need more amps than a 110V machine can give.
4. Mind The Duty Cycle
If your welder gets hot or slows down, stop and let it cool. Don’t push past the duty cycle—this can damage the machine or trip your breaker.
5. Weld In The Right Position
Flat or horizontal welds are much easier with low-powered welders. Vertical or overhead welds are harder and need good technique.
6. Make Multiple Passes
If you need to weld thicker metal, don’t try to do it in one pass. Bevel the edges, lay down a root pass, and then stack more welds on top.
7. Plug Directly Into The Wall
Skip power strips or old outlets. Plug your welder straight into a grounded, modern outlet for best results.
8. Set Your Welder’s Controls Properly
Start on a scrap piece and test your settings. Adjust voltage and wire speed for MIG, or amperage for stick, until the weld looks smooth and strong.
9. Practice Makes Perfect
Even a small welder can make professional-looking welds in the hands of someone with practice. Run test beads on scrap metal before tackling your project.
What A 110v/120v Welder Can’t Do
There are real limits to these machines. Knowing them saves frustration and wasted effort:
- No heavy structural work: Don’t use a 110V welder for load-bearing beams, trailer hitches, or anything that holds a lot of weight.
- Not for thick steel: Welding 1/4 inch or more in one pass is not safe or practical.
- Limited aluminum and stainless ability: You need special wire and gas, and results may not be strong or pretty.
- Duty cycle restrictions: Can’t weld for long stretches without stopping.
- Less penetration: Welds may not fuse as deeply into the base metal, so joint design is important.
If you want to build a car frame, repair farm equipment, or weld for hours at a time, you’ll need a 220V welder or bigger.
Credit: www.ebay.com
Real-world Examples: What Homeowners Achieve With 110v/120v Welders
Many people are surprised at what they can accomplish with a basic machine and some patience. Here are some real-world projects completed with 110V/120V welders:
- Repairing cracked wheelbarrow legs and reinforcing handles
- Fixing a broken gate latch and welding hinges back in place
- Building a custom tool rack from scrap steel
- Mending a patio chair with a cracked frame
- Patching a car’s exhaust system with new pipe sections
- Creating metal plant stands and yard art for the garden
- Repairing a snow shovel or lawnmower deck
Most of these tasks involve mild steel under 1/8 inch thick—right in the sweet spot for these welders. By using the right technique and prepping the metal, you can get strong, long-lasting results.
Key Features To Look For In A 110v/120v Welder
If you’re shopping for a home welder, consider these features:
- Amperage Range: Look for at least 80–140 amps output for versatility. Lower is okay for sheet metal, higher is better for thicker pieces.
- Duty Cycle: Higher duty cycle means less waiting. Machines with 20% or more at full power are best.
- Wire Feed Speed (for MIG): Adjustable speed helps you fine-tune the weld for different jobs.
- Multi-Process Capability: Some welders can do MIG, stick, and even TIG—good for different tasks.
- Portability: Lighter models are easier to move and store.
- Quality Leads and Ground Clamp: Thicker cables and a solid clamp improve current flow.
- Easy-to-Use Controls: Simple dials and clear markings help avoid mistakes.
- Spool Gun or Aluminum Capability: If you want to try aluminum welding, make sure the welder supports it.
- Safety Features: Look for thermal overload protection and clear indicators.
- Warranty/Support: Brands with good support and longer warranties offer peace of mind.
Common Mistakes Beginners Make With 110v/120v Welders
If you’re new to welding, watch out for these pitfalls:
- Using the wrong extension cord (too thin or too long)
- Not cleaning the metal before welding
- Trying to weld thick metal in one pass
- Setting amperage too high or too low
- Ignoring duty cycle and overheating the machine
- Using the wrong electrode or wire size
- Poor joint preparation (not beveling edges for thicker metal)
- Not testing settings on scrap metal first
- Expecting industrial results from a home welder
Avoiding these mistakes saves you time and makes your repairs last longer.
Is A 110v/120v Welder Worth It For Home Use?
For most homeowners, the answer is yes. Here’s why:
- Low cost: Entry-level welders start around $200–$400.
- Convenience: Plug in anywhere, no need for special wiring.
- Good for small repairs: Handles nearly all typical home and garden metalwork.
- Safe for beginners: Less chance of burning through thin metal.
You don’t need to be a professional to get value from a 110V/120V welder. With smart project choices and attention to prep, you’ll get strong, durable welds on household items, tools, and light frames.
Credit: www.walmart.com
How To Choose Between 110v/120v And 220v Welders
It’s smart to compare both before you buy. Here’s a quick guide:
| Consideration | 110V/120V Welder | 220V Welder |
|---|---|---|
| Best For | Home repairs, hobby projects, thin metal | Thick steel, heavy fabrication, pro use |
| Cost | Low | Higher |
| Setup | Plug into any outlet | Needs special wiring |
| Portability | Very portable | Often heavy |
| Skill Needed | Beginner-friendly | More advanced |
| Project Size | Small to medium | Medium to large |
If your main goal is to repair fences, make tool racks, or fix patio furniture, a 110V/120V welder is all you need. If you dream of building trailers or working on cars professionally, save for a 220V model.
Non-obvious Tips And Insights Most Beginners Miss
- Upgrade your ground connection. Most stock ground clamps are small and weak. Replace them with a heavy-duty clamp for better weld quality and fewer arc problems.
- Shorten your work lead. The shorter the cables between your welder and the workpiece, the less voltage drop you get. This small change makes a big difference with low-power welders.
- Keep your breaker rating in mind. Standard home circuits are 15 or 20 amps. If your welder pushes the upper end of that, don’t run other big appliances at the same time, or you’ll trip the breaker.
- Flux-core wire is more forgiving outdoors. Wind blows away shielding gas, but flux-core wire works in the breeze. It’s messier, but for fences or gates outside, it’s a smart choice.
- Practice stacking weld beads. Before jumping into a real project, fill a gap with multiple passes on scrap. This teaches you how to build up thicker welds safely with a small machine.

Credit: www.homedepot.com
Safety Essentials For Home Welding
Never cut corners on safety. Even a 110V/120V welder can cause serious burns or start fires. Always follow these rules:
- Wear a proper welding helmet with auto-darkening lens.
- Use gloves and long sleeves to protect your skin from sparks and UV rays.
- Work in a ventilated area. Welding fumes are harmful—use a fan or open doors.
- Keep a fire extinguisher nearby in case of sparks.
- Check your cables and plugs for wear or damage before each use.
- Don’t weld near flammable materials (gasoline, paint, wood shavings).
- Never weld in wet conditions or while standing in water.
When To Upgrade Or Rent A Bigger Welder
If you run into any of these situations, it’s time to look at 220V machines or pro help:
- Welding steel thicker than 1/8 inch regularly
- Building heavy trailers, car frames, or structural supports
- Needing to weld for long periods without cooling breaks
- Working with large aluminum parts
Some hardware stores rent 220V welders by the day. For big jobs, it’s often cheaper and safer than pushing a small machine past its limits.
Where To Learn More And Get Help
Welding is a skill you build over time. There are great resources to speed up your learning:
- YouTube welding channels (like Weld.com and ChuckE2009)
- Forums (WeldingWeb, Garage Journal)
- Free guides from manufacturers (Miller, Lincoln, Hobart)
- Community college or night classes for hands-on instruction
Frequently Asked Questions
Can A 110v/120v Welder Weld Car Frames Or Trailers?
No, it’s not safe or recommended. Car frames and trailers need deep weld penetration and structural strength. A 110V/120V welder can’t provide enough power for these heavy-duty jobs. Use a 220V welder or hire a professional for such projects.
What Metals Can I Weld With A 110v/120v Welder?
You can weld mild steel easily, and some machines can handle stainless steel or thin aluminum with the right wire or rods. Results are best with mild steel up to 1/8 inch thick. For thicker or exotic metals, use a higher-powered welder.
Can I Use A Regular Extension Cord With My 110v/120v Welder?
Yes, but it must be heavy-duty—12-gauge or thicker, and as short as possible. Thin or long cords cause voltage drop, which weakens the arc and makes welding harder. Always plug directly into a grounded outlet when possible for best performance.
Are 110v/120v Welders Safe For Beginners?
Yes, they’re safer and easier for beginners than larger welders. They have lower output, which reduces burn-through risk. Just follow safety rules: wear protective gear, keep your workspace clear, and don’t weld near anything flammable or in wet conditions.
Do I Need Gas For A 110v/120v Mig Welder?
You can use shielding gas for cleaner welds indoors, but many 110V MIG welders also work with flux-cored wire. Flux-core doesn’t need gas and is better for outdoor work or dirty metal. It’s a bit messier, but very effective for home repairs.
A 110V/120V welder is a powerful tool for home repairs, metal art, and small DIY projects. If you stay within its limits, use the right setup, and practice safe welding, you’ll get strong, lasting results—and you’ll enjoy the freedom to fix and build on your own terms.