Disclosure: This post contains affiliate links and I will be compensated if you make a purchase after clicking through my links. Learn More
Brazing copper pipe is a trusted method for making strong, leak-proof connections in plumbing, refrigeration, and HVAC work. This process uses a filler metal with a lower melting point than copper. The filler melts, flows into the joint, and forms a solid bond when it cools.
Many professionals and skilled homeowners choose brazing because it creates durable joints that last for decades, even under pressure and heat.
If you want to learn how to braze copper pipe the right way, you need more than just basic instructions. Good results rely on careful preparation, the right tools, and a clear understanding of each step. Mistakes in brazing can lead to leaks, wasted materials, or even dangerous situations.
This guide explains everything you need to know—from tools and safety, to cleaning and fitting, to heating and finishing. By the end, you will know how to braze copper pipe with confidence and avoid common problems that frustrate beginners.
What Is Brazing And Why Use It For Copper Pipe?
Brazing is a process that joins two pieces of metal by melting a filler rod, not the base metals. The key difference between brazing and soldering is the temperature. Brazing uses higher heat (usually above 800°F / 427°C) and filler metals that create stronger bonds.
In plumbing and HVAC, people choose brazing for copper pipe because:
- It handles higher pressures than soldered joints.
- The joints resist vibration and temperature changes.
- Brazed connections work well for refrigerants and gas lines.
- It allows for joining different metals (like copper to brass).
Brazed joints are common in both new installations and repairs.
Essential Tools And Materials
Before you start, gather all the tools and materials you need. Missing even one item can slow down your work or cause poor results.
Tools
- Torch: An oxy-acetylene or air-acetylene torch provides enough heat. For large pipes, oxy-acetylene is better.
- Tube Cutter or Hacksaw: To cut copper pipe cleanly.
- Pipe Reamer or Deburring Tool: Removes burrs from inside the pipe after cutting.
- Wire Brush or Emery Cloth: Cleans the pipe and fitting surfaces.
- Flux Brush: For applying flux (if needed for your filler metal).
- Fitting Brush: Cleans inside fittings.
- Heat Shield: Protects nearby surfaces from flame.
- Fire-Resistant Cloth or Pad: Extra protection in tight spaces.
- Work Gloves and Safety Glasses: Protect your hands and eyes.
- Measuring Tape and Marker: For accurate cuts.
Materials
- Copper Pipe and Fittings: Choose the right diameter and type (Type L, M, or K).
- Brazing Rod/Filler Metal: Most use an alloy with silver or phosphorus. The rod must match your pipe and the application.
- Flux: Some rods (like phosphorus-copper) do not need flux for copper-to-copper. Use flux if you join copper to brass or bronze.
- Gas Cylinders: Filled with acetylene or propane, depending on your torch.
- Water or Fire Extinguisher: For safety in case of fire.
Example Table: Common Brazing Rod Types
| Rod Type | Main Alloy | Melting Range (°F) | Best For | Needs Flux? |
|---|---|---|---|---|
| Phos-Copper (BCuP-2) | Copper, Phosphorus | 1310–1475 | Copper to Copper | No |
| Silver-Phos (BCuP-5) | Copper, Silver, Phosphorus | 1190–1495 | Copper to Brass/Bronze | Yes |
| Silver Alloy (BAg-5) | Silver, Copper, Zinc | 1145–1650 | Brass, Steel, Dissimilar Metals | Yes |
Preparing The Work Area
Preparation is key to safe, high-quality brazing. Many beginners overlook workspace safety, which increases the risk of accidents or poor joints.
- Choose a well-ventilated area. Brazing produces smoke and fumes. If working indoors, open windows and use a fan.
- Remove flammable materials. Keep paper, wood, and chemicals away from your work zone.
- Lay out a heat shield behind the pipe and fittings. This prevents fire damage to walls or cabinets.
- Have a fire extinguisher nearby. Even pros keep one within reach.
- Check your torch and hoses for leaks. Use soapy water to spot leaks before lighting.
Measuring And Cutting Copper Pipe
Accurate measurements and smooth cuts are essential for leak-free joints.
- Measure carefully. Use a measuring tape and a marker to mark your cut point. Double-check the length.
- Cut the pipe using a tube cutter for a smooth, straight cut. Place the cutter on the mark, tighten slightly, and rotate. Tighten again after each full rotation.
- Deburr the pipe. Use a deburring tool or reamer inside the pipe to remove sharp edges or burrs. This step is important because burrs can create turbulence in water lines and cause leaks.
- Clean the pipe ends. Wipe away any dust or debris.
Tip: Never rush the cutting and deburring process. Small errors here can cause leaks later.
Cleaning And Fitting Preparation
Cleanliness is critical for brazing. Even a small amount of oil or oxidation can stop the filler from bonding.
Cleaning Steps
- Scrub the outside of the pipe with a wire brush or emery cloth until the copper shines. Clean about 1 inch past the end.
- Clean the inside of the fitting using a fitting brush or rolled emery cloth.
- Wipe with a clean cloth to remove dust.
Non-obvious insight: Many leaks happen because of hidden oxidation or leftover oil from manufacturing. Always clean both the pipe and the fitting, even if they look new.
Dry Fitting
- Insert the pipe into the fitting to check for a proper fit. It should go in smoothly but not loosely.
- Mark the depth with your marker so you know how far to insert the pipe later.
This step helps you confirm the pieces fit well before adding heat or filler.
Applying Flux (if Needed)
Flux is a chemical that helps the filler flow and prevents oxidation during heating.
- When to use flux: If you use a silver-phosphorus or silver alloy rod, or if you join copper to brass, always use flux. For copper-to-copper with phosphorus-copper rod, you usually do not need flux.
- How to apply: Use a small brush to spread a thin layer of flux on the pipe end and inside the fitting—do not overapply.
Common mistake: Applying too much flux. Excess flux can burn, create smoke, and contaminate the joint.
Setting Up The Torch
Proper torch setup ensures even heating and good control.
Steps:
- Check connections on the torch and gas cylinder. Tighten if needed.
- Open the gas valve slowly. For oxy-acetylene, open acetylene first, then oxygen.
- Light the torch with a spark lighter, not a match or lighter.
- Adjust the flame. For brazing, aim for a neutral flame (not too much orange/yellow or blue).
Non-obvious insight: A neutral flame prevents soot and overheating, which can damage copper.
Heating The Joint
Heating is the most important part of brazing. Too little heat causes poor flow; too much can melt the pipe.
Heating Tips
- Heat the fitting, not the filler. Move the flame around the joint to heat both the pipe and fitting evenly.
- Do not overheat. The copper should glow slightly. If it turns bright red, it’s too hot.
- Test the heat by touching the filler rod to the joint. When the rod melts on contact, you have the right temperature.
Example Table: Torch Types for Brazing
| Torch Type | Best For | Max Pipe Size | Cost Range |
|---|---|---|---|
| Air-Acetylene | Home, Light Commercial | Up to 1.5″ | $75–$150 |
| Oxy-Acetylene | Large Pipes, Fast Jobs | 3″ and above | $200–$500 |
| Propane/MAPP Gas | Small Repairs, Thin Pipes | Up to 3/4″ | $30–$80 |

Credit: www.thefabricator.com
Adding The Filler Metal
Once the joint is hot enough, add the filler rod.
- Touch the rod to the joint (not directly in the flame). The rod should melt and flow into the gap by capillary action.
- Move the rod around the joint. The melted filler will chase the heat. Keep the flame moving to avoid overheating one spot.
- Use enough filler. Fill the entire joint, but do not build up excess on the outside.
Common mistake: Feeding the rod directly into the flame or onto a cold spot. This can cause uneven flow or weak joints.
Practical tip: Watch for a shiny ring of filler around the whole joint. This shows the filler has flowed completely through.
Cooling And Cleaning The Joint
After brazing, proper cooling and cleaning ensure a strong, reliable connection.
- Let the joint cool naturally. Do not splash water on hot copper—it can crack the joint.
- Wipe away flux residue with a wet cloth when the joint is cool to the touch.
- Inspect the joint. Look for smooth, even filler with no gaps or cracks.
Non-obvious insight: Some fluxes turn green or white when overheated. If you see this, you may need to clean and re-braze.
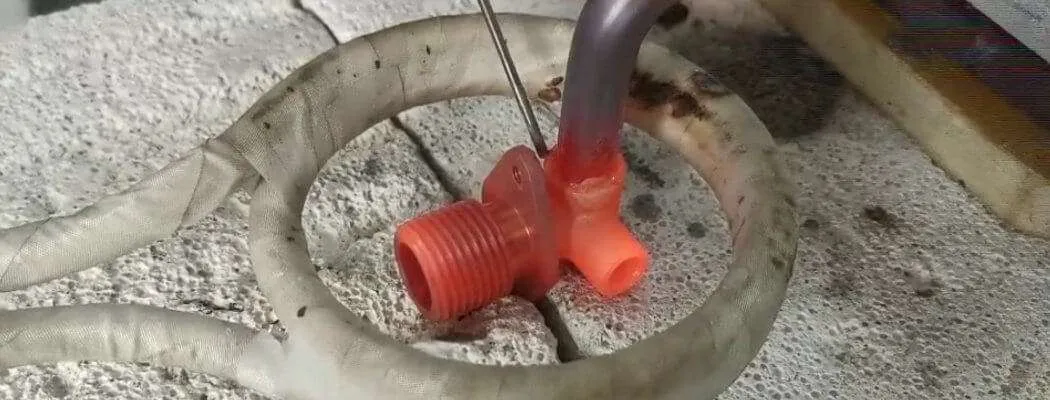
Credit: www.focoinduction.com
Pressure Testing The Joint
Testing is the only way to be sure your brazed joint is leak-free.
- Wait until the pipe is cool. Connect the pipe to your system.
- Apply water or air pressure. For plumbing, fill the system with water and check for leaks.
- Check the joint. Watch for drips or drops forming. Also, use a dry paper towel to detect dampness.
- Fix leaks. If you find a leak, re-clean, reapply flux, and re-braze.
Common mistake: Skipping the pressure test. Even small leaks can cause big problems later.
Brazing Copper Pipe In Tight Spaces
Many jobs require brazing pipes close to walls or in ceilings. These spots need extra care.
- Use a heat shield to protect wood, drywall, or wiring.
- Choose a small torch tip. A focused flame helps in tight spots.
- Keep a spray bottle of water nearby for quick cooling or fire control.
- Work slowly. Rushing can overheat nearby materials.
Practical tip: For very close work, wrap a wet rag around the pipe near the wall as extra protection.
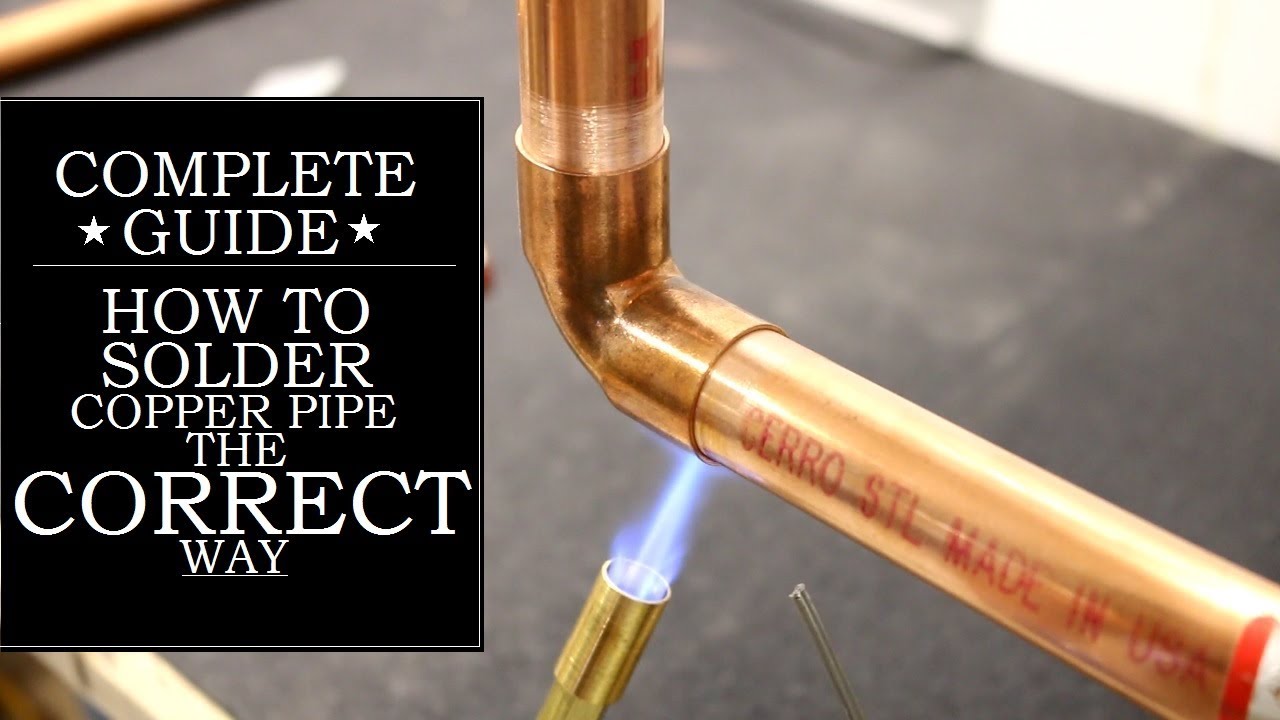
Credit: www.youtube.com
Joining Dissimilar Metals
Sometimes, you need to join copper to brass or another metal. The process is similar but requires more care.
- Always use flux for dissimilar metals.
- Heat both metals evenly. Brass heats slower than copper.
- Choose the right filler. Silver-phosphorus or silver alloys are best.
- Check for color change. Brass will darken before the filler flows.
Non-obvious insight: Dissimilar metal joints often fail because the metals expand at different rates. Let the joint cool slowly to reduce stress.
Common Problems And Solutions
Brazing does not always go perfectly. Here are some issues you may see—and how to fix them.
- Filler does not flow: The joint is not hot enough. Heat evenly and try again.
- Filler balls up or drips: Surface is dirty or oxidized. Stop, clean, and restart.
- Joint leaks after cooling: Not enough filler, or a gap in the joint. Re-heat and add more filler.
- Discoloration or burnt pipe: Too much heat. Use a lower flame or move the torch more.
- Porous or weak joint: Overheated flux or poor cleaning. Disassemble, clean, and repeat the process.
Practical tip: Always keep extra filler rods and flux on hand for quick fixes.
Safety Tips For Brazing Copper Pipe
Heat and gas present real dangers. Follow these steps for safe brazing:
- Wear safety glasses and gloves every time.
- Work in a ventilated area to avoid breathing fumes.
- Check for gas leaks before lighting the torch.
- Keep fire extinguisher or water nearby.
- Do not leave a lit torch unattended.
- Allow pipes to cool before touching.
Non-obvious insight: Acetylene is heavier than air and can collect near the floor. Always check for leaks at ground level.
For more safety guidelines, see the OSHA brazing safety page.
Comparing Brazing, Soldering, And Welding
Many people confuse these methods. Here is how brazing compares to other joining methods:
| Method | Heat Needed | Filler Used | Strength | Main Uses |
|---|---|---|---|---|
| Brazing | High (Over 800°F) | Silver/Phos Alloys | Very Strong | Pressure Pipes, HVAC |
| Soldering | Low (450–700°F) | Tin/Lead/Silver | Medium | Water Pipes |
| Welding | Very High (Melts Base Metal) | Varies | Strongest | Steel, Large Structures |
Extra Tips For First-time Brazers
- Practice on scrap pipe before working on your project.
- Label your pipes and joints to avoid confusion during assembly.
- Keep your workspace organized to prevent accidents.
- Read the filler rod instructions. Some alloys have specific temperature ranges.
- Check local codes. Some areas require specific types of filler or testing.
Practical tip: Take photos of each joint before closing walls or ceilings. This helps with future maintenance or repairs.
Frequently Asked Questions
What Is The Main Difference Between Brazing And Soldering Copper Pipe?
The key difference is temperature. Brazing uses higher heat (over 800°F) and creates stronger joints, suitable for high-pressure and high-temperature systems. Soldering uses lower heat (typically under 700°F) and is common for water supply lines. Brazed joints are preferred for HVAC, refrigeration, and gas lines due to their strength.
Can I Braze Copper Pipe With A Propane Torch?
You can braze small-diameter copper pipe (up to 3/4″) with a high-quality propane or MAPP gas torch. Larger pipes need more heat, so oxy-acetylene or air-acetylene torches are better. Always check that your torch can reach the required temperature for your filler rod.
How Do I Know If My Brazed Joint Is Strong?
A good brazed joint shows a smooth, shiny ring of filler around the entire joint. It should not have gaps, cracks, or excess buildup. The best way to confirm strength is to pressure test the system after cooling. If the joint holds without leaks, it is strong.
Do I Always Need Flux For Brazing Copper Pipe?
You do not always need flux. If you use a phosphorus-copper rod for copper-to-copper joints, the phosphorus acts as a flux. For copper to brass, bronze, or steel, always use flux. When in doubt, read the instructions for your filler rod.
Is Brazing Copper Pipe Safe For Drinking Water?
Yes, brazing is safe for drinking water if you use approved filler metals (no lead content) and clean the joint after brazing. Always check your local codes, as some areas require specific types of filler for potable water systems.
Brazing copper pipe is a skill that pays off with strong, durable connections. Whether you are repairing a leak or installing new lines, the right tools, careful preparation, and clear steps make all the difference. Take your time, focus on safety, and test your work. With practice, you will get reliable results every time. For more detailed safety and technique guides, visit the Wikipedia brazing page.

