Disclosure: This post contains affiliate links and I will be compensated if you make a purchase after clicking through my links. Learn More
Setting up a Lincoln 140 MIG welder is one of the most important steps to getting clean, strong welds. Many people think this machine is simple, but real results depend on careful setup. Small details can make a big difference. Even if you have some experience, there are always new things to learn or mistakes to avoid. This guide covers 140 setup tips—each one based on real practice, common issues, and expert advice. Whether you weld at home or in a small shop, these tips will help you use your Lincoln 140 MIG welder with more confidence and safety.
1. Choose The Right Power Outlet
Use a dedicated 120V outlet. Avoid long extension cords, as they can cause voltage drops and weak welds.
2. Check Your Circuit Breaker
The Lincoln 140 needs a 20-amp circuit. If your breaker is lower, the welder may trip it during use.
3. Inspect The Power Cord
Before plugging in, check the power cord for cuts, cracks, or exposed wires.
4. Ground Your Welder
Always plug your welder into a grounded outlet to avoid electric shocks.
5. Set Up In A Dry Area
Moisture increases the risk of electric shock. Keep the welder and work area dry.
6. Use Proper Lighting
Good lighting helps you see the weld puddle and setup controls clearly.
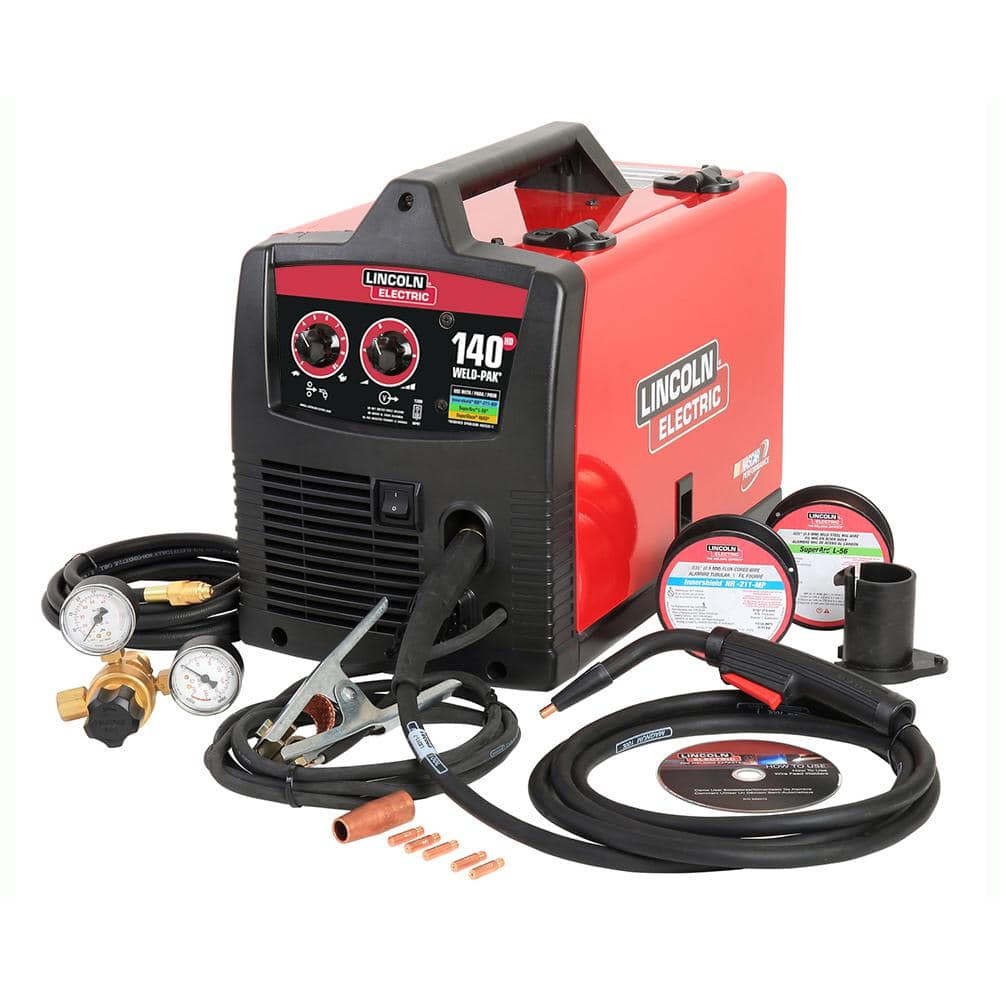
Credit: www.homedepot.com
7. Secure The Welder
Place your Lincoln 140 on a stable, flat surface. It should not wobble or tip over.
8. Keep Ventilation In Mind
Welding makes fumes. Use your welder in a well-ventilated area or use a fan to move fumes away.
9. Read The Manual
The Lincoln 140 manual has important setup and safety instructions. Even experienced welders sometimes miss details.
10. Check For Damage
Inspect the welder, cables, and accessories for shipping damage before first use.
11. Gather All Accessories
Collect your torch, ground clamp, gas regulator, wire, and safety gear before setup.
12. Select The Correct Wire Type
Use solid wire (ER70S-6) for MIG with gas, and flux-cored wire (E71T-GS) for gasless welding.
13. Choose The Right Wire Diameter
For most jobs, use .030-inch wire. For thinner metal, .025-inch works best.
14. Store Wire Properly
Keep wire spools in a dry place to prevent rust, which causes feeding problems.
15. Install The Wire Spool Correctly
Place the spool on the spindle so it turns smoothly with no binding.
16. Check The Spool Tension
Use the spindle tension knob to keep the spool from unspooling too fast or too slow.
17. Feed Wire Into Drive Rollers
Guide the wire into the drive rollers carefully to avoid kinks.
18. Set The Correct Drive Roller
Use the smooth roller for solid wire, and the knurled roller for flux-cored wire.
19. Adjust Drive Roller Tension
Tighten the drive roller just enough to push wire. Too tight can flatten wire; too loose can slip.
20. Check Wire Straightness
If the wire is bent or tangled, cut off the damaged part before feeding.
21. Install The Correct Contact Tip
Match the contact tip size to your wire diameter.
22. Tighten The Contact Tip
Loose tips cause arc instability. Tighten with your fingers first, then a small wrench if needed.
23. Use The Right Nozzle
A conical nozzle works best for MIG. For flux-core, use a tip designed for spatter protection.
24. Clean The Nozzle
Remove any spatter from the nozzle before starting.
25. Attach The Ground Clamp
Clamp the ground directly to clean, bare metal near your weld.
26. Clean The Workpiece
Remove rust, paint, grease, and oil from the weld area for best results.
27. Secure The Workpiece
Clamp your metal so it does not move while welding.
28. Attach The Gas Hose
Connect the gas hose securely to the regulator and welder.
29. Check For Gas Leaks
Spray soapy water on connections. Bubbles mean a leak.
30. Use The Right Shielding Gas
For mild steel, use 75% Argon / 25% CO2 for clean welds.
31. Set The Gas Flow Rate
Start at 20–25 cubic feet per hour (CFH). Too much or too little gas affects weld quality.
32. Open The Gas Tank Slowly
Turn the gas valve slowly to avoid damaging the regulator.
33. Check The Regulator Gauge
Confirm your gas cylinder has enough pressure for the job.
34. Store Gas Cylinders Safely
Secure tanks upright and away from heat or sparks.
35. Use Correct Polarity
For MIG with gas, set to DCEP (Electrode Positive); for flux-core, use DCEN (Electrode Negative).
36. Check Polarity Connections
Double-check the internal polarity leads match your chosen process.
37. Set The Voltage Dial
Start with the recommended setting in the chart on your welder’s cover.
38. Set The Wire Feed Speed
Use the chart as a guide, then fine-tune based on your weld.
39. Use Short Power Cables
Long cables cause voltage drop, which weakens your arc.
40. Keep Cables Untangled
Neat cables prevent tripping and improve power delivery.
41. Test The Gun Trigger
Before welding, squeeze the trigger to check wire feeding.
42. Purge The Gas Line
Press the trigger briefly to clear air from the gas line.
43. Wear Proper Ppe
Use a welding helmet, gloves, long sleeves, and closed shoes.
44. Use The Right Helmet Shade
For MIG, use shade 10–13 based on arc brightness.
45. Keep A Fire Extinguisher Nearby
Welding can start fires. Use an ABC-type extinguisher within reach.
46. Remove Flammable Items
Clear away paper, wood, rags, and solvents from your weld area.
47. Set Up A Welding Curtain
Protect others from arc flash with a welding curtain.
48. Use A Welding Table
Metal tables help ground the work and stay fire-safe.
49. Avoid Welding On Concrete
Heat can cause concrete to crack or explode.
50. Plan Your Weld Path
Decide where to start and end before striking the arc.
51. Check Wire Stick-out
Use a wire stick-out of 3/8 to 1/2 inch for most work.
52. Keep The Gun Angle Right
For most MIG jobs, use a 10–15 degree push angle.
53. Maintain A Steady Travel Speed
Moving too fast or slow affects bead shape and penetration.
54. Practice On Scrap
Test settings and technique on scrap metal before your actual project.
55. Listen For The Right Sound
A steady sizzle means good settings; popping or hissing signals problems.
56. Watch The Weld Puddle
Keep your eyes on the puddle to control bead shape.
57. Adjust As You Weld
Fine-tune voltage and speed as you see results.
58. Use Two Hands If Possible
Steady your torch for better control, especially on long welds.
59. Keep The Gun Moving
Stopping too long in one spot causes burn-through.
60. Avoid Weaving
For thin metal, use straight lines. Weaving is for filling wide joints.
61. Use Tack Welds
Hold pieces together with tacks before final welding.
62. Space Out Tack Welds
Put tacks every few inches to prevent warping.
63. Let Tacks Cool
Too many tacks at once cause heat buildup and distortion.
64. Weld In Short Bursts
For thin metal, use short welds to control heat.
65. Let Welds Cool Between Passes
Give metal a minute to cool if you need several layers.
66. Use Anti-spatter Spray
Spray the nozzle and workpiece to stop spatter from sticking.
67. Clean Spatter After Welding
Remove spatter with a chipping hammer or wire brush.
68. Inspect Welds
Look for cracks, holes, or undercut along your welds.
69. Grind Rough Welds
Use a grinder to smooth out high spots or sharp edges.
70. Store The Torch Properly
Hang the torch when not in use to avoid damage.
71. Keep The Welder Covered
Use a welder cover to keep dust and dirt out when not used.
72. Check The Fan
Make sure the welder’s cooling fan runs during use.
73. Clean The Welder Vents
Dust in the vents can cause overheating.
74. Avoid Overloading The Welder
Do not weld for long periods at high power; follow the duty cycle limits.
75. Let The Welder Cool
If the overheat light comes on, turn off and wait for it to cool fully.
76. Use The Correct Extension Cord
If you must use one, pick a heavy-duty cord rated for 20 amps.
77. Check For Tripped Breakers
If the welder stops, check your main panel first.
78. Know Your Duty Cycle
For example, at 90 amps, you can weld for 20% of a 10-minute period (2 minutes).
79. Respect Circuit Limits
Running other big tools on the same circuit can trip breakers.
80. Use Correct Filler Metal
Match the wire to your base metal for best strength.
81. Store Filler Wire Properly
Seal unused wire in bags or containers to keep it rust-free.
82. Avoid Kinks In The Liner
A kinked liner causes wire jams.
83. Replace Worn Liners
Change the liner if wire feeding is rough or erratic.
84. Clean The Drive Rolls
Wipe off dust and metal shavings that can cause slipping.
85. Use A Wire Cleaner
Install a felt cleaner on the wire before the rollers to catch dust.
86. Inspect The Torch Head
Look for burns, cracks, or loose parts before each use.
87. Check O-rings
Gas leaks often come from bad O-rings at the torch or regulator.
88. Replace Damaged Parts
Never weld with broken cables, torch, or connectors.
89. Use The Right Tip Recess
Keep the contact tip flush or slightly recessed inside the nozzle for most work.
90. Replace Worn Contact Tips
A tip with a big hole or burn marks needs changing.
91. Use The Right Wire Tension
If you get bird-nesting (wire bunching), tension may be too high or low.
92. Avoid Dirty Wire
Dirty or rusty wire causes feeding problems and weak welds.
93. Check The Gas Flow At The Nozzle
Hold your finger over the end briefly to feel the gas flow (wear gloves).
94. Keep The Work Lead Short
Shorter leads give better current and less resistance.
95. Use A Quality Ground Clamp
A strong clamp gives better current flow and fewer arc problems.
96. Clamp Close To The Weld
Long distances from the clamp to the weld can cause poor arc performance.
97. Clean The Ground Area
Attach the ground only to bare, clean metal.
98. Do Not Coil Cables Tightly
Loose coils prevent overheating and reduce resistance.

Credit: www.youtube.com
99. Keep Cables Off The Floor
Hang cables when possible to avoid damage from foot traffic.
100. Avoid Sharp Bends
Sharp bends in cables or hoses can cause breaks or leaks.
101. Replace Damaged Hoses
A cracked gas hose leads to leaks and poor welds.
102. Monitor Gas Usage
Check your gas gauge often so you don’t run out in the middle of a project.
103. Store Gas Cylinders Upright
Lay them down only for transport and always secure them.
104. Protect The Regulator
Remove the regulator and add a safety cap when not in use.
105. Use The Right Regulator
A CO2 regulator is different from an Argon/CO2 mix regulator.
106. Check For Frost On The Tank
Heavy use can freeze a CO2 tank, lowering gas flow.
107. Use A Gas Heater If Needed
In cold shops, a small tank heater can keep flow steady.
108. Purge Hoses After Changing Tanks
Let gas run for a few seconds to clear air and moisture.
109. Never Oil Regulators
Oil and high-pressure oxygen or CO2 can cause fires.
110. Avoid Open Flames Near Tanks
Keep torches, lighters, and cigarettes away from gas.
111. Mark Empty Cylinders
Tag empty tanks so others do not try to use them.
112. Return Empty Cylinders Quickly
Do not store empty tanks for long periods.
113. Use A Cylinder Cart
Move heavy tanks safely with a wheeled cart.
114. Chain Tanks To The Wall
Do not let tanks stand loose, as they can fall and injure you.
115. Use Only Approved Hoses
Low-quality hoses may burst under pressure.
116. Inspect Hoses Often
Look for cracks, hard spots, or leaks every week.
117. Keep Hoses Away From Sparks
Sparks can burn holes in gas lines.
118. Replace Worn Fittings
Leaky fittings lower gas flow and cause bad welds.
119. Tighten Fittings By Hand First
Then finish with a wrench but do not overtighten.
120. Match Connectors
Use only compatible connectors between hose, regulator, and machine.
121. Use Correct Thread Sealant
Only use tape or paste made for gas fittings.
122. Avoid Over-tightening
Too much force can strip threads or crack fittings.
123. Know Your Gas Type
Do not mix different gases in one tank or line.
124. Label Hoses And Tanks
Use color coding or tags to avoid confusion.
125. Store Hoses Coiled
Hang them up to prevent kinks or crushing.
126. Keep Hoses Off Hot Surfaces
Heat can soften and break rubber hoses.
127. Keep Hoses Dry
Water inside hoses can cause rust and leaks.
128. Use A Gas Shutoff
Turn off gas at the tank when not welding.
129. Purge Gas Lines Before Storage
Clear gas from lines by running the welder for a few seconds.
130. Store The Welder In A Cool Place
Heat shortens electronic parts’ life.
131. Avoid Direct Sunlight
UV rays can damage plastics and hoses.
132. Clean The Case
Wipe down the welder after each use to keep dust away.
Credit: www.weldingtipsandtricks.com
133. Check For Loose Screws
Vibration during use can loosen screws inside and outside.
134. Inspect The Circuit Board
Look for signs of burning or damage if the welder acts up.
135. Keep Spare Tips And Nozzles
Having extras saves time if you need to change during a project.
136. Keep A Spare Drive Roll
If a roll gets damaged, quick replacement keeps you working.
137. Maintain A Parts List
List all replaceable parts with sizes for easy ordering.
138. Update Your Manual
If Lincoln releases a new manual or update, keep a copy.
139. Join A Welding Forum
Online forums have user tips, troubleshooting, and advice. The Welding Tips and Tricks site is a good resource.
140. Practice And Review
The best setup is only as good as your technique. Practice often and review your results to improve.
—
These setup tips for the Lincoln 140 MIG welder cover everything from electrical safety to fine control of the weld bead. Many beginners do not realize how much wire tension, gas selection, or even simple cable management can affect their results. For example, a slightly loose ground clamp or a kinked liner can cause frustrating arc problems that seem like machine failure. Also, many users forget about the duty cycle, pushing the welder too hard and causing thermal overload. One non-obvious insight is that your wire stick-out—the length of wire beyond the nozzle—matters almost as much as your voltage and speed settings. Another is that even a perfectly clean workpiece needs a freshly cleaned ground spot for the best current flow.
Using these 140 tips will help you get clean welds, save time, and avoid common problems. Every step, even small ones like checking for loose screws or storing your wire properly, adds up to a better welding experience. Whether you are just starting or have been welding for years, careful setup is the foundation of good work.
Frequently Asked Questions
How Do I Know If My Lincoln 140 Mig Welder Is Set Up Correctly?
Check for a steady arc, smooth wire feed, and no gas leaks. If you hear popping or see poor welds, review the setup tips, especially wire tension, voltage, and ground connection.
What Is The Best Gas Mix For Mild Steel With The Lincoln 140?
Use 75% Argon / 25% CO2 for most mild steel. This mix gives clean welds with little spatter.
How Often Should I Change The Contact Tip?
Change the tip if you see burn marks, an enlarged hole, or if the arc becomes unstable. Frequent users may need to change tips every few projects.
Why Does My Welder Keep Tripping The Breaker?
You may be using a circuit with too low amperage or running other heavy tools at the same time. The Lincoln 140 needs a 20-amp circuit for best performance.
Is It Okay To Use Extension Cords With My Lincoln 140 Mig Welder?
Use only heavy-duty extension cords rated for 20 amps, and keep them as short as possible to avoid voltage drops that affect the arc and wire feed.