Disclosure: This post contains affiliate links and I will be compensated if you make a purchase after clicking through my links. Learn More
Setting up a safe welding space in your garage takes more than just owning a welding machine and safety gear. The smoke, gases, and heat produced during welding can harm your health and damage your tools and property. Many people overlook garage ventilation for welding, but it is the key to keeping the air clean and lowering the risk of fire or explosion. A good ventilation system is not just about opening a window or turning on a fan. It means planning airflow, removing fumes, and controlling temperature to make your garage a safe place to work.
Many hobbyists and small shop welders underestimate how much welding fumes can build up in a closed garage. These fumes carry small metal particles and harmful gases like carbon monoxide and ozone. Without proper ventilation, these can cause health problems like headaches, nausea, and even long-term lung damage.
Good ventilation also keeps your garage cooler, so you can work longer without feeling tired.
This article explains how to set up effective garage ventilation for welding. It covers the main types of ventilation, step-by-step installation, important safety points, and common mistakes to avoid. You will learn how to choose the right fans, use fume extractors, place vents, and combine different methods for the best results. By the end, you will have a clear plan for a safe and healthy welding space.
Why Garage Ventilation Is Essential For Welding
Welding creates hazardous fumes and gases. These fumes often contain metal oxides, ozone, and other particles. Even small welding jobs can fill your garage with smoke and invisible gases.
Health risks are the main reason to install good ventilation. Breathing welding fumes can cause:
- Irritation in your eyes, nose, and throat
- Headaches and dizziness
- Shortness of breath
- Asthma or other lung diseases
Some metals like chromium and nickel create even more toxic fumes. Over time, these can lead to cancer or nerve damage if you do not remove them from the air.
Fire risk is another concern. Welding produces sparks and heat that can ignite fumes or dust. Good ventilation lowers this risk by clearing out flammable gases and keeping the air moving.
Comfort and productivity also improve with proper ventilation. Clean, cool air helps you focus and reduces fatigue. You will notice less rust and damage to tools or stored items as well.
Understanding Welding Fumes And Airflow
Before you can set up a ventilation system, you need to know what you are dealing with. Welding fumes are not the same as normal dust or smoke. Their particles are much smaller and can float in the air for hours.
Airflow direction matters too. If you only blow air around, you might push fumes into other parts of your garage or back into your face. The goal is to move fumes away from your breathing zone and out of your workspace.
Here are some facts about welding fumes:
- Fume particles are usually 0.01 to 1 micron in size (very small)
- Gases like carbon monoxide can build up quickly in closed spaces
- Some metals (like galvanized steel) create extra toxic fumes
Always check the type of metal and welding process you use. Stick welding, MIG, and TIG all produce different types and amounts of fumes.
Key Types Of Garage Ventilation
You can use three main types of ventilation for welding in a garage: natural, mechanical, and local exhaust. Each has strengths and limits. Often, you get the best results by combining them.
Natural Ventilation
This method uses windows, doors, and vents to move air. It costs little and works best when there is a breeze or temperature difference between inside and outside.
Pros:
- No electricity needed
- Low cost
- Simple to install
Cons:
- Not reliable on still days
- Hard to control airflow direction
- May not remove all fumes
Natural ventilation can work for small jobs, but it is not enough for regular welding or toxic metals.
Mechanical Ventilation
Mechanical systems use fans to force air in or out of your garage. You can use wall fans, ceiling fans, or portable units.
Pros:
- Moves more air than natural methods
- Works in any weather
- Lets you control airflow direction
Cons:
- Needs electricity
- Louder than natural methods
- Needs regular cleaning
Mechanical ventilation is a good choice for garages without enough windows or for bigger welding tasks.
Local Exhaust Ventilation (lev)
LEV pulls fumes directly from the welding area using hoods or arms. The system has a fan and ductwork to carry fumes outside.
Pros:
- Removes fumes before they spread
- Best for health protection
- Works with all welding types
Cons:
- More expensive to install
- Takes up space above your work area
- Needs careful setup
LEV is standard in professional shops. For home garages, a small portable fume extractor can work well.
Comparing Ventilation Types
Here is a quick look at how each method compares:
| Type | Cost | Effectiveness | Maintenance | Noise |
|---|---|---|---|---|
| Natural | Low | Low-Medium | Low | Silent |
| Mechanical | Medium | Medium-High | Medium | Moderate |
| LEV | High | High | Medium-High | Moderate |
Planning Your Garage Ventilation System
Good ventilation starts with a plan. Look at your garage layout, welding habits, and local safety rules.
Step 1: Measure Your Garage
Find the size (length x width x height) to know how much air you need to move. For welding, you want at least 6 to 10 air changes per hour. For example, a 200-square-foot garage with an 8-foot ceiling holds 1,600 cubic feet of air. If you want 8 air changes per hour, you need a system that moves 12,800 cubic feet per hour (cfh), or about 213 cubic feet per minute (cfm).
Step 2: Identify Fume Sources
Think about where you weld most often. Is it always in the same spot, or do you move around? Fixed welding tables can use a mounted hood, but mobile welding might need a portable extractor.
Step 3: Check Existing Openings
List all windows, doors, and vents. Decide which ones you can use or modify. More openings can help with cross-ventilation.
Step 4: Plan Airflow Direction
Always move air from clean to dirty zones. Bring in fresh air behind you and pull out fumes in front of you. Never blow air across your face or toward other people.
Step 5: Think About Power And Noise
Check if you have enough outlets for fans or extractors. Some fans are noisy, which can be a problem if you weld late or live near others.
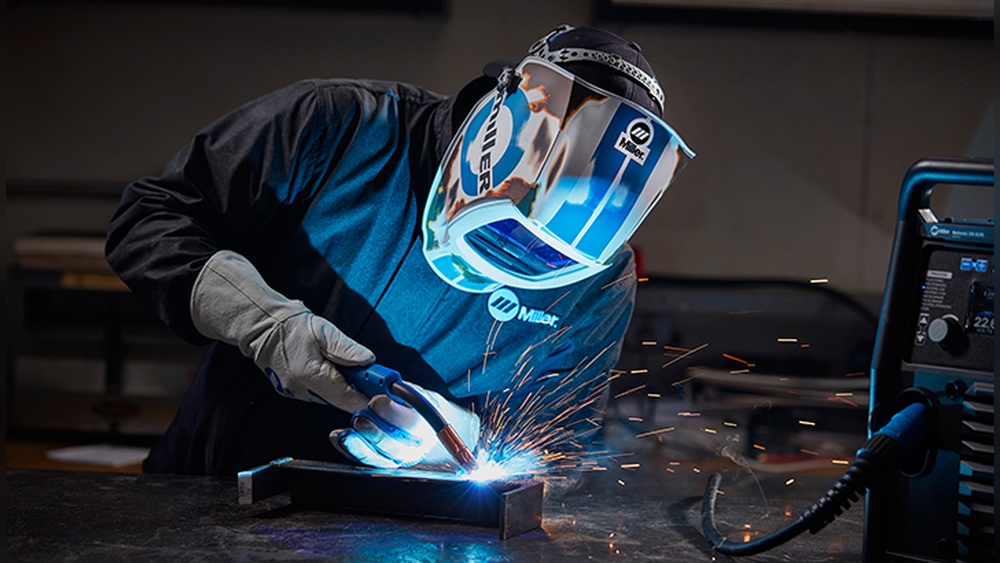
Credit: www.millerwelds.com
Choosing The Right Fans And Extractors
The main tools for garage ventilation are exhaust fans, supply fans, and fume extractors. Each has special uses.
Exhaust Fans
These fans pull air out of your garage. Place them high on the wall or ceiling, since hot fumes rise. Use a fan with a cfm rating that matches your garage size.
For example, a 1,600 cubic foot garage needing 8 air changes per hour requires a 213 cfm fan. For best results, use a slightly larger fan to handle extra fumes.
Supply Fans
Supply fans push fresh air into your garage. They help replace the air removed by exhaust fans. Place supply fans low on the opposite wall from exhaust fans.
Supply fans also help balance air pressure. If you only use exhaust, you might create a vacuum that pulls fumes in from other rooms or outside.
Fume Extractors
A fume extractor pulls air right at the welding spot. It has a filter and a hose or hood. Some units are portable and can be moved to different workstations.
Portable extractors are a good choice for small garages or mobile welding. They do not replace general ventilation but add extra safety.
Comparing Fan And Extractor Options
Here is a quick comparison of common equipment:
| Device | Placement | Best Use | Cost |
|---|---|---|---|
| Wall Exhaust Fan | High on wall/ceiling | General air removal | $$ |
| Supply Fan | Low on wall/door | Bringing in fresh air | $ |
| Fume Extractor | Near weld area | Spot fume removal | $$$ |
How To Install Garage Ventilation For Welding: Step-by-step
Setting up a good system does not have to be hard. Here is a clear guide:
1. Plan The Layout
Mark where you want your exhaust fan(s), supply fan(s), and welding area. Make sure you have space for ductwork and outlets.
2. Install Exhaust Fan
- Cut a hole in the wall or ceiling for the fan
- Mount the fan securely using the hardware provided
- Seal gaps with caulk to stop leaks
- Connect the fan to power (use a licensed electrician if unsure)
- Make sure the exhaust is at least 10 feet from doors, windows, or neighbor’s property
3. Add Supply Air
- Open a window or install a supply fan on the opposite side of the garage
- Use a filter on the supply fan to block dust and pollen
- Avoid blowing supply air straight at your welding table
4. Set Up Fume Extraction (optional)
- Place the fume extractor arm or hood as close to the weld as possible (4–8 inches is best)
- Plug in and test the extractor
- Clean or replace filters as needed
5. Test Airflow
- Use a smoke pen, incense stick, or tissue to check airflow direction
- Make sure smoke moves from clean air source, past you, and out the exhaust
- Adjust fan speeds or positions if needed
6. Add Extra Vents If Needed
- If air still feels smoky, add more vents or a second exhaust fan
- You can use roof vents or vented soffits for extra airflow
7. Check For Air Leaks
- Seal gaps around doors, windows, and fan mounts
- Air leaks can lower system power and let fumes in
Tips For Better Garage Welding Ventilation
Many people miss small details that make a big difference. Here are some advanced tips:
- Use a carbon monoxide detector. Fumes can build up without warning. A detector gives early alerts.
- Clean fans and filters often. Dust or metal particles can clog fans and lower airflow.
- Do not block exhaust vents. Keep boxes and tools away from fan openings.
- Use flexible ductwork for fume extractors. This lets you move the hood closer to the weld.
- Paint walls a light color. Light walls help you see smoke or dust buildup sooner.
- Place welding tables near exhaust points. This lowers the distance fumes travel.
- Test your system in different weather. Cold air can lower airflow, while wind can boost it.
- Add an air curtain or plastic strips at the garage door. This stops fumes from blowing into your house or other rooms.
- Wear a respirator for extra safety, especially with toxic metals.
- Keep a fire extinguisher near your welding area.
Special Ventilation Concerns For Different Welding Types
Not all welding makes the same kind of fumes. Here is what you need to know for each main type:
Mig Welding
MIG welding produces a lot of smoke and metal fumes. It often uses shielding gas (argon, CO2) that can build up in closed spaces. You need strong exhaust and spot fume removal.
Tig Welding
TIG welding makes fewer fumes, but still releases some ozone and nitrogen oxides. You can use a smaller fan, but always check air quality.
Stick Welding
Stick welding produces heavy smoke and spatter. Natural ventilation is not enough. Use strong exhaust and a fume extractor.
Flux-cored Welding
Flux-cored wire releases even more smoke than MIG. You need both general and local exhaust.
Cutting And Grinding
Cutting, grinding, or plasma work can make metal dust and sparks. Always use a fan or extractor and wear a dust mask.

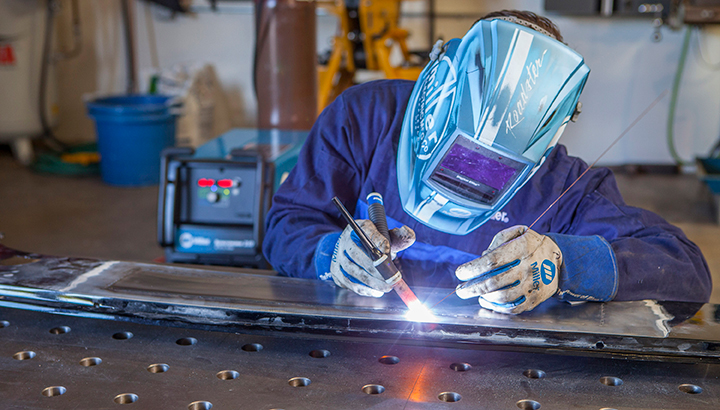
Credit: www.dreamstime.com
Common Mistakes To Avoid
Many welders make simple mistakes that lower ventilation effectiveness:
- Using only one small fan. This rarely moves enough air for safety.
- Placing fans in the wrong spot. Fans should not blow fumes into your face or toward open doors.
- Not checking airflow with smoke. Air can move in strange ways—always test before welding.
- Ignoring filter changes. Dirty filters block air and lower fan life.
- Forgetting about makeup air. Removing air without adding fresh air can create a vacuum.
Cost And Maintenance Of Garage Ventilation Systems
Setting up garage ventilation can fit most budgets. Here is a rough cost breakdown:
- Basic box or window fan: $40–$80
- Wall exhaust fan: $100–$300
- Supply fan: $80–$200
- Portable fume extractor: $300–$1,000
- Ductwork and vent covers: $50–$200
Professional installation can add $200–$500, but many home systems are DIY-friendly.
Maintenance is simple but important:
- Clean fan blades and grills every few months
- Change or wash filters as recommended by the maker
- Check all ducts for leaks or blockages yearly
- Test airflow with smoke or a tissue every season
Legal And Safety Codes
Welding at home must follow certain rules. Some local laws restrict indoor welding or require special permits. Always check your city or county code before starting.
Key safety codes often require:
- At least 6 air changes per hour for welding spaces
- Exhaust outlets at least 10 feet from property lines or windows
- No flammable storage near welding areas
- Fire-rated doors if the garage is attached to your house
If you are not sure, contact your local fire department or building office. They can give clear guidance and help you avoid fines.
Real Example: Garage Ventilation Setup
Consider a 2-car garage, 400 square feet, with an 8-foot ceiling (3,200 cubic feet total). The welder uses MIG for small projects.
Ventilation plan:
- 1 wall exhaust fan (400 cfm) mounted near the ceiling, opposite the garage door
- 1 supply fan (200 cfm) near the floor, by a side window
- Portable fume extractor (250 cfm) with flexible hose
- Carbon monoxide alarm on the wall
- Fire extinguisher by the welding table
With this setup, the air changes about 7–8 times per hour. The welder checks airflow with incense before each use and cleans filters monthly.

Credit: www.weltransim.eu
Extra Insights Most Beginners Miss
- Makeup air matters: Removing air with no way for fresh air to enter (makeup air) can cause negative pressure. This can pull in fumes from the rest of your home or even backdraft your gas heater. Always provide a fresh air source.
- Fan placement is key: Placing exhaust fans too close to your welding area without a supply air source can create dead spots where fumes build up. Place supply and exhaust fans at opposite corners for best flow.
- Fume extractors are not just for big shops: Many affordable portable extractors work well for home garages. They can remove up to 90% of welding fumes at the source if used correctly.
- Noise can be a problem: Larger fans are louder. If you weld often, look for “quiet” fans or install vibration pads to reduce noise.
- Check for gas leaks: If you use shielding gas, check hoses and valves for leaks. Some leaks can lower air quality or cause fire risk.
Frequently Asked Questions
What Size Exhaust Fan Do I Need For Garage Welding?
You need an exhaust fan that can move enough air to change all the air in your garage 6–10 times per hour. For example, a 1,600 cubic foot garage needs a fan rated for 213–267 cfm. Always choose a slightly higher rating to be safe.
Can I Just Open My Garage Door For Ventilation?
Opening the garage door helps, but it does not control airflow direction or remove fumes as well as a fan system. If you only open the door, fumes might blow back inside or toward your house. Use fans for best results.
Is A Fume Extractor Necessary If I Have Good General Ventilation?
A fume extractor is not required, but it adds a big safety boost. Extractors pull fumes right from the weld, lowering the amount that spreads through your garage. For frequent or long welding sessions, use both extractor and general ventilation.
How Do I Test If My Ventilation Is Working?
Light a smoke pen or incense stick near your welding table. Watch the smoke move. It should flow away from you and toward the exhaust fan or vent. If the smoke lingers or blows toward you, adjust your fans or add more airflow.
Where Can I Find More Information About Welding Ventilation Safety?
The OSHA Welding Safety Guide gives clear rules and tips for safe ventilation in welding spaces.
Setting up garage ventilation for welding is a smart investment in your health and safety. With the right planning, tools, and habits, you can keep your workspace clean, cool, and safe for years to come. Always keep learning and improving your setup as your welding skills grow.