Disclosure: This post contains affiliate links and I will be compensated if you make a purchase after clicking through my links. Learn More
To test a generator stator with a multimeter, set the multimeter to resistance mode and check for continuity. Ensure readings are within specified limits.
Testing a generator stator with a multimeter is crucial for maintaining optimal performance. A stator converts rotational energy into electrical energy, making it a key component. Faulty stators can lead to inefficient power generation or complete failure. Regular testing helps identify issues early, ensuring longevity and reliability.
With just a multimeter, you can diagnose potential problems quickly. Proper testing involves checking for continuity and resistance within the manufacturer’s specified ranges. This simple yet effective method provides peace of mind and helps avoid costly repairs. Regular maintenance and testing keep your generator running smoothly, providing uninterrupted power when you need it most.
Safety Precautions
Testing a generator stator with a multimeter involves handling electrical components. Ensuring safety is crucial to avoid accidents and injuries. Follow these safety precautions to protect yourself and your equipment.
Personal Protective Equipment
Wearing the right personal protective equipment (PPE) is essential. This includes insulated gloves, safety glasses, and sturdy footwear. PPE helps protect you from electrical shocks and other hazards.
- Insulated gloves: Protect your hands from electrical shocks.
- Safety glasses: Shield your eyes from sparks or debris.
- Sturdy footwear: Provide protection against electrical hazards.
Generator Safety
Before testing, ensure the generator is turned off and unplugged. This prevents accidental electrocution. Always work in a dry environment to reduce the risk of electrical shocks.
Verify the generator is on a stable surface to avoid tipping. Keep the area well-ventilated to prevent buildup of harmful fumes.
| Safety Measure | Importance |
|---|---|
| Turn off and unplug | Prevents accidental electrocution |
| Dry environment | Reduces risk of electrical shocks |
| Stable surface | Avoids tipping and accidents |
| Well-ventilated area | Prevents harmful fumes buildup |
Follow these safety precautions to ensure a safe testing environment. Your safety is the top priority.
Preparing The Generator
Before testing a generator stator with a multimeter, proper preparation is key. This ensures safety and accuracy. Follow these steps to prepare the generator correctly.
Shutting Down
First, turn off the generator. Allow it to cool down completely. This prevents burns and other injuries. Make sure to switch off all connected devices. This step is crucial for safe testing.
Disconnecting Power
Next, disconnect the power source from the generator. Unplug the generator from any outlets. Remove any connected batteries. This eliminates the risk of electric shock. Follow the manufacturer’s instructions for safe disconnection.
| Step | Action | Safety Tip |
|---|---|---|
| 1 | Turn off the generator | Wait until it cools down |
| 2 | Switch off all connected devices | Prevents damage to devices |
| 3 | Disconnect power source | Avoid electric shock |
- Wear protective gloves.
- Use insulated tools.
- Check the generator manual for specific instructions.
Following these steps prepares your generator for safe testing. Always prioritize safety and follow guidelines.
Setting Up The Multimeter
Testing a generator stator with a multimeter requires proper setup. This ensures accurate readings and safety. Follow these steps to set up your multimeter correctly.
Choosing The Right Settings
First, select the correct settings on your multimeter. Set the multimeter to measure resistance (Ohms). Look for the Omega symbol (Ω) on your device. This is essential for testing the stator coils.
Ensure the multimeter is in manual mode. Automatic mode may not provide precise readings for this task. Select the lowest resistance setting, typically around 200 Ohms. This helps detect small resistance values in the stator coils.
Calibrating The Device
Calibrating the multimeter is crucial for accurate measurements. Start by connecting the multimeter probes together. This checks the device’s baseline resistance.
Observe the reading on the display. It should show zero or very close to zero. If not, adjust the calibration knob if your multimeter has one. Some digital multimeters auto-calibrate, showing zero without adjustment.
Next, test the probes’ continuity. Switch the multimeter to the continuity setting, often marked with a sound wave symbol. Touch the probes together. A beep confirms proper continuity, indicating the probes are working correctly.
| Step | Action |
|---|---|
| 1 | Set multimeter to resistance (Ω) |
| 2 | Select the lowest resistance setting |
| 3 | Connect probes together |
| 4 | Observe display for zero reading |
| 5 | Switch to continuity mode |
| 6 | Touch probes together for beep |
Following these steps ensures your multimeter is ready. Proper setup leads to accurate generator stator testing. Always handle the device with care to avoid damage or injury.
Testing Resistance
Testing the resistance of a generator stator ensures it works well. A multimeter helps in measuring the resistance. Follow these steps to get accurate results.
Measuring Coil Resistance
First, gather your tools. You need a multimeter and the generator stator. Set your multimeter to the resistance or Ohms setting.
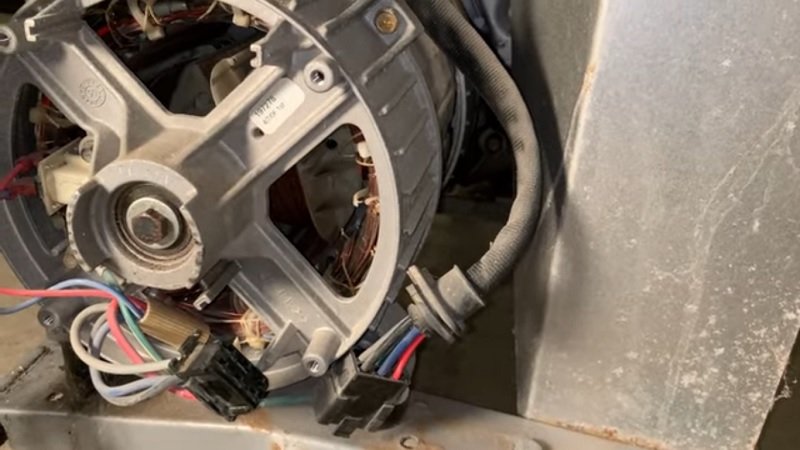
Next, locate the stator’s coil terminals. These are usually marked and easy to find. Attach the multimeter probes to the coil terminals.
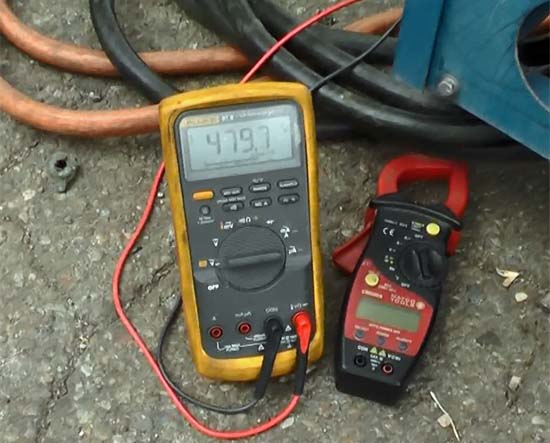
Read the multimeter display. The number you see is the coil resistance. Write down this value for future reference.
Compare your reading to the generator’s manual. The manual lists the normal resistance range. If your reading matches, the stator is good.
If the reading is too high or low, there could be a problem. High resistance often means a broken wire or poor connection. Low resistance may indicate shorted coils.
Use the table below to understand common resistance issues:
| Resistance Reading | Possible Issue |
|---|---|
| Matches manual | Stator is good |
| Too high | Broken wire or poor connection |
| Too low | Shorted coils |
Fixing issues requires a deeper look or professional help. Always follow safety guidelines when testing electrical components.
Checking For Ground Faults
Testing a generator stator for ground faults is crucial. This ensures the stator runs smoothly. A ground fault could lead to dangerous electrical issues. Use a multimeter to test for ground faults accurately.
Setting Up For Ground Testing
First, gather your tools. You need a multimeter and safety gloves. Turn off the generator and disconnect it from any power source. This is important for your safety.
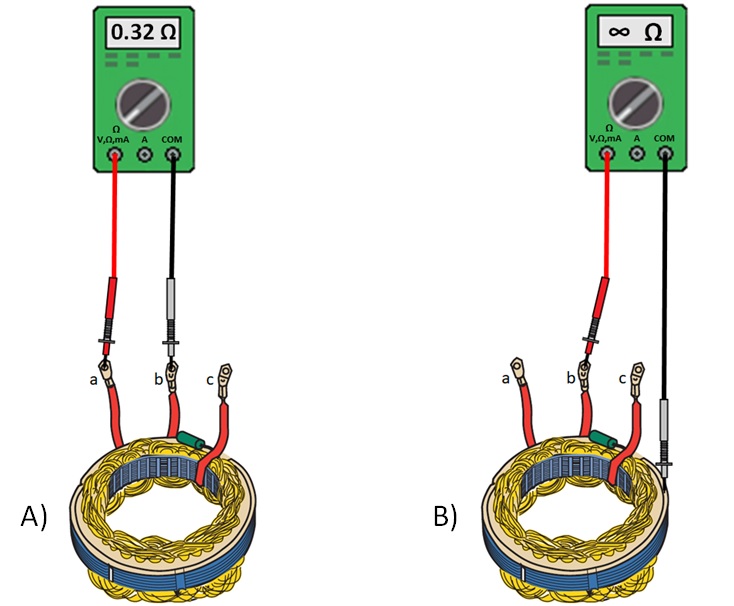
Set the multimeter to the ohms setting. This measures resistance. Attach the black lead to the stator’s ground terminal. Attach the red lead to one of the stator windings.
Ensure all connections are tight. Loose connections can give inaccurate readings.
Analyzing Ground Faults
Look at the multimeter display. A reading close to zero means a ground fault. This indicates a short circuit. A very high reading or “OL” (overload) means no ground fault. This is a good sign.
If you find a ground fault, check the stator for damage. Look for burnt or worn-out areas. These could be the cause of the fault.
Record your readings in a table for easy reference:
| Stator Winding | Resistance (Ohms) | Ground Fault |
|---|---|---|
| Winding 1 | 0.0 | Yes |
| Winding 2 | OL | No |
Repeat the test for all stator windings. This ensures thorough checking.
Inspecting Insulation
Inspecting the insulation of a generator stator is crucial. It ensures the stator functions safely and efficiently. A multimeter helps in this process. The following sections explain how to perform an insulation resistance test and evaluate insulation quality.
Performing Insulation Resistance Test
Follow these steps to perform an insulation resistance test:
- Turn off the generator and disconnect it from any power source.
- Set your multimeter to the highest resistance range.
- Connect one multimeter probe to the stator winding.
- Connect the other probe to the stator housing.
- Read the resistance value on the multimeter.
A high resistance value indicates good insulation. Low resistance suggests potential issues.
Evaluating Insulation Quality
After performing the insulation resistance test, evaluate the results:
- If the resistance is above 1 Megaohm, the insulation is good.
- If the resistance is between 0.5 and 1 Megaohm, the insulation may need attention.
- If the resistance is below 0.5 Megaohm, the insulation is poor.
Regular inspection helps maintain your generator’s performance. It also ensures safety.
Interpreting Results
After testing a generator stator with a multimeter, understanding the results is crucial. Correct interpretation helps in diagnosing issues accurately. Below, we will explore how to read and understand the measurements effectively.
Normal Readings
A functional stator will show specific readings. Set your multimeter to measure resistance (Ohms). Place the probes on the stator’s terminals.
- Resistance Range: The resistance should be between 0.2 to 0.5 Ohms.
- Continuity Test: The continuity test should show a closed circuit.
These readings confirm the stator is in good condition. If your readings fall within this range, the stator likely has no issues.
Identifying Issues
If the readings deviate from the normal range, there may be problems. Here’s how to identify them:
| Issue | Reading | Possible Cause |
|---|---|---|
| High Resistance | Above 0.5 Ohms | Internal winding damage |
| No Continuity | Open Circuit | Broken wire or connection |
| Low Resistance | Below 0.2 Ohms | Short circuit |
If you find any of these issues, the stator needs repair or replacement.
Frequently Asked Questions
How Do You Test A Generator Stator?
Set your multimeter to resistance mode. Measure between stator windings and check for consistency.
What Should A Stator Reading Be?
A healthy stator should read low resistance, typically between 0. 2 to 2 ohms, depending on the model.
Can A Multimeter Test Stator Insulation?
Yes, use the multimeter’s continuity test. Check for continuity between stator windings and ground.
What Indicates A Bad Stator?
High resistance, open circuits, or continuity to ground indicate a faulty stator needing replacement.
Final Thoughts
Testing a generator stator with a multimeter is straightforward. Follow the steps for accurate results. Ensure safety precautions are taken. Regular testing helps maintain generator efficiency. With these tips, you can troubleshoot issues effectively. Keep your generator running smoothly and extend its lifespan by performing routine checks.